April 17, 2015
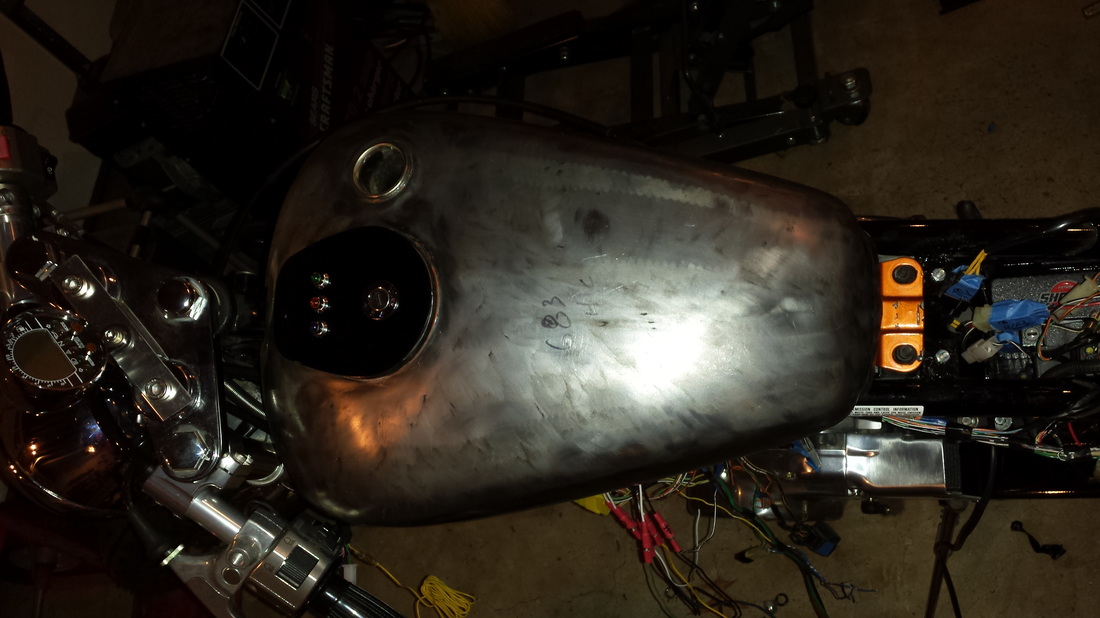
Spent some time on the bike looking at wiring and such. I went to put on the coil but found that the gas tank was trying to fight for space. I've heard others mention this and they lower it down or put it somewhere else. The solution I found was to take about 3/16" off of the spacer and tuck it in closer to the frame. As soon as I did this, it fit perfectly.
I did get a note saying my kickstand bolt is on its way. Yay! (groan...)
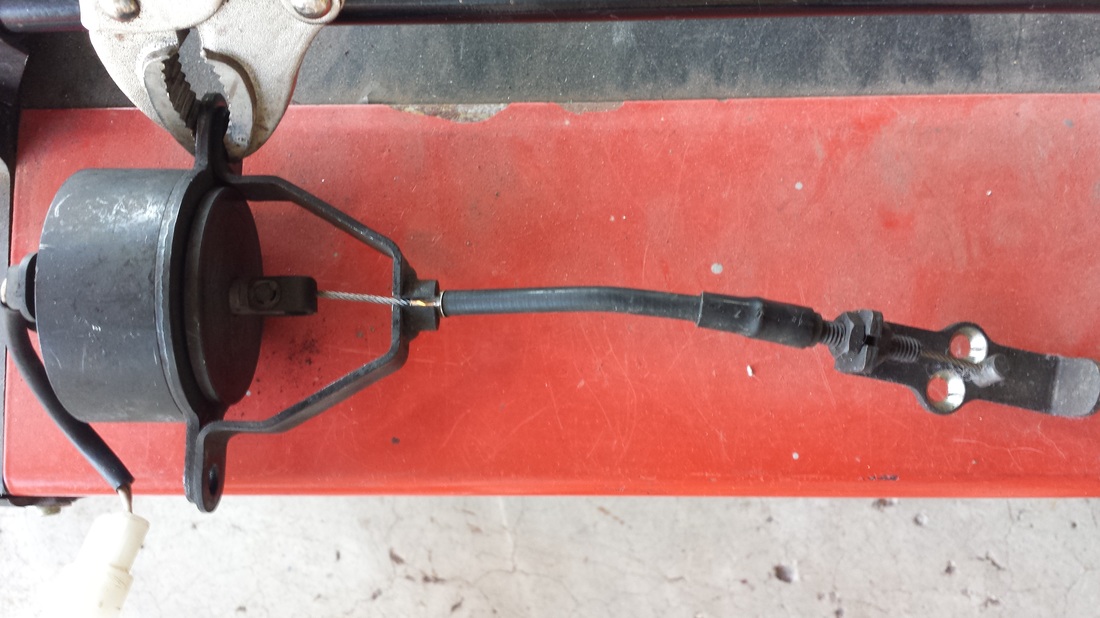
I decided I had better take a look at the decomp situation. Now Ryca came up with the foot release system, but I kind of like the stock setup. Now before anyone has a fit about it hanging out or looks bad. 1. It's my bike. 2. It's going just behind where the horn originally was. 3. It will be fully functional.
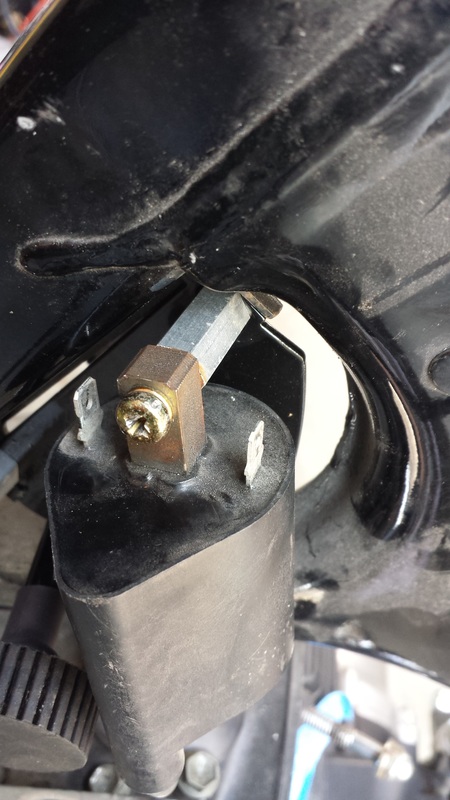
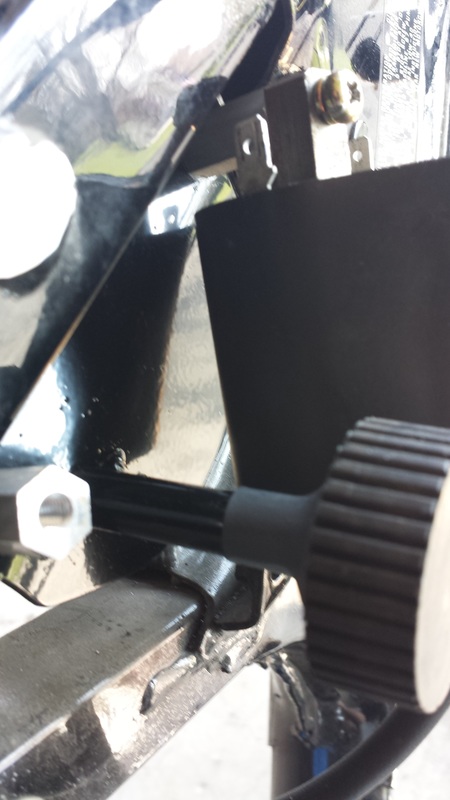
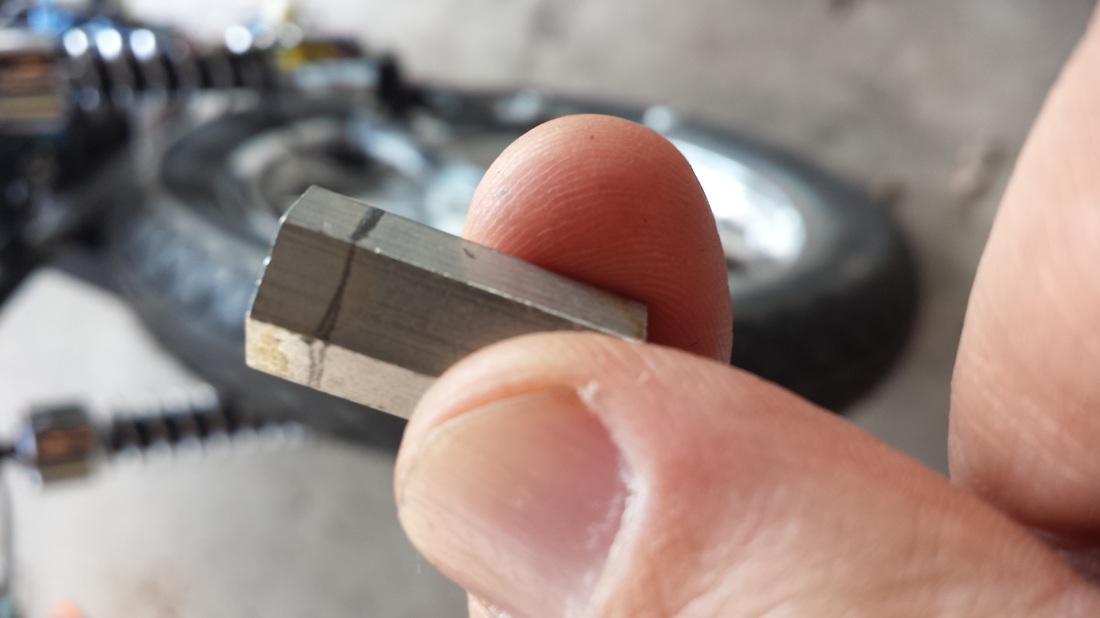
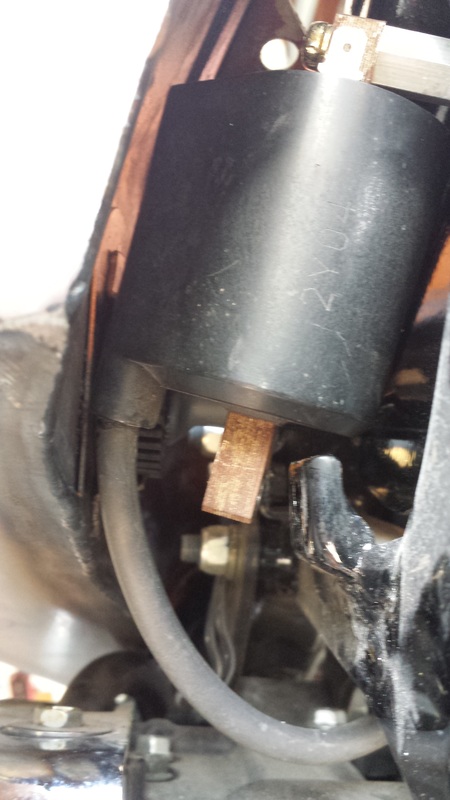
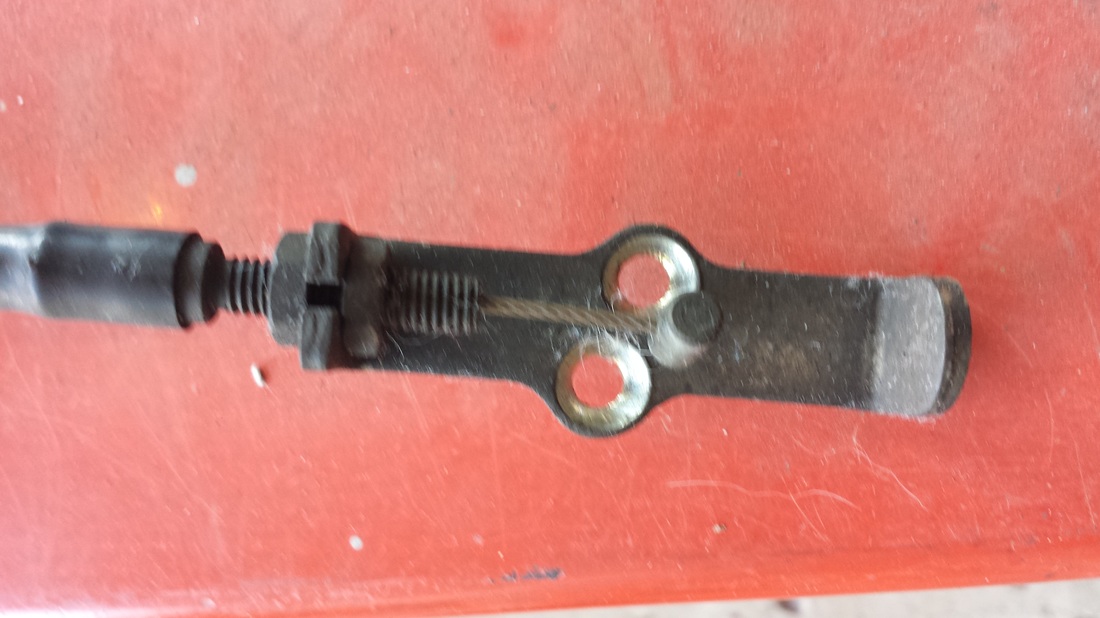
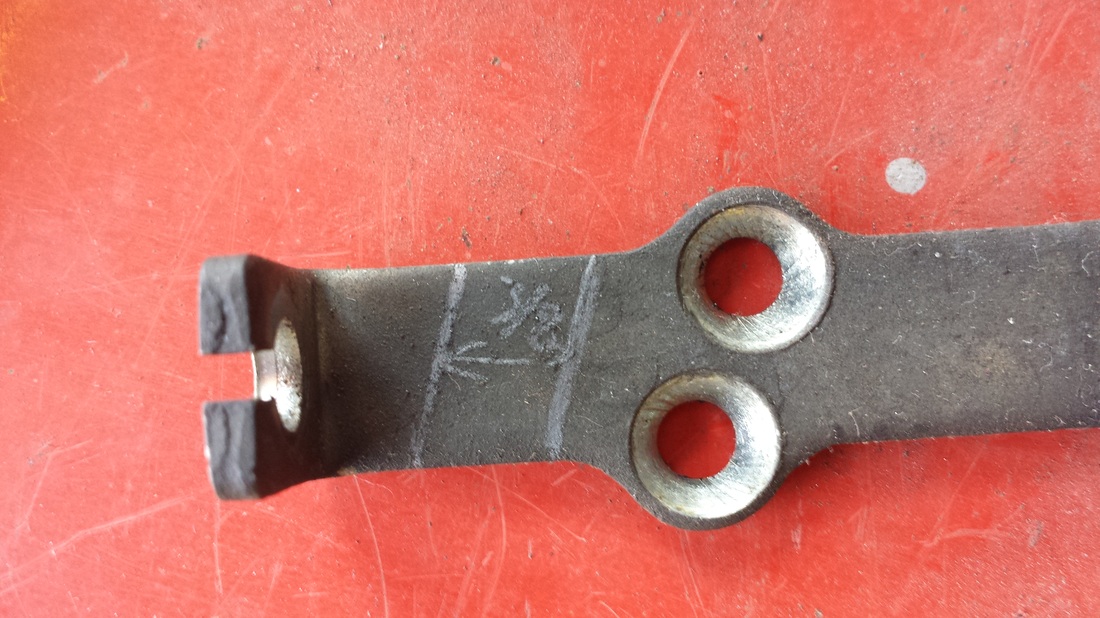
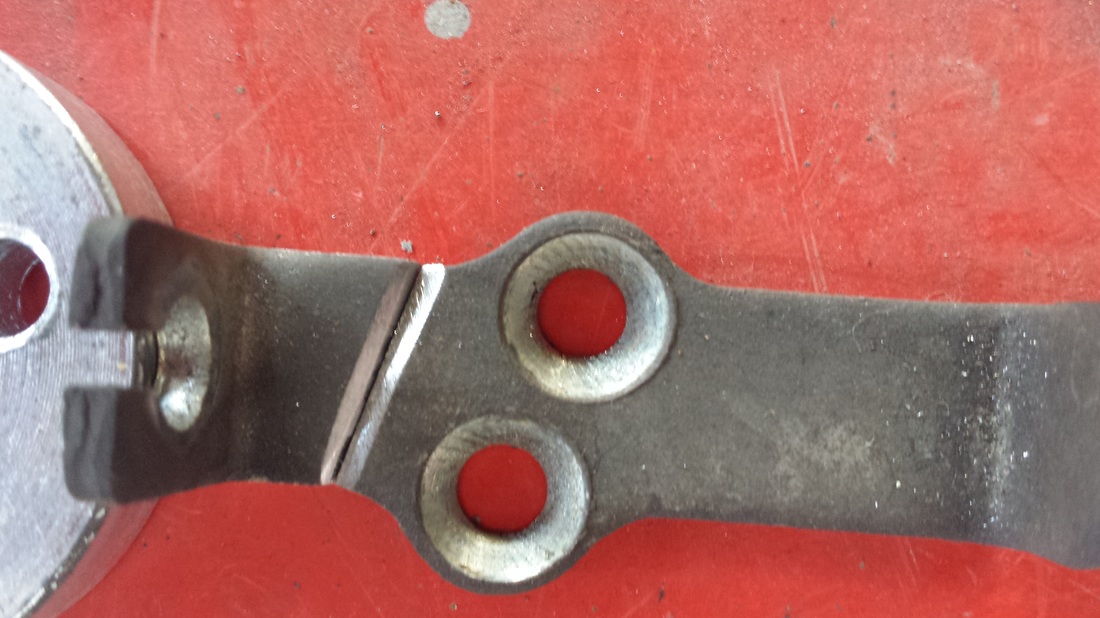
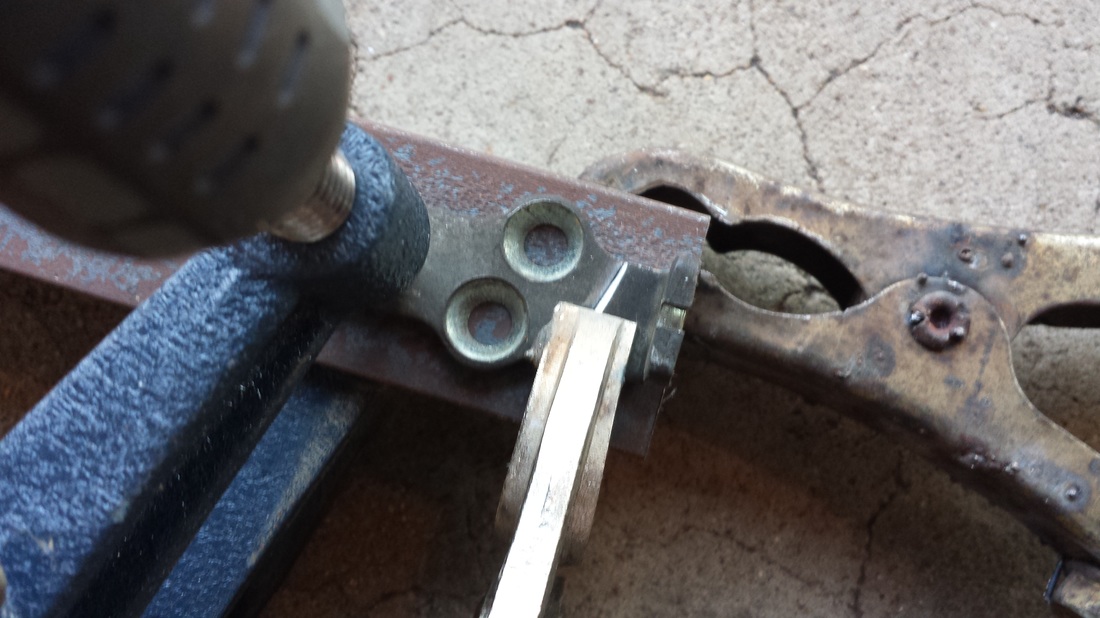
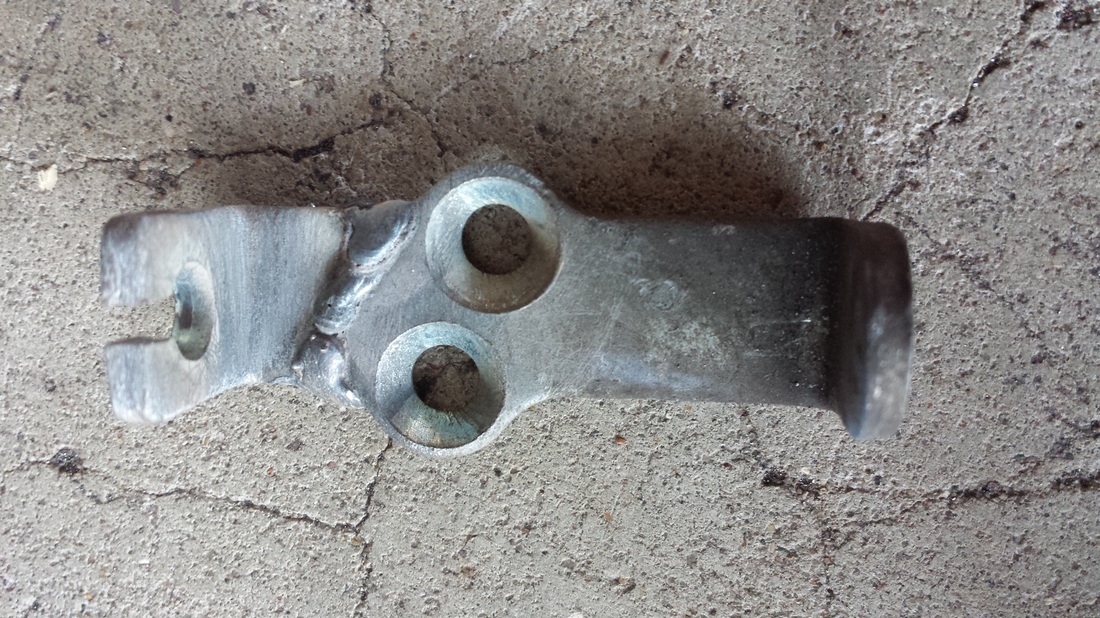
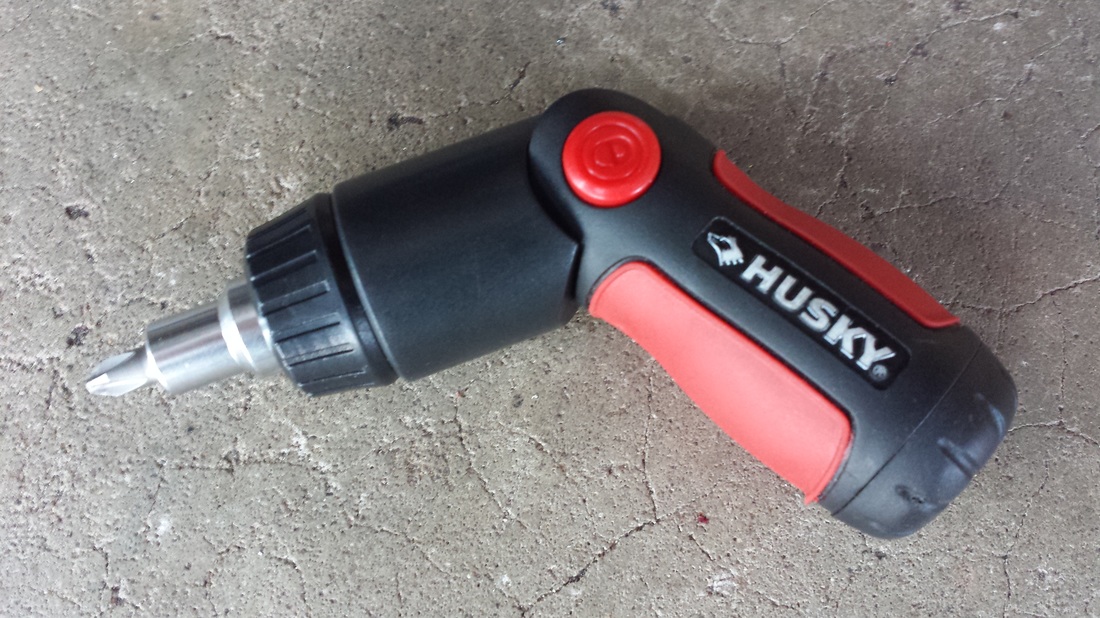
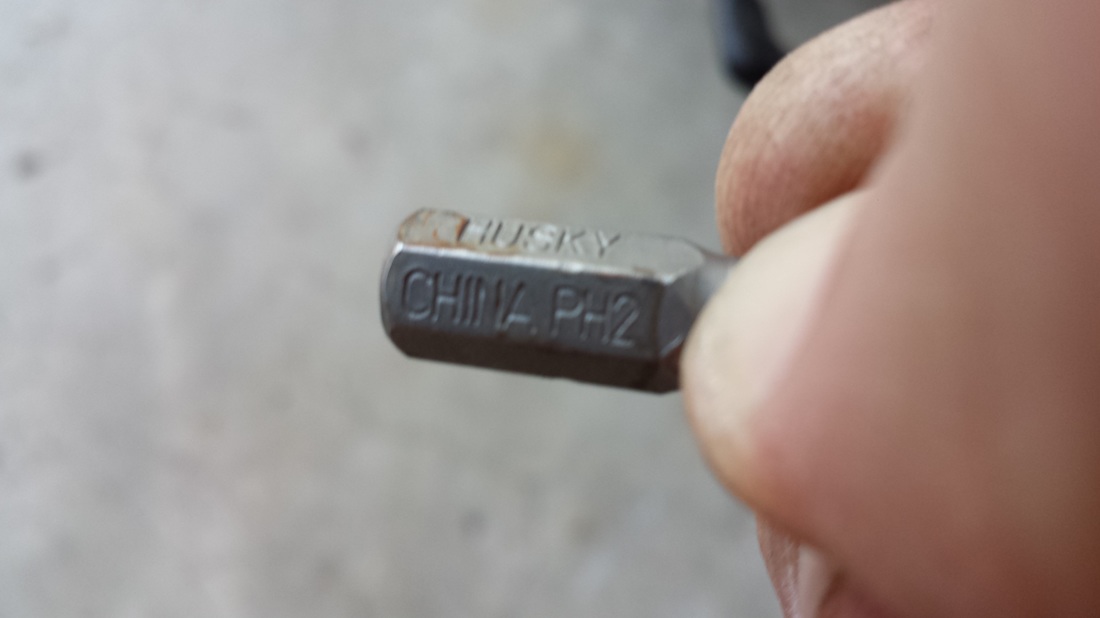
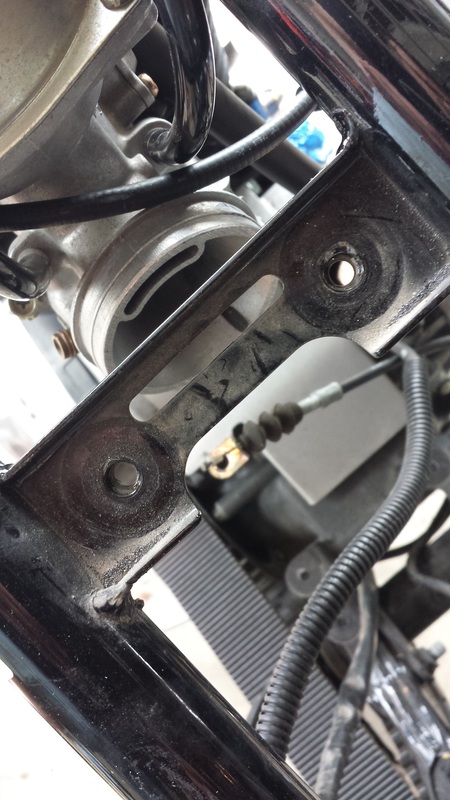
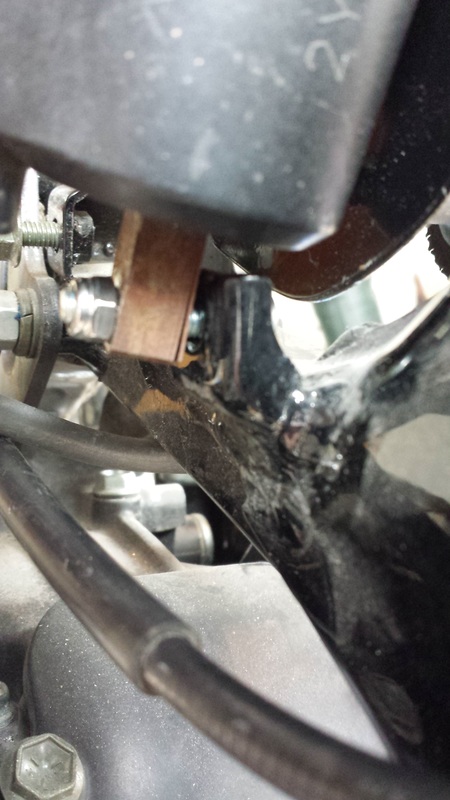
The original location was where the new tank mounting points are and this also drops the tank down quite a bit. The clearance under the tank for the decomp cable is very tight but I did notice that even though the cable bends, it isn't restricted. But even so, I thought I could do something about it being a little lower. On the original bike setup, you could just see the cable adjustment nut under the gas tank, right behind the chrome head covers. I plan on keeping the covers, well, because I like them. :) And since the Ryca tank drops so low, you're not going to see the cable much anyway. But I wondered if the mechanism could be lowered any? I knew I couldn't move the decomp on the head at all, but the lever only went up so high, basically making it easier to adjust and install etc... I took a few measurements and realized that I could drop the top about 3/8" as long as I put a 3/8" spacer by the solenoid mount. Luckily I had found a second decomp setup on Ebay very cheap that I could test my idea on. I basically measured, cut, beveled and welded. No real need to clean up the welds as they didn't interfere with anything and you would never be able to see them. One of the first things I had to do was get the bracket off the engine first. These screws were in there tight! Not as tight as the screws on the top of the carb, but VERY close! What I found was to use the same screwdriver and tip that I used on the carb. Below is a pic of it and the number of the tip in case you wanted to try it yourself.
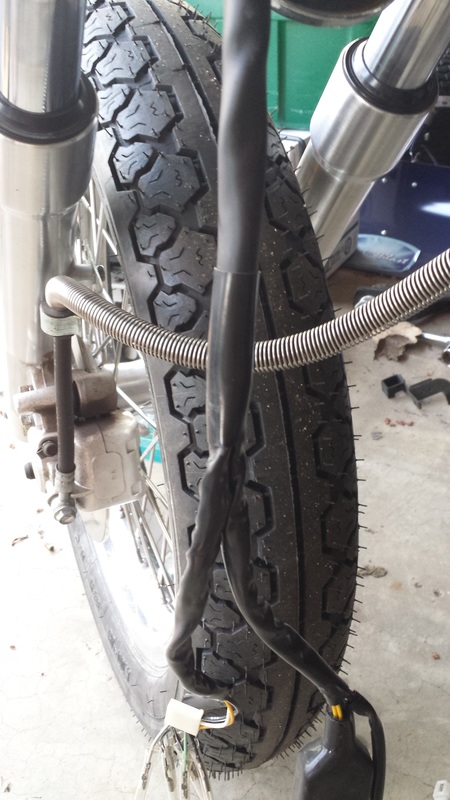
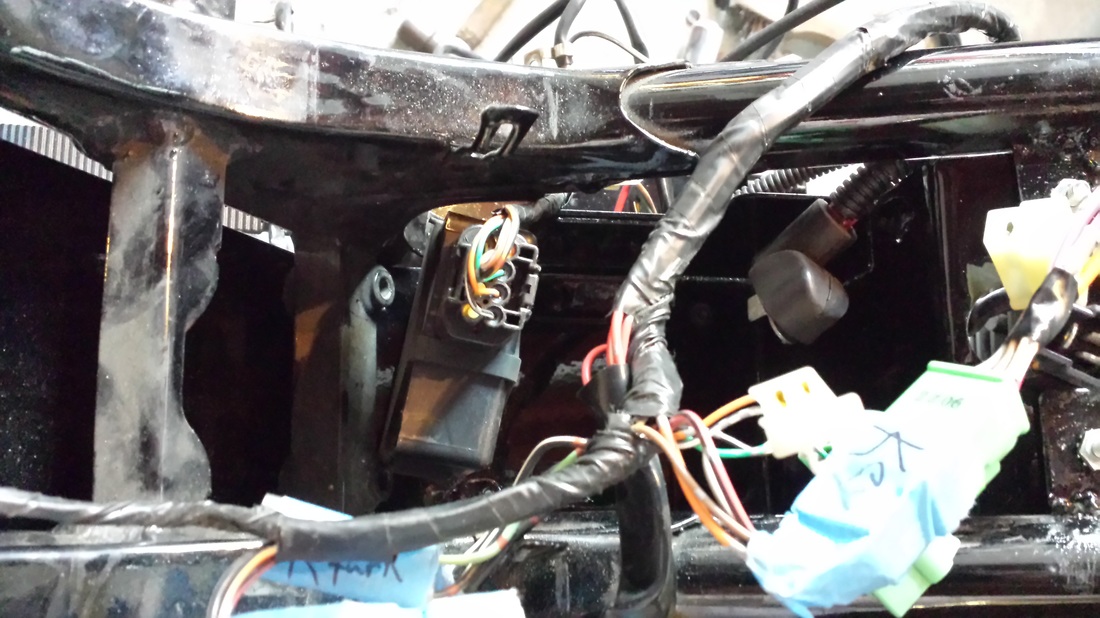
I started in on the front wiring and stripped the outer casing so I could see what I was doing and how things needed to be rerouted. It will be a challenge but nothing I haven't done on a few VWs.
Spent some time on the bike looking at wiring and such. I went to put on the coil but found that the gas tank was trying to fight for space. I've heard others mention this and they lower it down or put it somewhere else. The solution I found was to take about 3/16" off of the spacer and tuck it in closer to the frame. As soon as I did this, it fit perfectly.
I did get a note saying my kickstand bolt is on its way. Yay! (groan...)
I decided I had better take a look at the decomp situation. Now Ryca came up with the foot release system, but I kind of like the stock setup. Now before anyone has a fit about it hanging out or looks bad. 1. It's my bike. 2. It's going just behind where the horn originally was. 3. It will be fully functional.
The original location was where the new tank mounting points are and this also drops the tank down quite a bit. The clearance under the tank for the decomp cable is very tight but I did notice that even though the cable bends, it isn't restricted. But even so, I thought I could do something about it being a little lower. On the original bike setup, you could just see the cable adjustment nut under the gas tank, right behind the chrome head covers. I plan on keeping the covers, well, because I like them. :) And since the Ryca tank drops so low, you're not going to see the cable much anyway. But I wondered if the mechanism could be lowered any? I knew I couldn't move the decomp on the head at all, but the lever only went up so high, basically making it easier to adjust and install etc... I took a few measurements and realized that I could drop the top about 3/8" as long as I put a 3/8" spacer by the solenoid mount. Luckily I had found a second decomp setup on Ebay very cheap that I could test my idea on. I basically measured, cut, beveled and welded. No real need to clean up the welds as they didn't interfere with anything and you would never be able to see them. One of the first things I had to do was get the bracket off the engine first. These screws were in there tight! Not as tight as the screws on the top of the carb, but VERY close! What I found was to use the same screwdriver and tip that I used on the carb. Below is a pic of it and the number of the tip in case you wanted to try it yourself.
I started in on the front wiring and stripped the outer casing so I could see what I was doing and how things needed to be rerouted. It will be a challenge but nothing I haven't done on a few VWs.


April 18, 2015
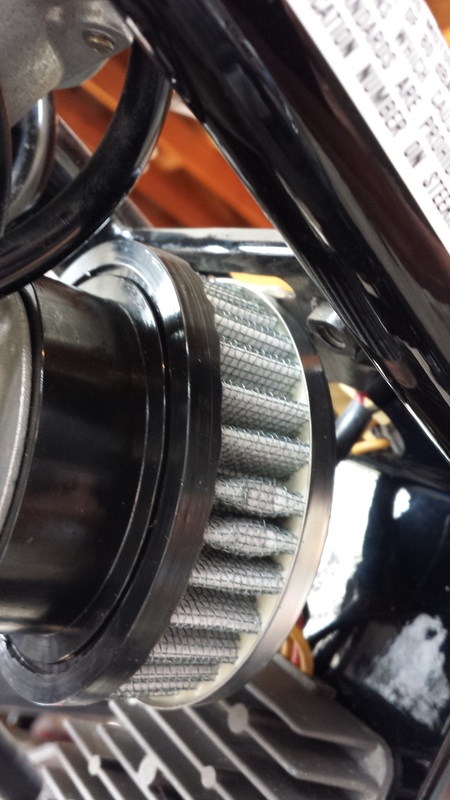
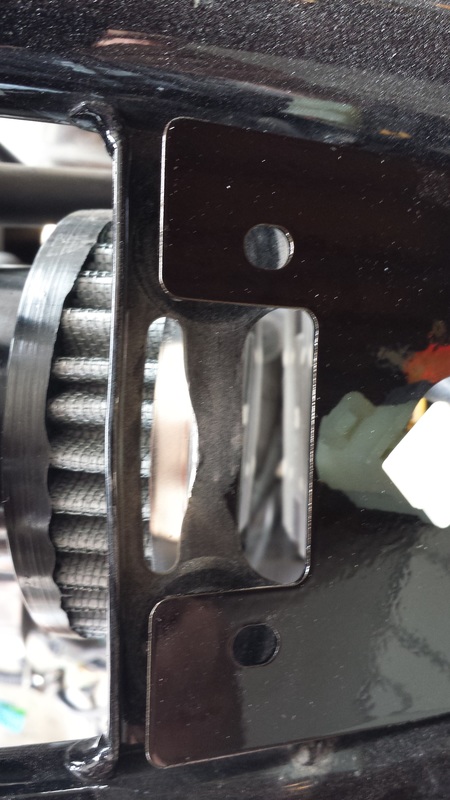
First off, it's my birthday!!!! And to celebrate, I worked on the bike for a few minutes today! First off, I went to install the air cleaner and battery box. The air cleaner would fit but it was just touching on the crossmember that mounts the rear of the gas tank and the front of the seat. Bob pounded his upwards which I tried but I wasn't getting very far, even though the little bit helped. I took my new Dremel and ground away just a little bit. It gave me about 2mm clearance with no pressure on the air cleaner.
I then tried the battery box. The problem is that the front tabs go under the crossmember but interfere with the air cleaner. I'm going to do what Bob did and cut the front of the box back a bit and relocate the mounting holes. Shouldn't be very hard. Got some scrap metal for tabs and about 10 minutes with the grinder I should be all set.
One good thing I did find out is that since my battery is so small, I can possibly mount more stuff inside the battery box.
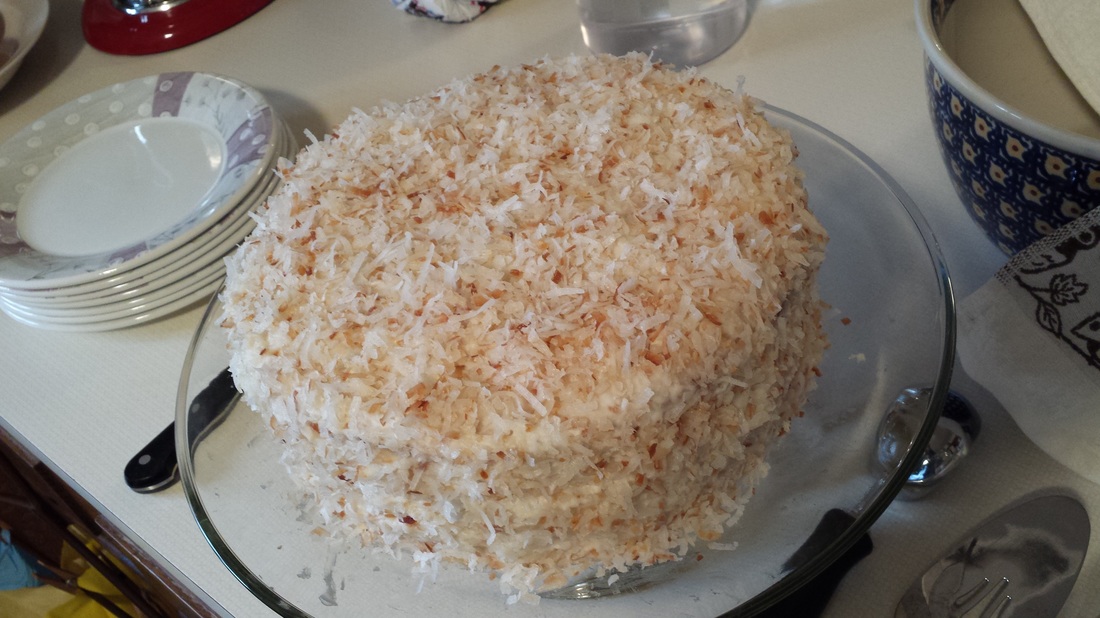
Oh, and for an added bonus, here is the triple layer toasted coconut cake with cream cheese frosting my awesome wife made for me! :)
First off, it's my birthday!!!! And to celebrate, I worked on the bike for a few minutes today! First off, I went to install the air cleaner and battery box. The air cleaner would fit but it was just touching on the crossmember that mounts the rear of the gas tank and the front of the seat. Bob pounded his upwards which I tried but I wasn't getting very far, even though the little bit helped. I took my new Dremel and ground away just a little bit. It gave me about 2mm clearance with no pressure on the air cleaner.
I then tried the battery box. The problem is that the front tabs go under the crossmember but interfere with the air cleaner. I'm going to do what Bob did and cut the front of the box back a bit and relocate the mounting holes. Shouldn't be very hard. Got some scrap metal for tabs and about 10 minutes with the grinder I should be all set.
One good thing I did find out is that since my battery is so small, I can possibly mount more stuff inside the battery box.
Oh, and for an added bonus, here is the triple layer toasted coconut cake with cream cheese frosting my awesome wife made for me! :)

April 19, 2015
Not a lot of pictures but got a few things done.
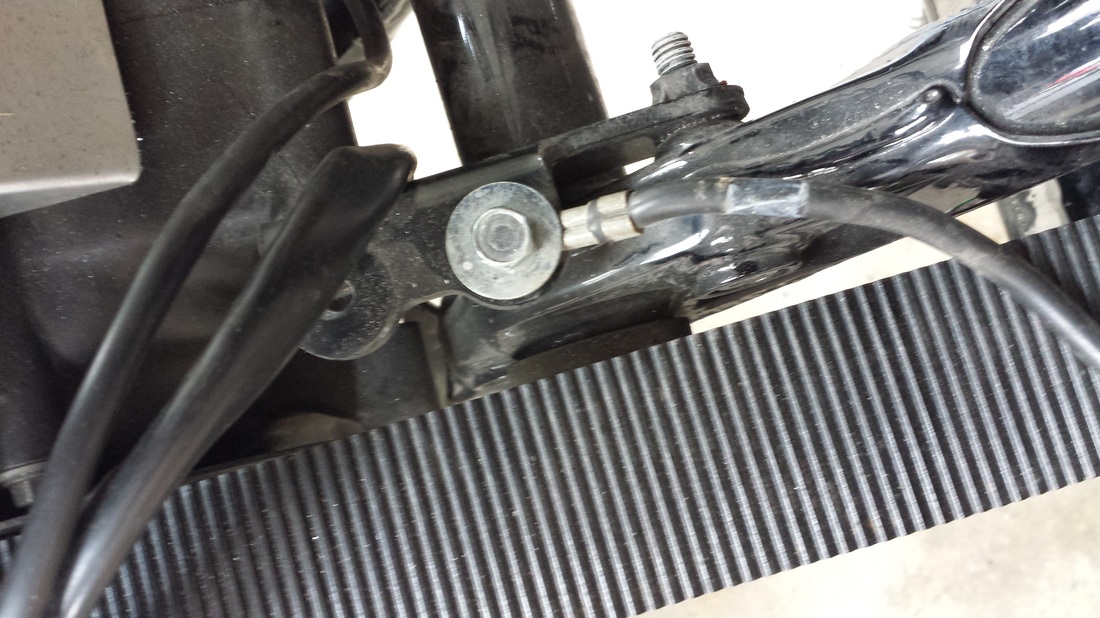
The lower bolt for the coil can be a pain to get in. Trying to get the bolt in the coil past the spark plug wire made me nervous as I didn't want to bend the line too far. I went to put the bolt in from the other side but you have to undo the front bolt of the tank support, pass the bolt through and then hook things back up. Getting the screwdriver under the bracket is tricky but doable. It pulled in fine and cleared the tank easily.
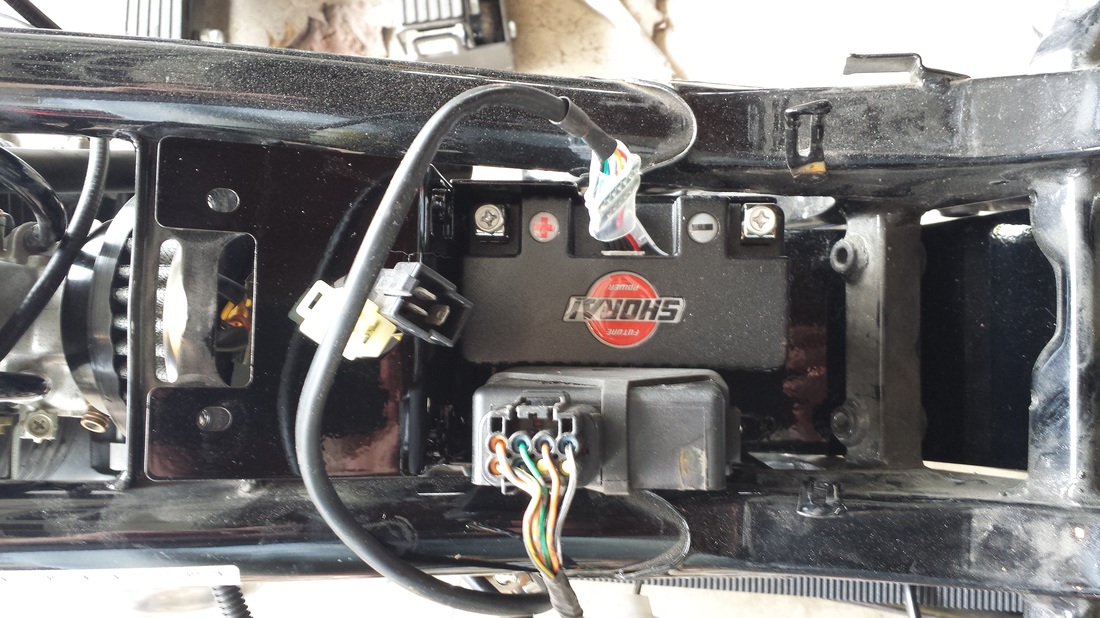
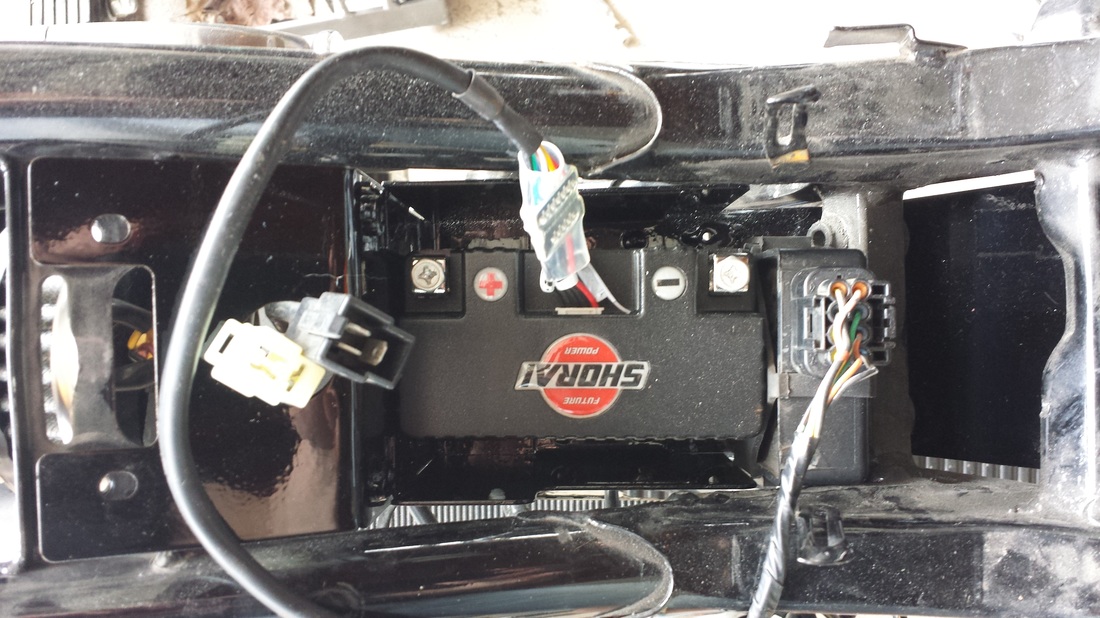
I clearanced the bracket for the air cleaner a bit more then relocated the battery ground to the former battery box bolt location, using one of the former bolts to hold it. Where the ground is connected to the engine is right behind the oil viewport and is a 8mm bolt. A 5/16" socket will work on it too. I then tackled the battery box.The front tabs would interfere with the air cleaner, so I cut them off, welded 2 tabs behind the mount, redrilled the box and bolted it in place. It took a bit and my welds weren't the greatest, (no pictures) but it worked. I need to do the touch up paint and start getting the tank and seat on next.
Not a lot of pictures but got a few things done.
The lower bolt for the coil can be a pain to get in. Trying to get the bolt in the coil past the spark plug wire made me nervous as I didn't want to bend the line too far. I went to put the bolt in from the other side but you have to undo the front bolt of the tank support, pass the bolt through and then hook things back up. Getting the screwdriver under the bracket is tricky but doable. It pulled in fine and cleared the tank easily.
I clearanced the bracket for the air cleaner a bit more then relocated the battery ground to the former battery box bolt location, using one of the former bolts to hold it. Where the ground is connected to the engine is right behind the oil viewport and is a 8mm bolt. A 5/16" socket will work on it too. I then tackled the battery box.The front tabs would interfere with the air cleaner, so I cut them off, welded 2 tabs behind the mount, redrilled the box and bolted it in place. It took a bit and my welds weren't the greatest, (no pictures) but it worked. I need to do the touch up paint and start getting the tank and seat on next.

April 21, 2015
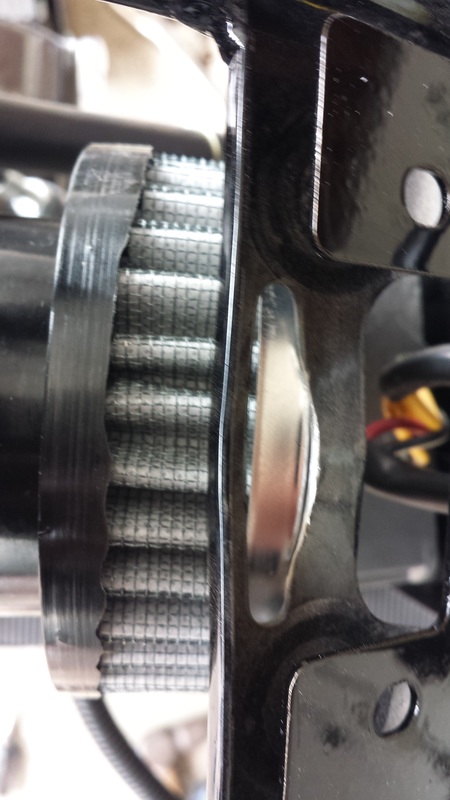
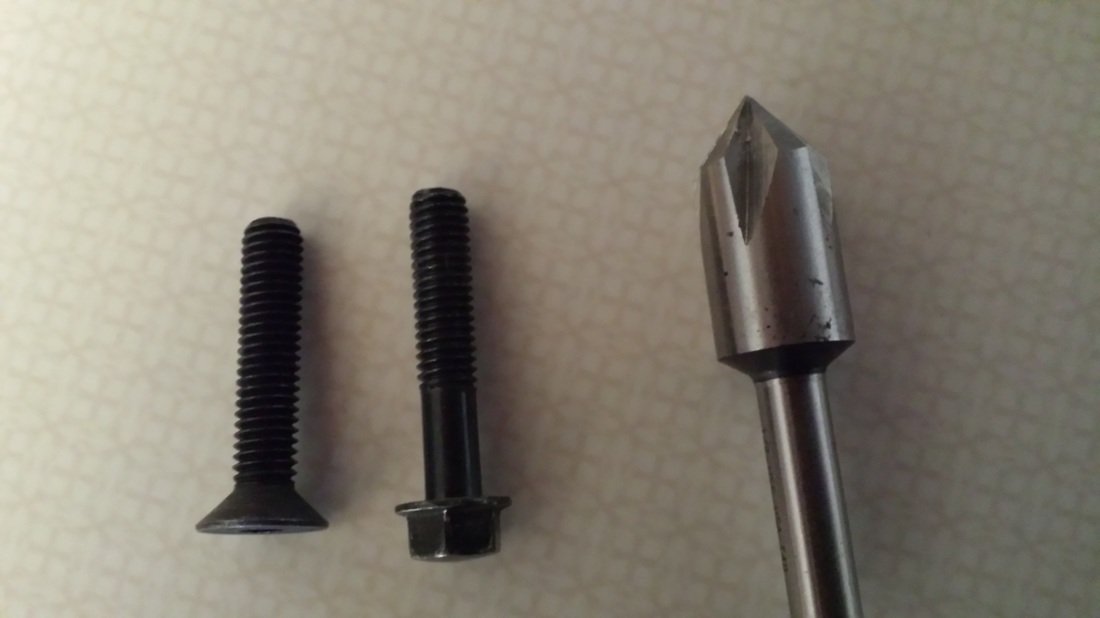
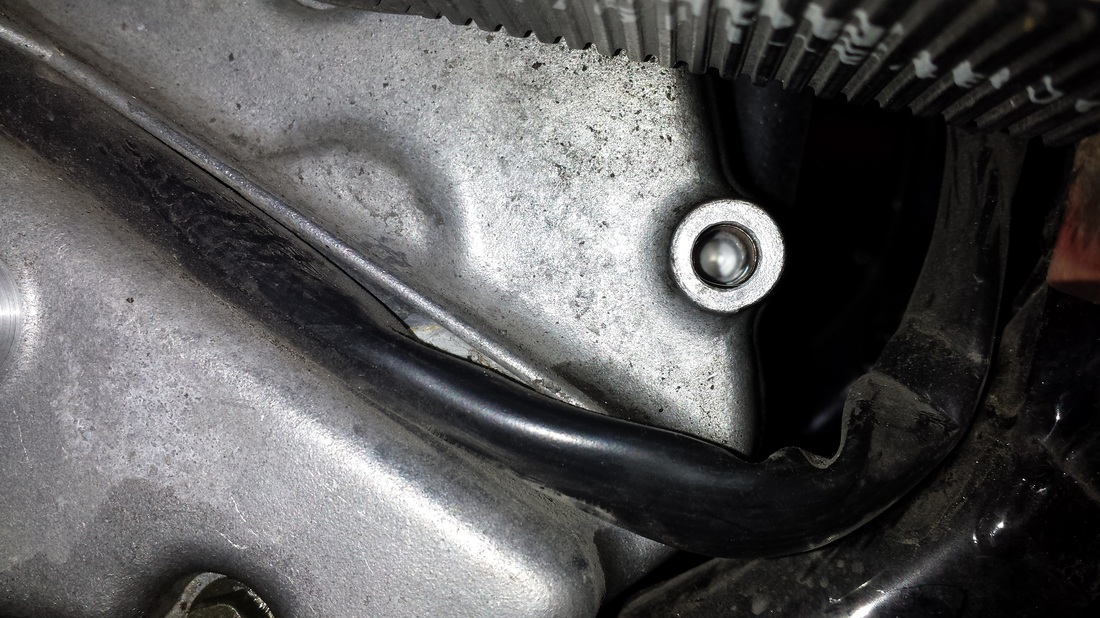
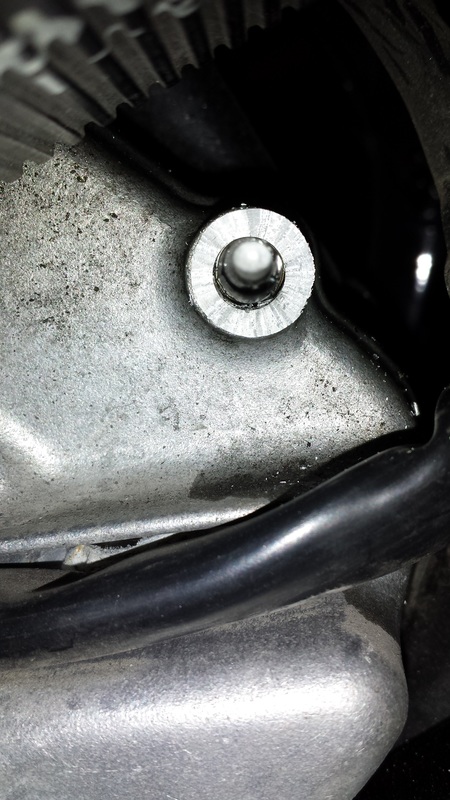
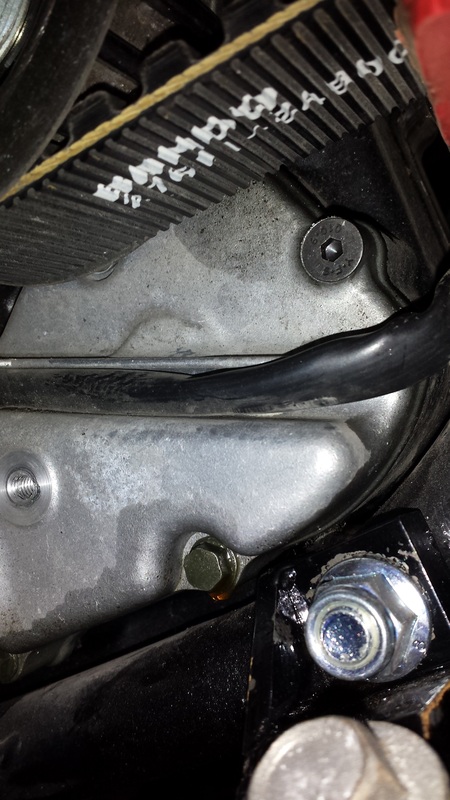
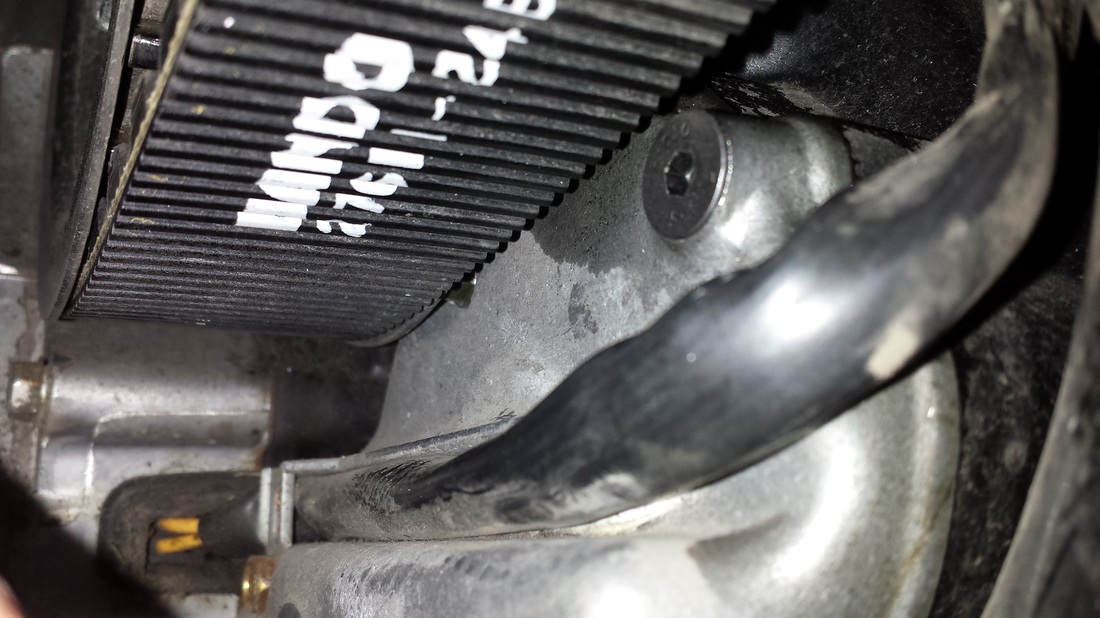
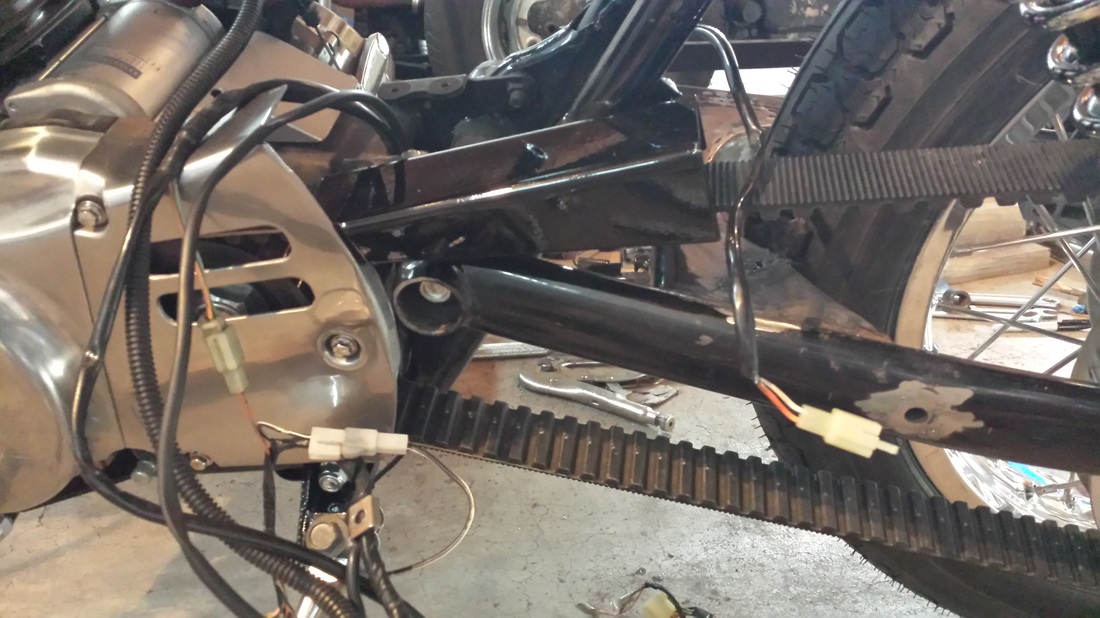
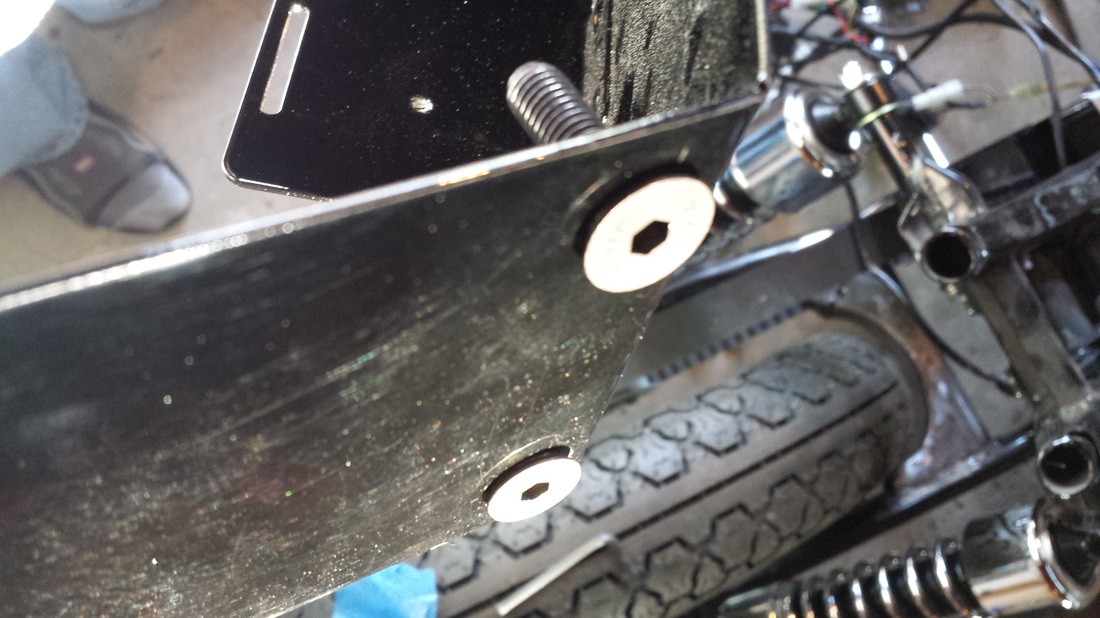
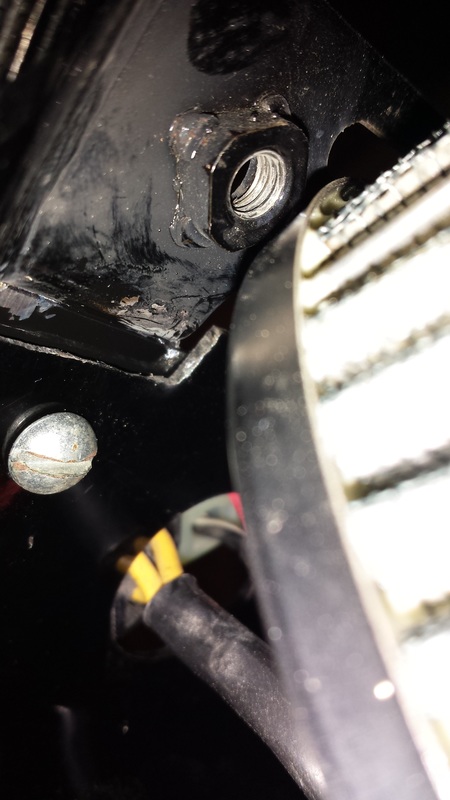
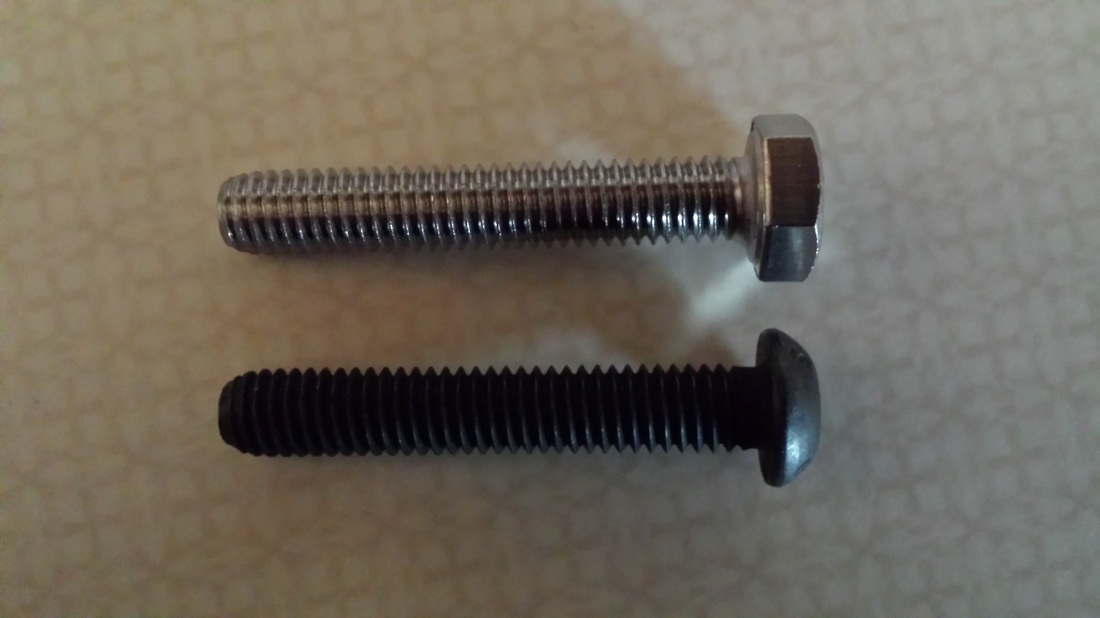
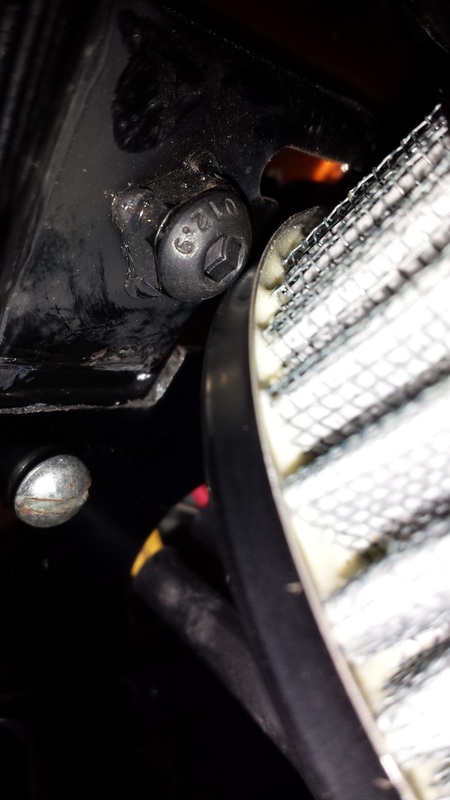
Since the suspension has been raised, one bolt head was rubbing against the belt. Checking on line, Bob had this same problem. The best solution was to pull the bolt, countersink the hole and put in a panhead bolt. The aluminum cuts very easily and I had it cut, cleaned and installed in about 5 minutes. The hardest part was taking the pictures! I could then put the pulley cover back on. I chased the threads out (6mm 1.00 pitch) and got it mounted up. It is a touch tricky as the threads are easy to gall out. I then bored out the rear mount to 3/8" and installed the top belt guard. I had to relocate the ground wire but that was hardly a problem.
I picked up a few other nuts and bolts and finally got my kickstand bolt. I bought a locknut for it along with some buttonhead bolts to install the starter relay and the rectifier to give just a hair more room in the battery box. I need to do the paint touchup soon but the weather has turned cold. I'll work on the ignition switch wiring extension next.

April 23, 2015
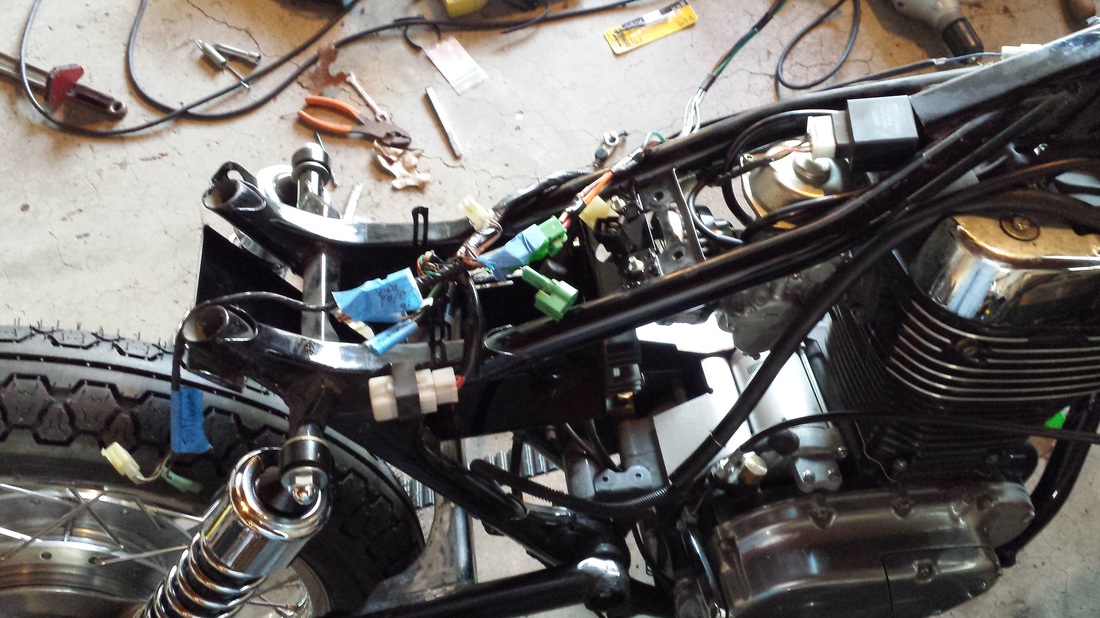
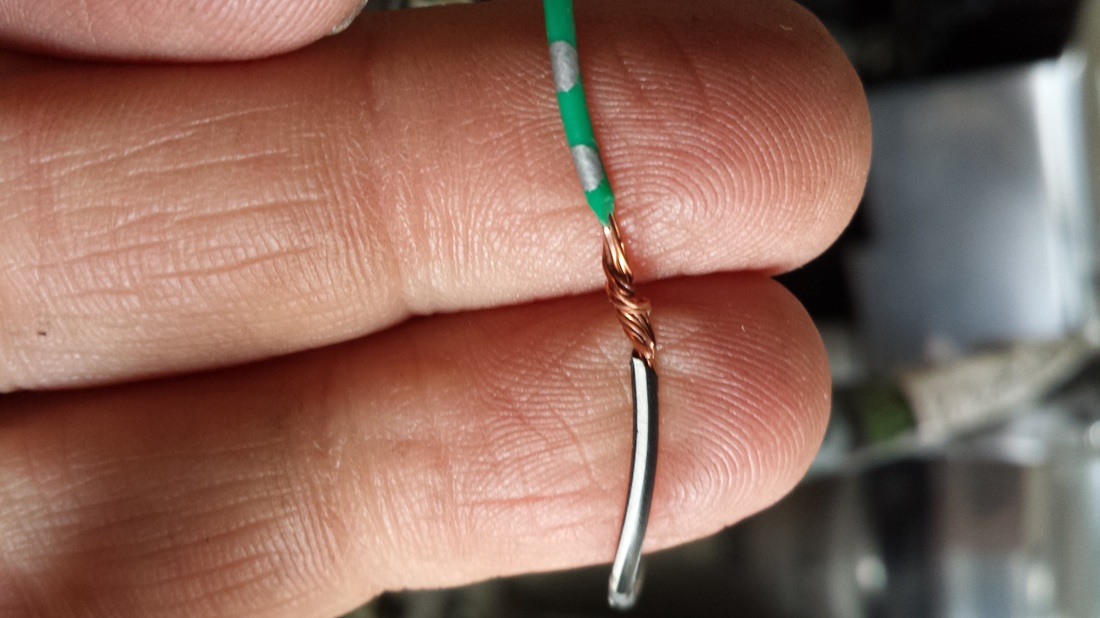
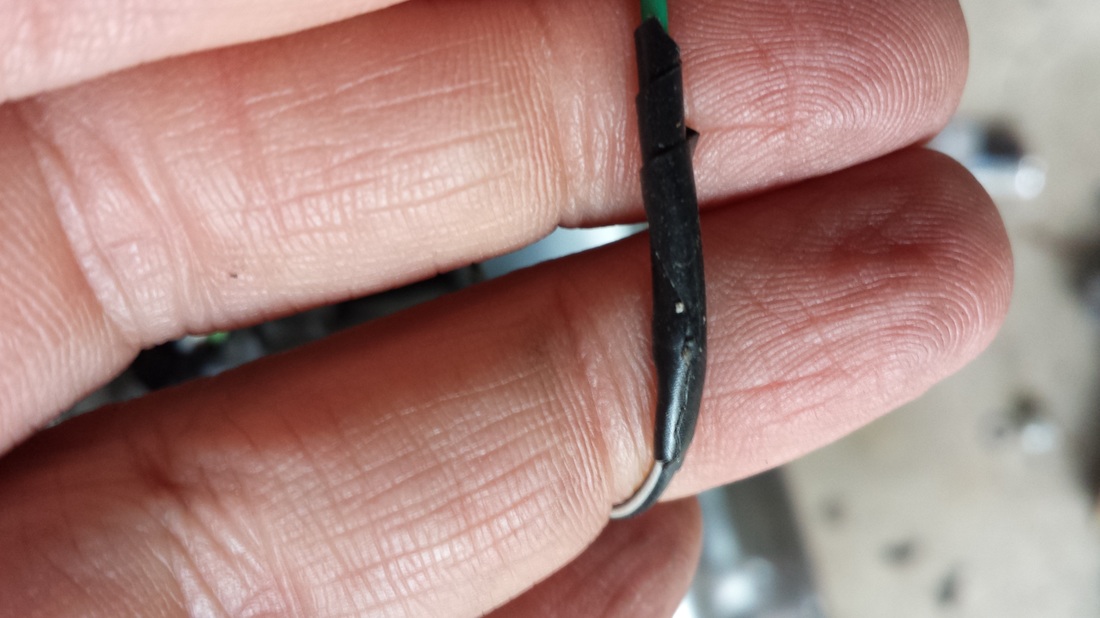
I extended the key switch wiring by 24". A 1973 VW super beetle sacrificed a part of it's wiring to extend it out. Everything was soldered and then covered with heat shrink. I taped it together every few inches until I get it finished. Once everything works I'll go back and wrap it properly.
I went through and touched up where I did the frame cuts. After it dried I was able to get the battery box installed. The rear of the box is held in with the stock fender bolts. I read on Bob's post about his tire rubbing against the bolt and what he did. I bought 2 panhead bolts, countersunk the metal on the box and bolted it up. They stick out a touch but probably far enough in to clear. I'll test it out later with the shocks off and clearance it more if necessary. I bolted the starter solenoid and the rectifier in with buttonhead bolts on the inside to give just a hair more clearance in the box.
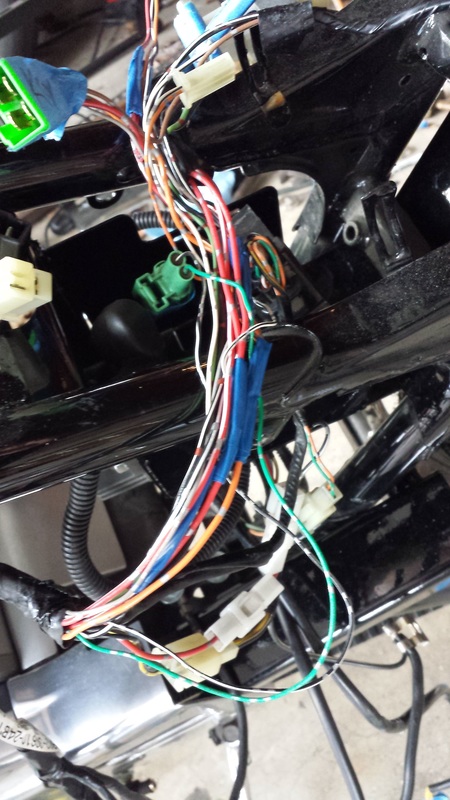
I started on the wiring. Getting everything placed and reconnected will be a bit of work. Going to start from front to back.
I extended the key switch wiring by 24". A 1973 VW super beetle sacrificed a part of it's wiring to extend it out. Everything was soldered and then covered with heat shrink. I taped it together every few inches until I get it finished. Once everything works I'll go back and wrap it properly.
I went through and touched up where I did the frame cuts. After it dried I was able to get the battery box installed. The rear of the box is held in with the stock fender bolts. I read on Bob's post about his tire rubbing against the bolt and what he did. I bought 2 panhead bolts, countersunk the metal on the box and bolted it up. They stick out a touch but probably far enough in to clear. I'll test it out later with the shocks off and clearance it more if necessary. I bolted the starter solenoid and the rectifier in with buttonhead bolts on the inside to give just a hair more clearance in the box.
I started on the wiring. Getting everything placed and reconnected will be a bit of work. Going to start from front to back.


April 24, 2015
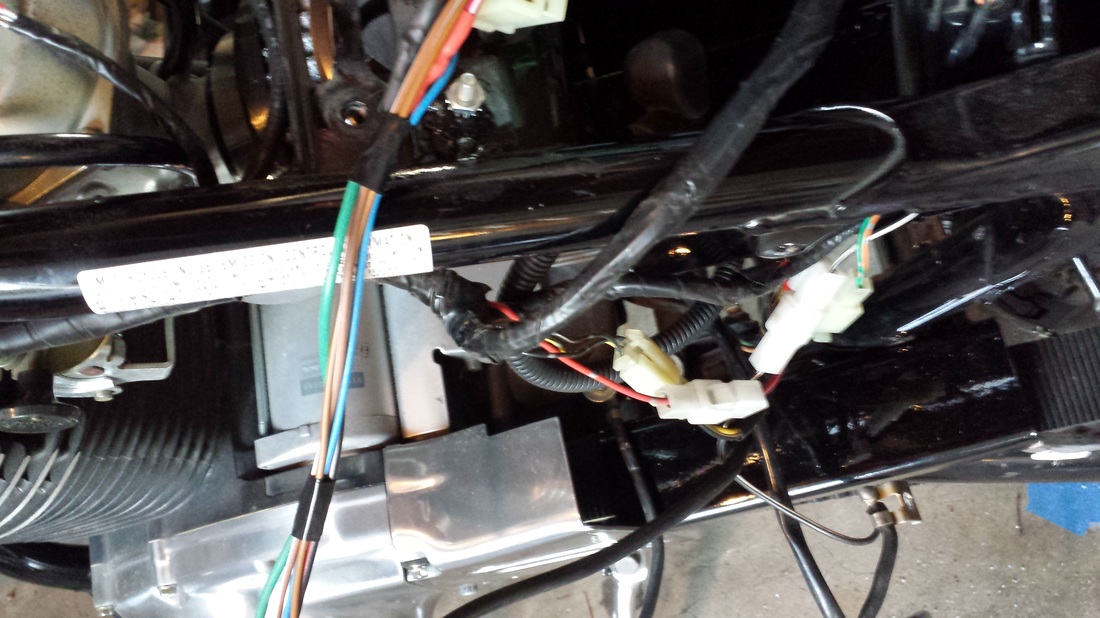
Today was more of a sorting day. Going through the wiring and looking things over it became clear that the electrical tape wrapping the wires was pretty bad in spots. Some places it was a gummy mess, others it was nearly dissolving. I unwrapped a bunch and did follow the kickstand wiring back to the grounding junction. I clipped it back there, twisted it together tight, taped it and put some heat shrink over it. I didn't solder it as the wires were very small and I would have probably trashed them with my (lack of) soldering skills. :)
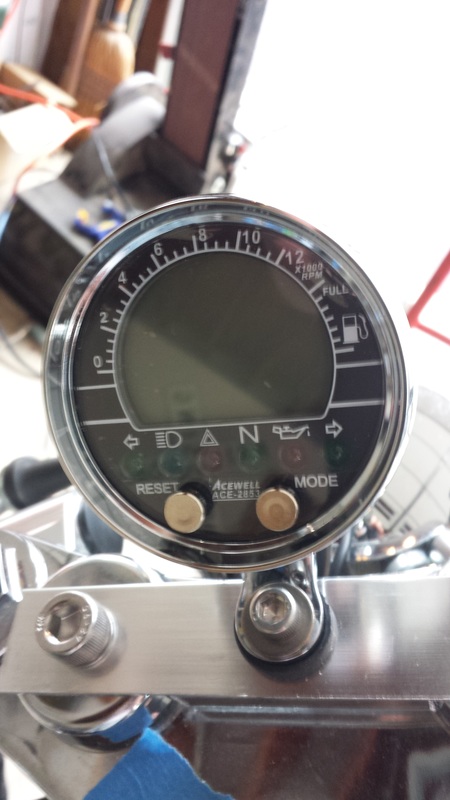
I mounted the Acewell speedo on a piece of scrap aluminum to get things set up. I'll make a better mount later.
Today was more of a sorting day. Going through the wiring and looking things over it became clear that the electrical tape wrapping the wires was pretty bad in spots. Some places it was a gummy mess, others it was nearly dissolving. I unwrapped a bunch and did follow the kickstand wiring back to the grounding junction. I clipped it back there, twisted it together tight, taped it and put some heat shrink over it. I didn't solder it as the wires were very small and I would have probably trashed them with my (lack of) soldering skills. :)
I mounted the Acewell speedo on a piece of scrap aluminum to get things set up. I'll make a better mount later.

April 25, 2015
Went out to get some bolts. The hex head bolts to mount the rear of the tank wouldn't clear the carb so I replaced them with buttonhead allens. It's a tight fit but they work. The tank fits right on with only a little tweaking needed to get it at 100%.
I then cut the parking light wires on the front turn signals as my bar lights are only for turn signals. I'll be shortening up the rest of the wires later tomorrow.
Since I was at the hardware store I wanted to do something about the shifter peg. Now the one that comes with the kit is very nice but the rough textured and I thought it would trash my boots. It was also a bit on the large diameter side and might be harder to get my toe under. I found a 5/8" by 1.5" spacer and a matching nut to the stock allenhead bolt. I'm going to file the nut down a touch , weld it in and dress it and I should be good to go.


April 26, 2015
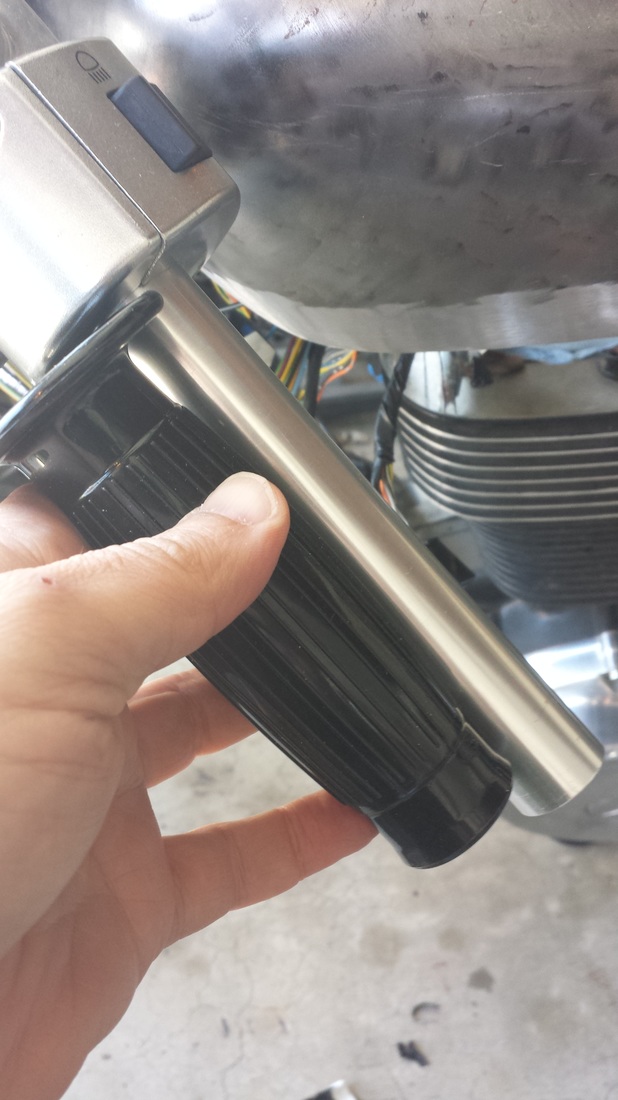
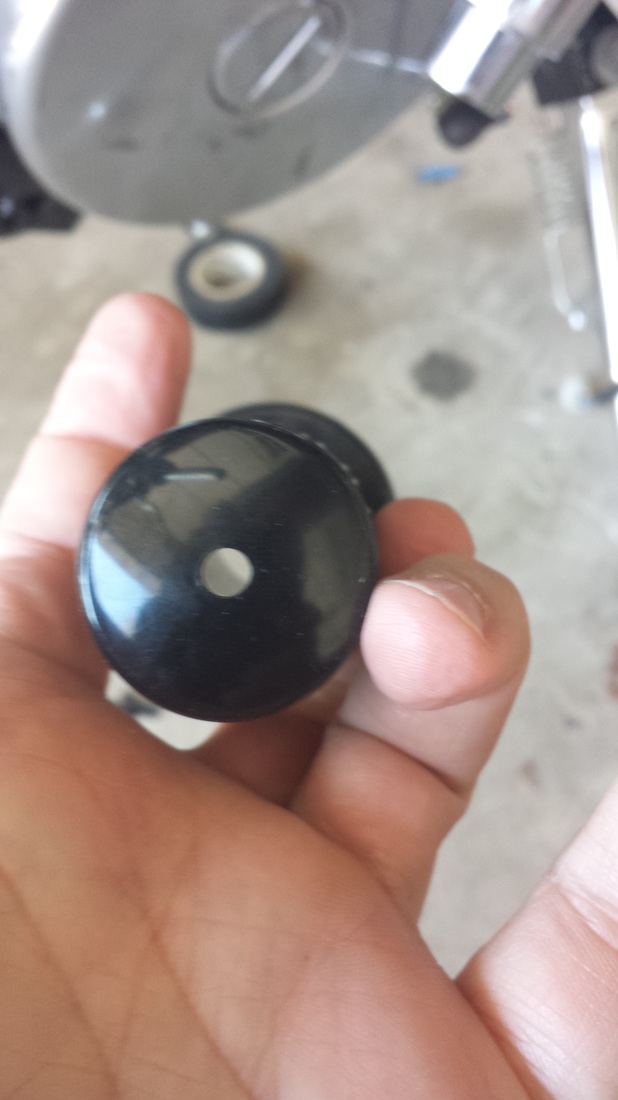
While at the hardware store yesterday, I picked up some 1/2" black tubing to run my turn signal wiring through. I figured black tape wouldn't look that good and I could set it up so it would be watertight. From there, I bored out the end caps 3/4 through and tapped the tubes on. But before I put the bar lights on, I had to install the grips. It was as simple as cutting the ends out , misting a touch of WD-40 in the grips and pushing them on. I fed the bar end light wires up through them then tapped the ends back into the bars. From there I wove the wiring back into the headlight bucket, did a little splicing and gave the bike it's "face" back.
While at the hardware store yesterday, I picked up some 1/2" black tubing to run my turn signal wiring through. I figured black tape wouldn't look that good and I could set it up so it would be watertight. From there, I bored out the end caps 3/4 through and tapped the tubes on. But before I put the bar lights on, I had to install the grips. It was as simple as cutting the ends out , misting a touch of WD-40 in the grips and pushing them on. I fed the bar end light wires up through them then tapped the ends back into the bars. From there I wove the wiring back into the headlight bucket, did a little splicing and gave the bike it's "face" back.


May 3, 2015
The past week has been all over the place, with work, my computer crashing and family stuff, I haven't been able to do proper updates. Here is what I have been up to.
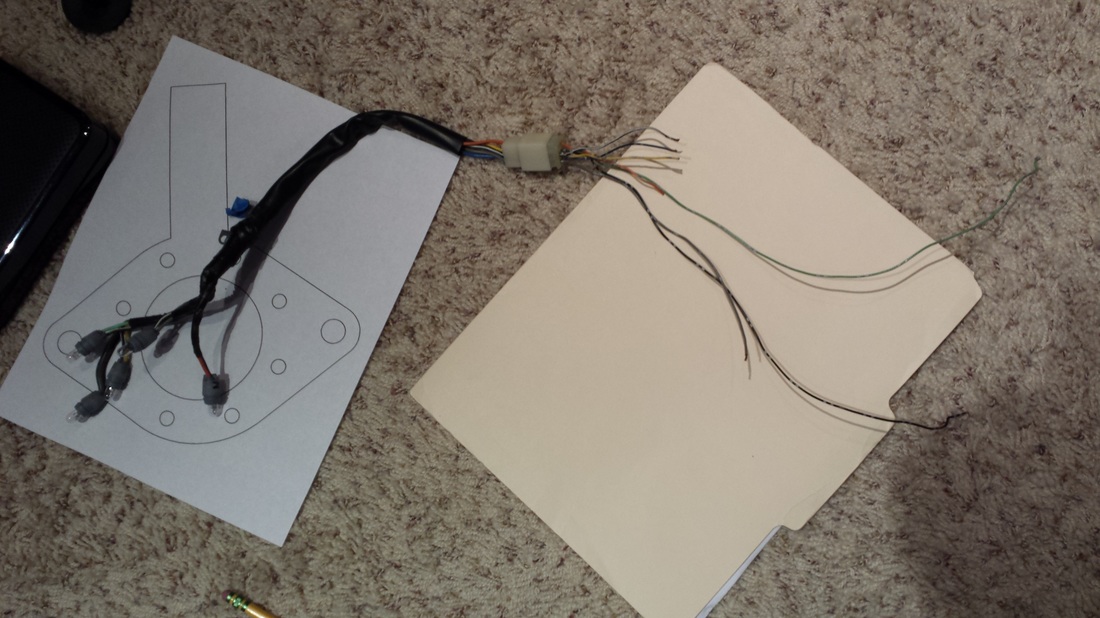
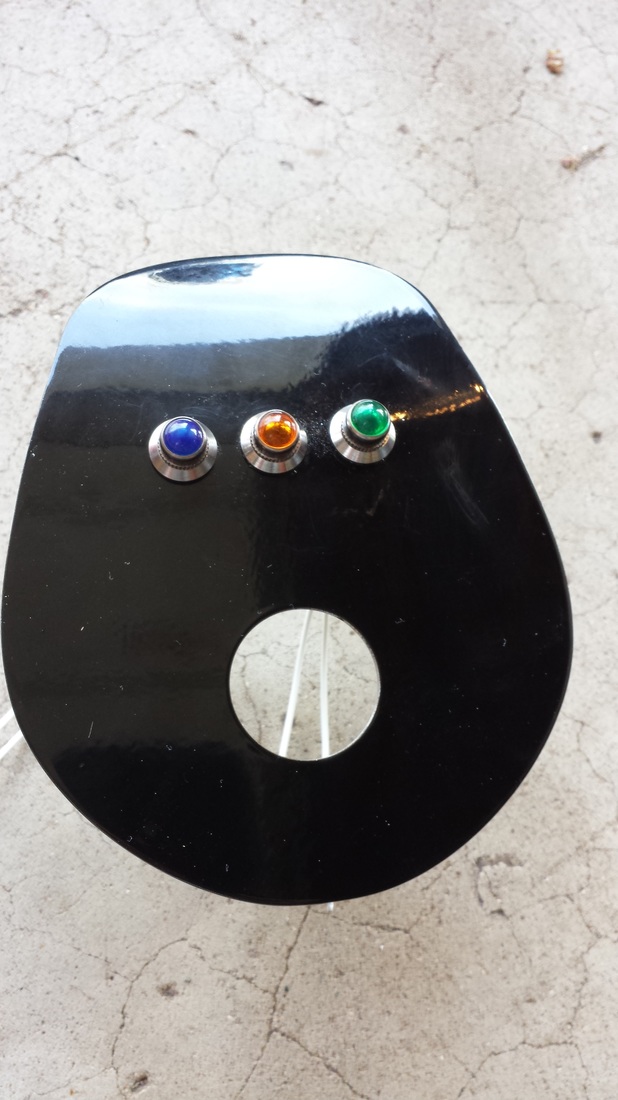
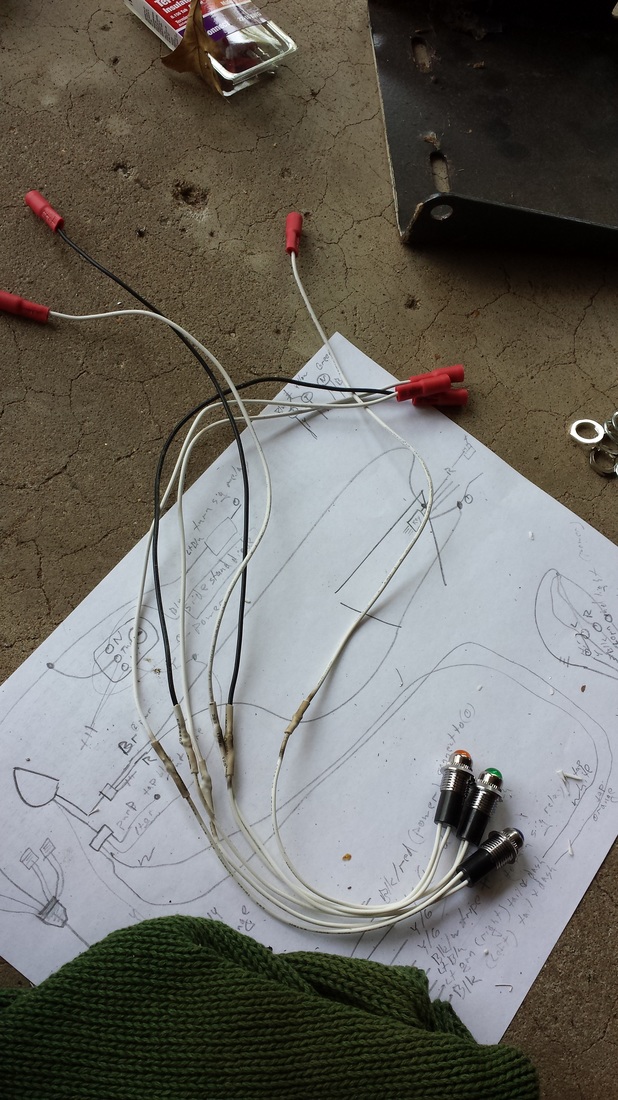
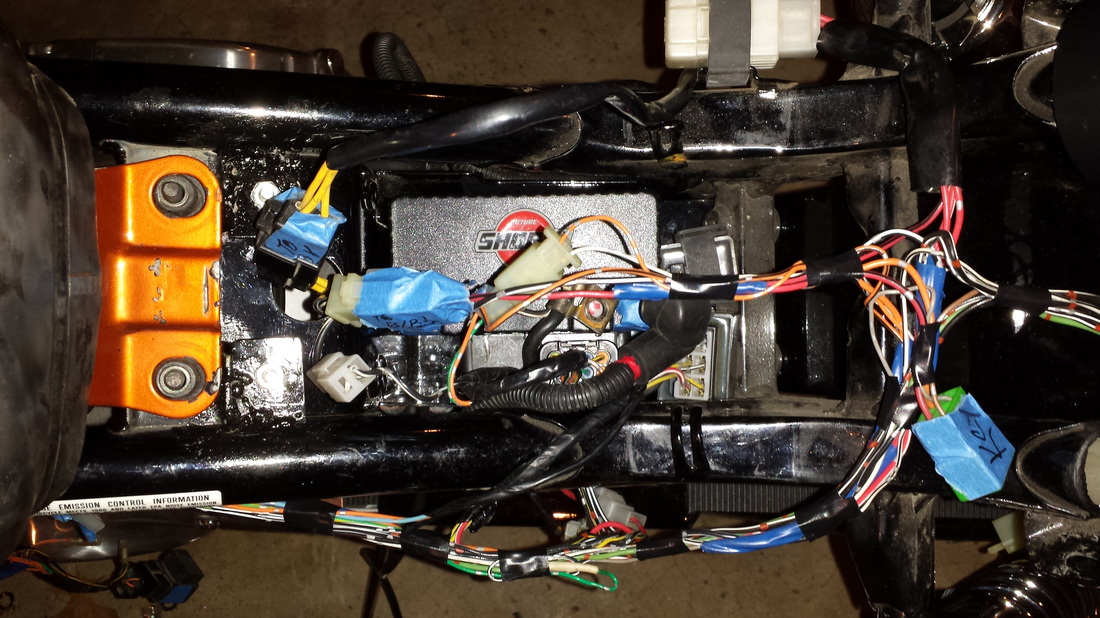
I pulled the wiring off of the speedo to map them out to see exactly how much I needed. Come to find out, I could cut the whole thing off behind the connector and rewire it. Wiring is crazy but if you take your time, it will all fall into place. I wasn't going to use the Ryca instrument lights and had a set from a hot rod shop. The blue is for the hi beams, the yellow for the turn signals and the green for the neutral indicator. I had to ream the holes out larger then make connections so I could connect them once the tank was on. I got the key switch installed and ran the wiring through the tank so I could see where I was going to connect everything to keep it clean. I found that the battery was so small I could fit a lot of the electronics in the back. From there I started laying things out and getting them taped together every few inches in case I needed to pull things apart for changes. I need to do some more splicing next, get the Acewell connected and the wiring loom mounted under the tank. It's getting there!
The past week has been all over the place, with work, my computer crashing and family stuff, I haven't been able to do proper updates. Here is what I have been up to.
I pulled the wiring off of the speedo to map them out to see exactly how much I needed. Come to find out, I could cut the whole thing off behind the connector and rewire it. Wiring is crazy but if you take your time, it will all fall into place. I wasn't going to use the Ryca instrument lights and had a set from a hot rod shop. The blue is for the hi beams, the yellow for the turn signals and the green for the neutral indicator. I had to ream the holes out larger then make connections so I could connect them once the tank was on. I got the key switch installed and ran the wiring through the tank so I could see where I was going to connect everything to keep it clean. I found that the battery was so small I could fit a lot of the electronics in the back. From there I started laying things out and getting them taped together every few inches in case I needed to pull things apart for changes. I need to do some more splicing next, get the Acewell connected and the wiring loom mounted under the tank. It's getting there!