May 19, 2015
Tried working on the tank lighting. Installed a LED, tried different wiring combos and flashers but it was giving me mixed results. The tank lights are a bit redundant as I have them on the Acewell so I think I'll just take them out and fill the holes with some nice bolts. It'll make installing the tank easier too.
May 21, 2015
Will get to the tank lights later. For now I just capped them. Sorry for the bad pic. I tried taking it a few times and this was as good as it was getting.

May 26, 2015
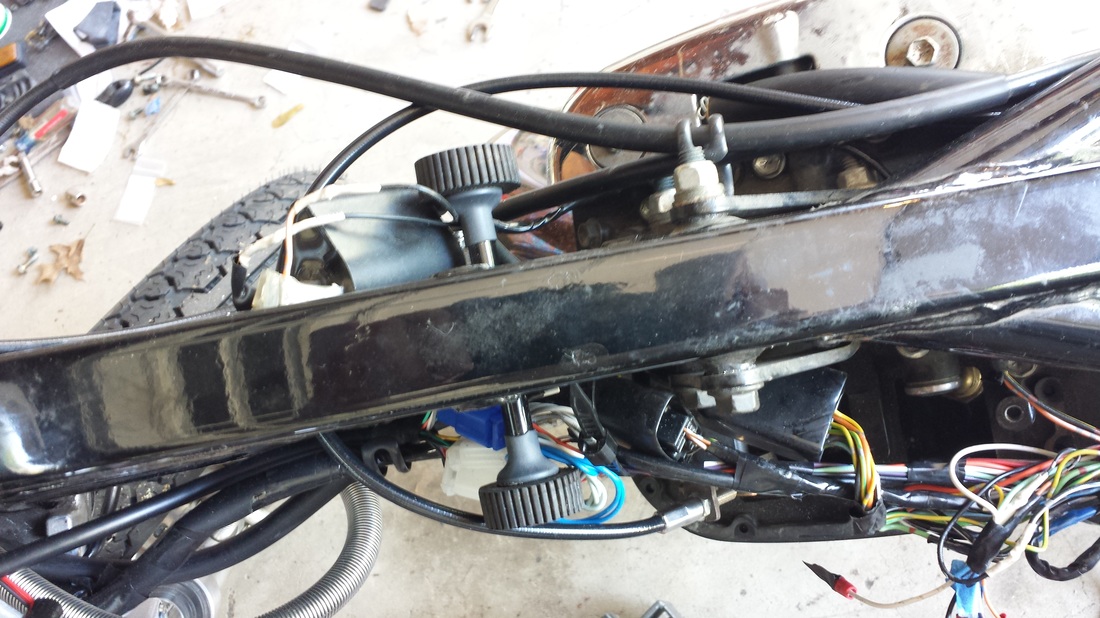
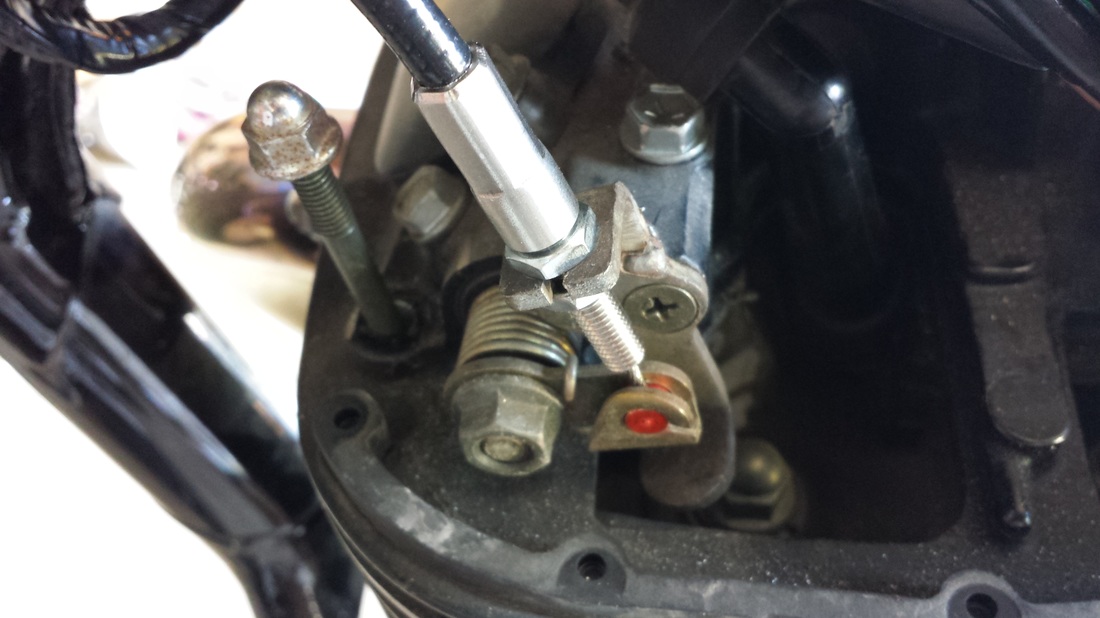
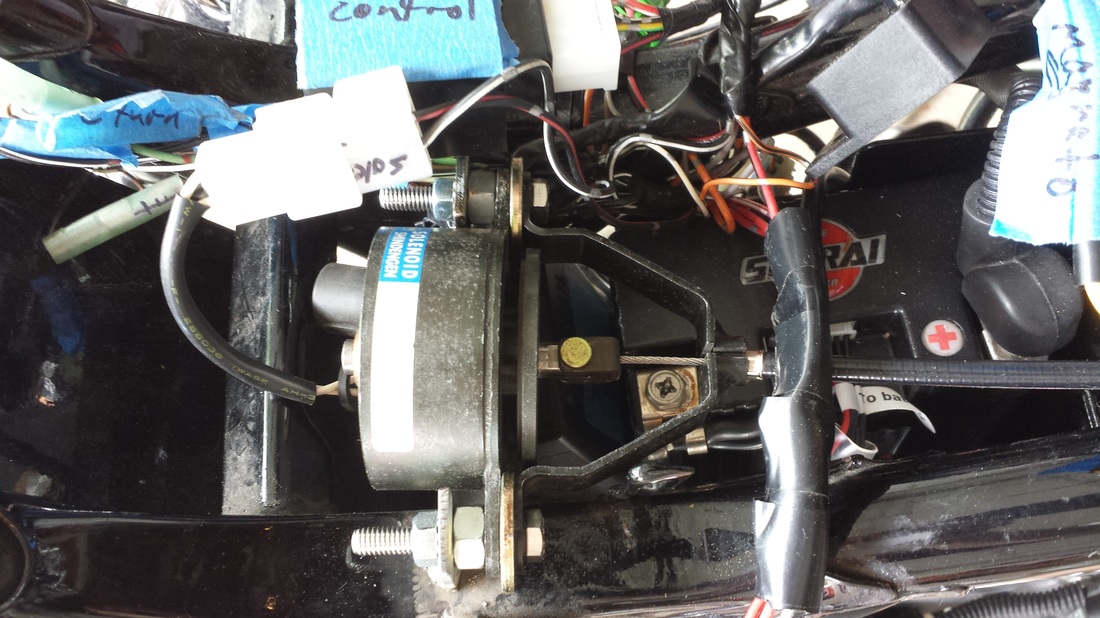
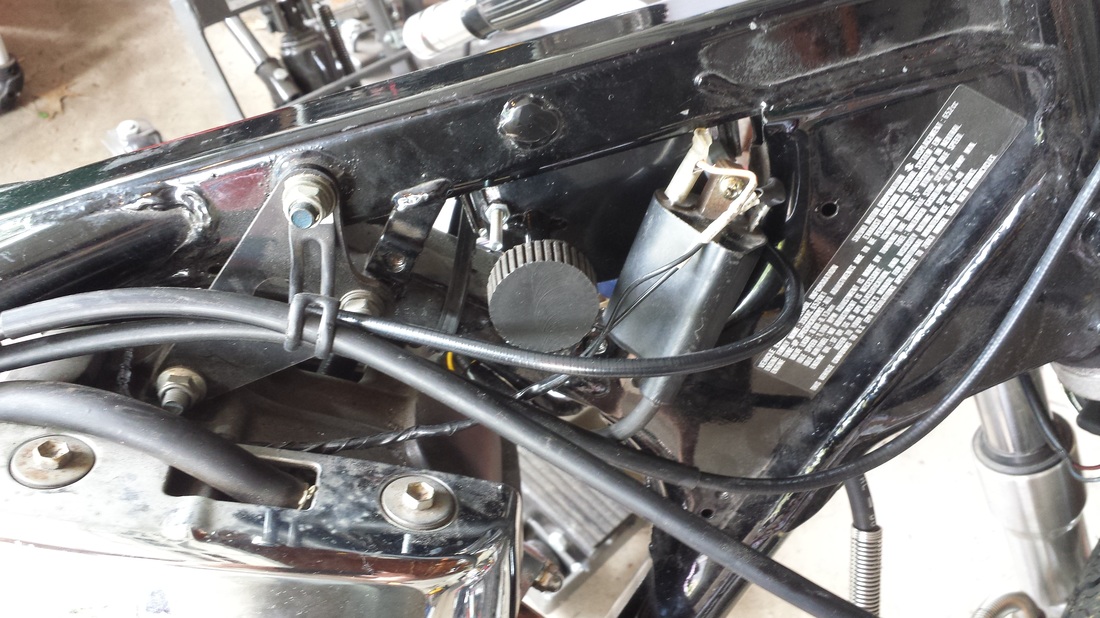
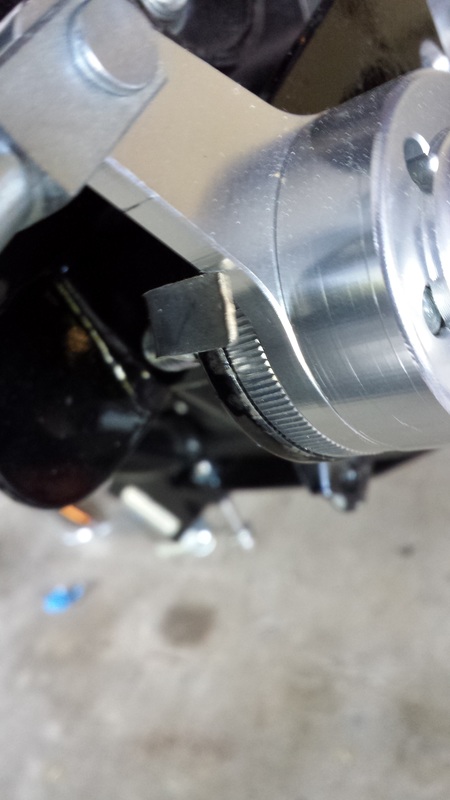
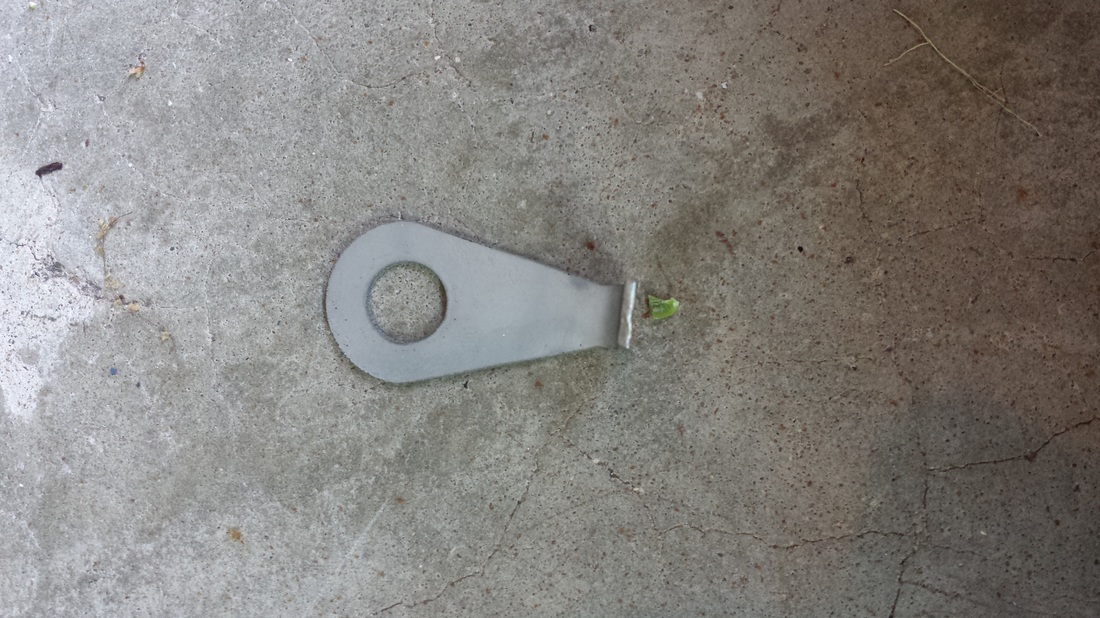
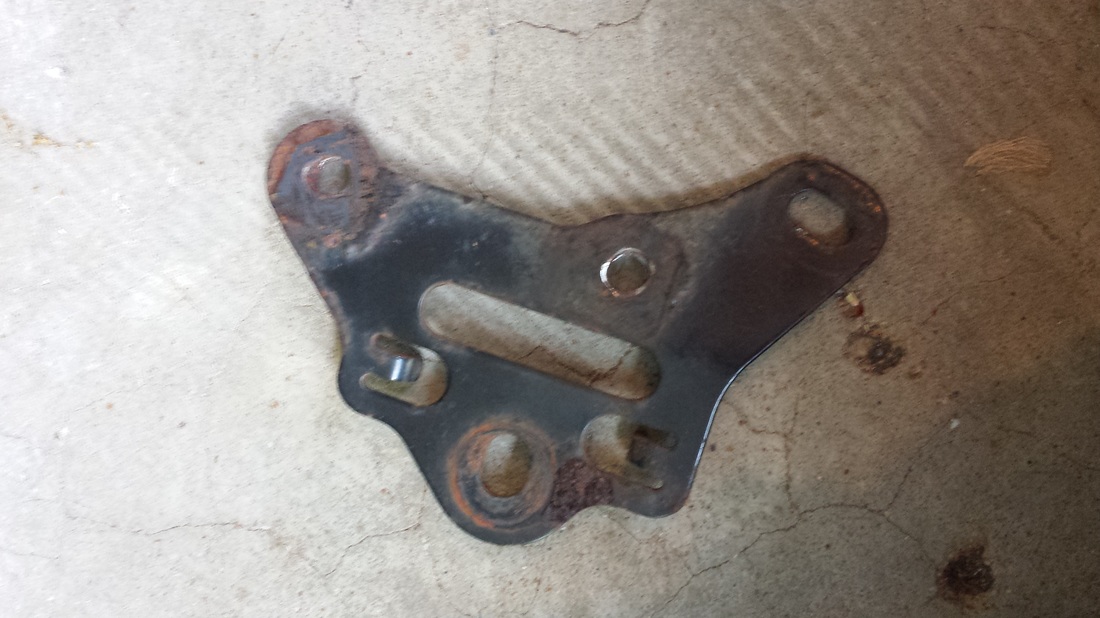
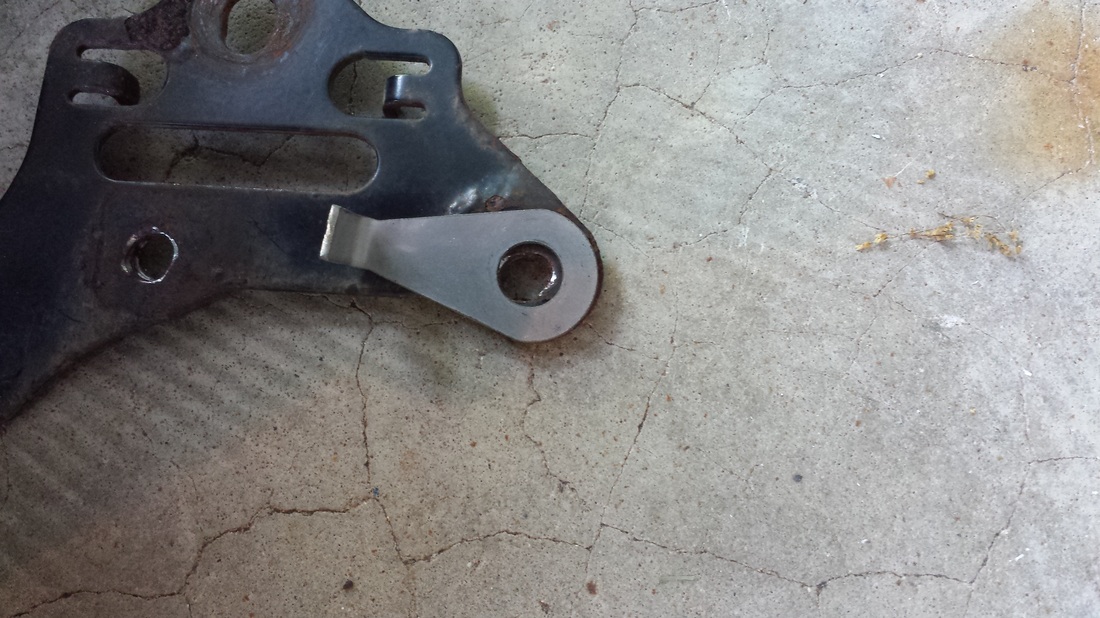
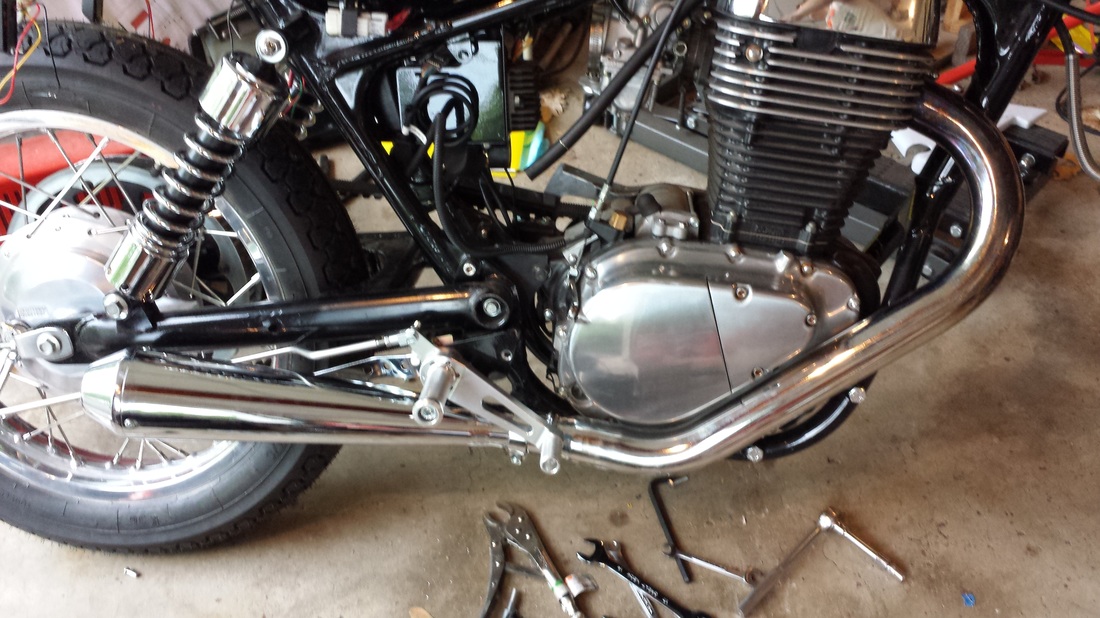
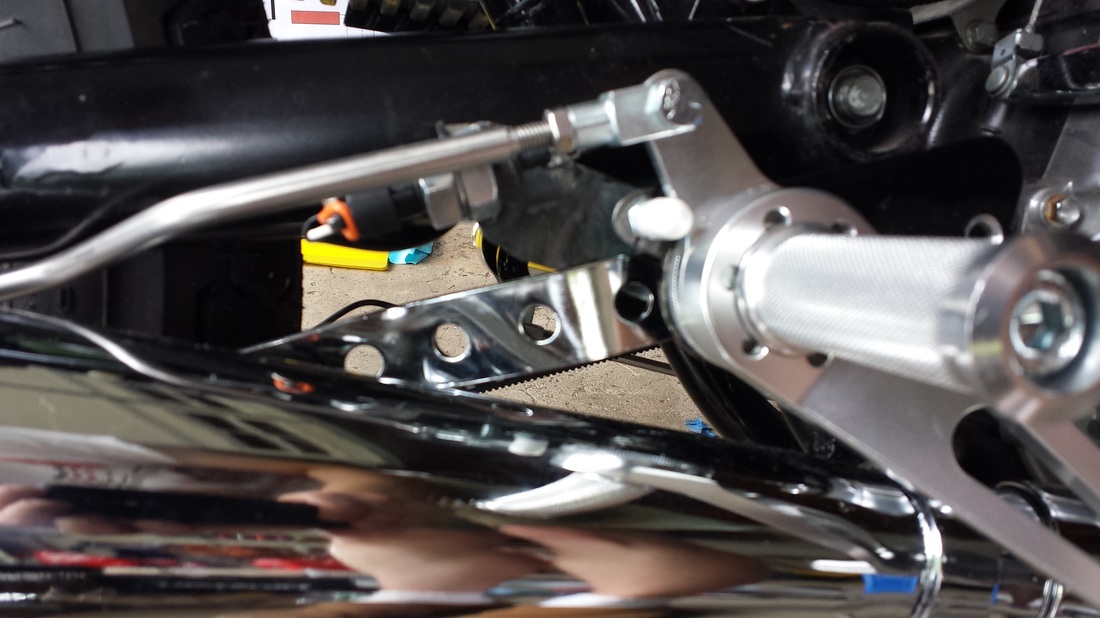
Okay, it's been a few days and I've worked on the bike on and off. It gets to the point where it isn't big chunks but little nuts and bolts here and there. I got the decomp cable in and figured out. I clearanced the front tank mount and raised it up about 1/8". It's just a little but it helps. The shot below is as it was stock. I cut the upper tabs off and lengthened the holes downward so I could raise the mount up. I notched the front out a bit too so the cable wouldn't bind. I remounted the coil and it fits better. The solenoid needed to be adjusted with spacers and also clocked a little to the right so the cable would line up square.
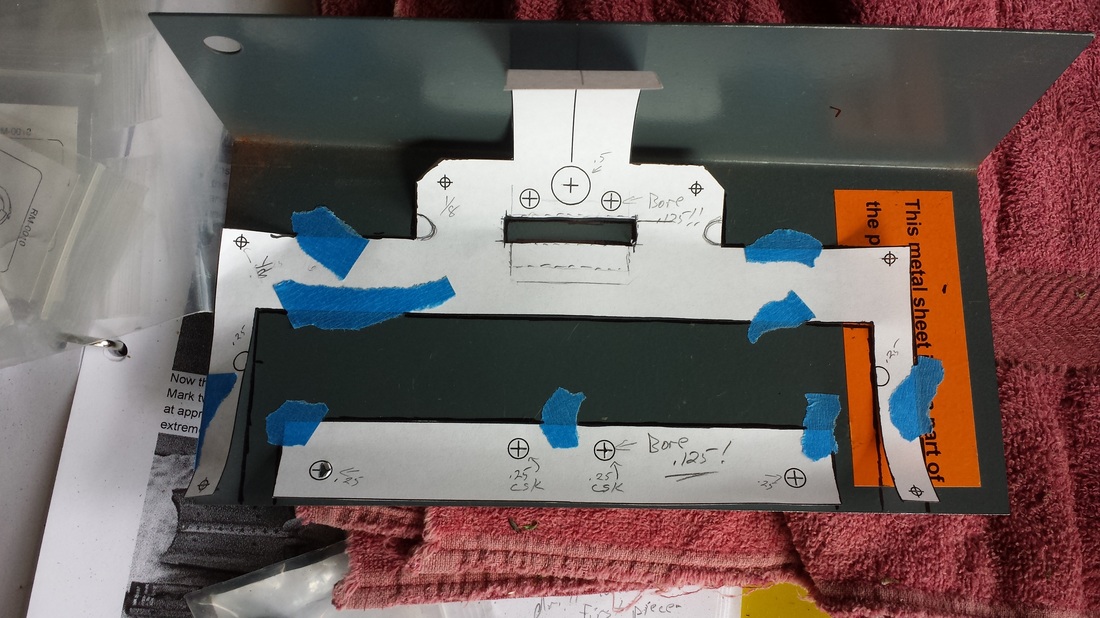
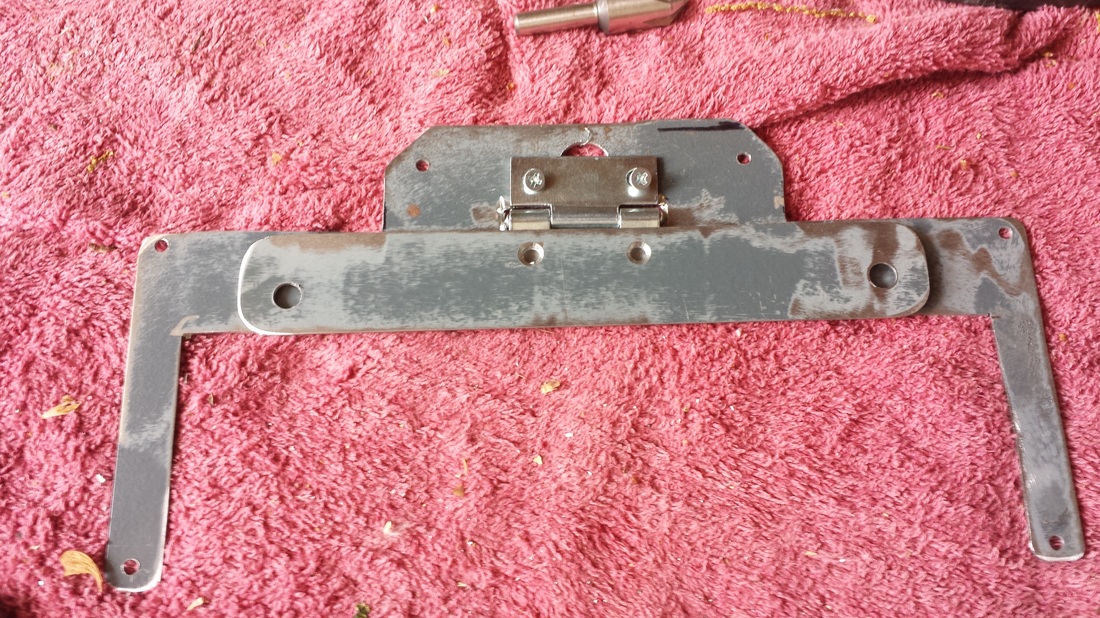
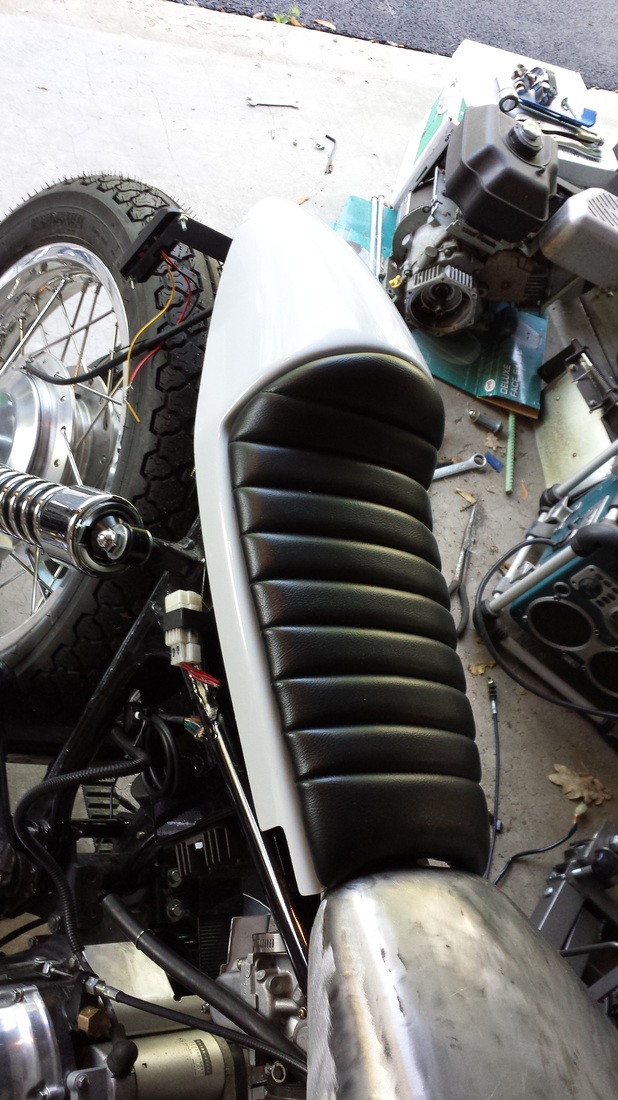
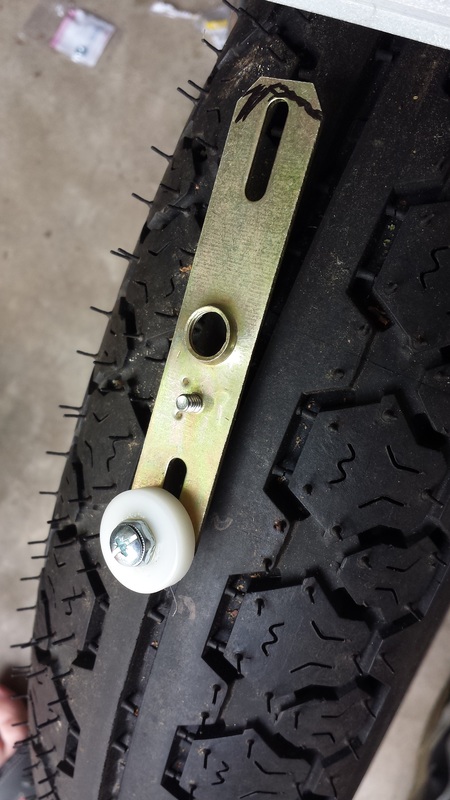
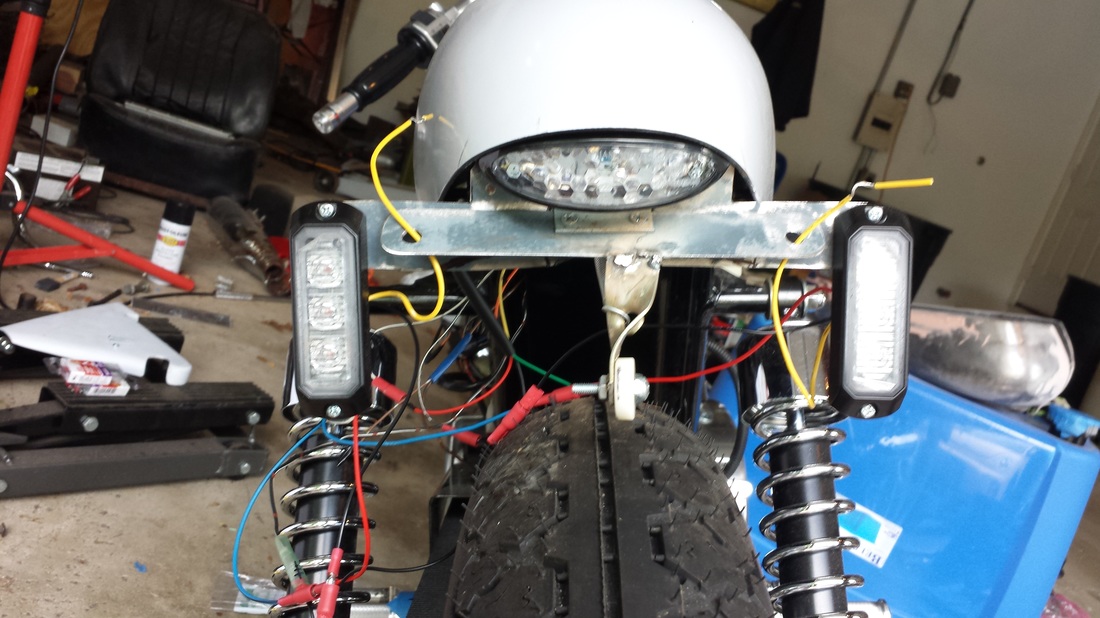
I have been working on the tail lights and license plate mount. The biggest problem is that the bottom of the plate is VERY close to the rear tire. Lots of riders bend the plate up or roll up the bottom. Bob put in rubber gaskets to allow the plate to wobble. What I found was that the bracket in the kit that holds the whole thing on wasn't fitting the best for me and I couldn't get it square and level in all directions. I decided to make my own bracket with a hinged plate that will be held by a spring. I'll be putting a bump wheel that will hit the tire before the plate and push the plate upwards. Luckily I got AutoCAD reinstalled on my computer and had a piece of metal laying around to make the mounting plate. I'm also mounting the brake lights to the side that won't pivot with the plate. A bunch of layered pieces but I think it should work. I'll be fabbing a mount for it to the back of the fiberglass where the seat connects.
Okay, it's been a few days and I've worked on the bike on and off. It gets to the point where it isn't big chunks but little nuts and bolts here and there. I got the decomp cable in and figured out. I clearanced the front tank mount and raised it up about 1/8". It's just a little but it helps. The shot below is as it was stock. I cut the upper tabs off and lengthened the holes downward so I could raise the mount up. I notched the front out a bit too so the cable wouldn't bind. I remounted the coil and it fits better. The solenoid needed to be adjusted with spacers and also clocked a little to the right so the cable would line up square.
I have been working on the tail lights and license plate mount. The biggest problem is that the bottom of the plate is VERY close to the rear tire. Lots of riders bend the plate up or roll up the bottom. Bob put in rubber gaskets to allow the plate to wobble. What I found was that the bracket in the kit that holds the whole thing on wasn't fitting the best for me and I couldn't get it square and level in all directions. I decided to make my own bracket with a hinged plate that will be held by a spring. I'll be putting a bump wheel that will hit the tire before the plate and push the plate upwards. Luckily I got AutoCAD reinstalled on my computer and had a piece of metal laying around to make the mounting plate. I'm also mounting the brake lights to the side that won't pivot with the plate. A bunch of layered pieces but I think it should work. I'll be fabbing a mount for it to the back of the fiberglass where the seat connects.


June 2, 2015
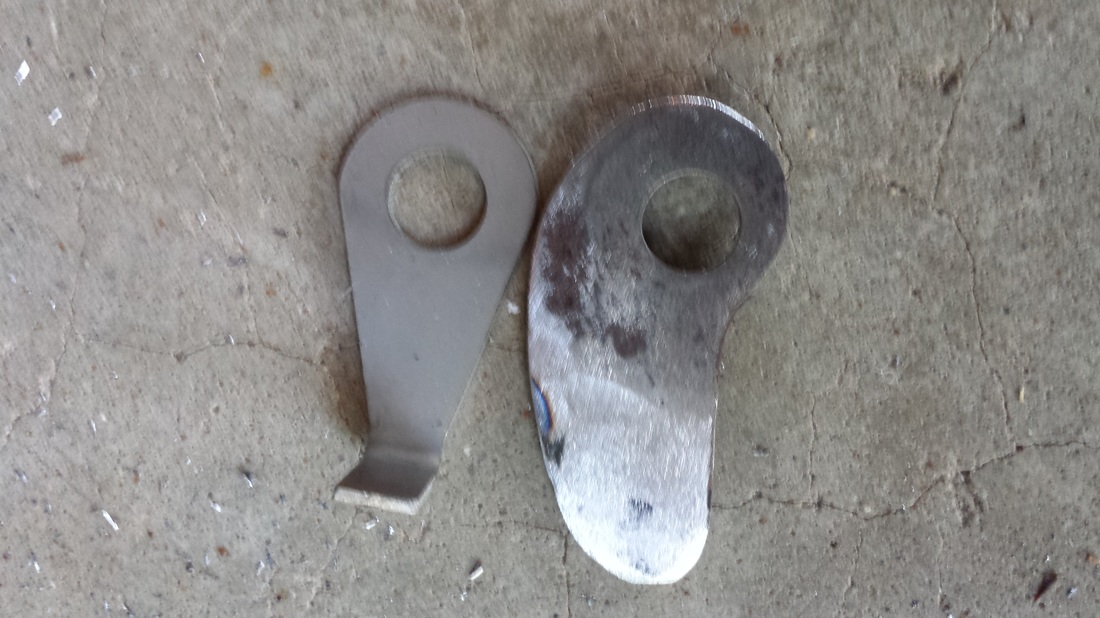
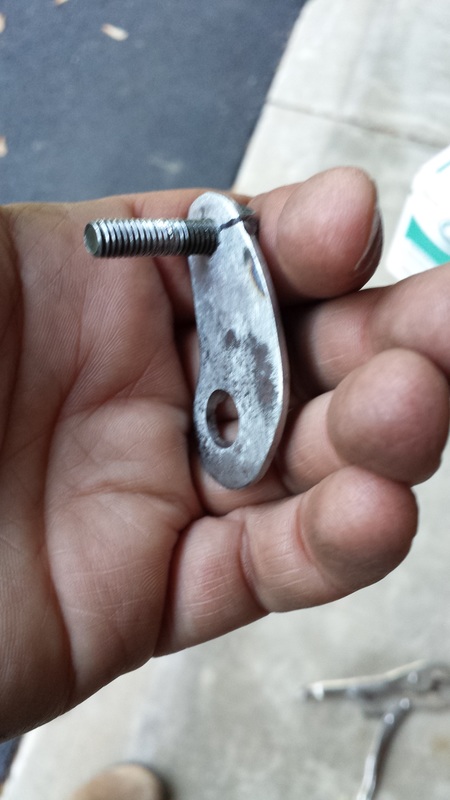
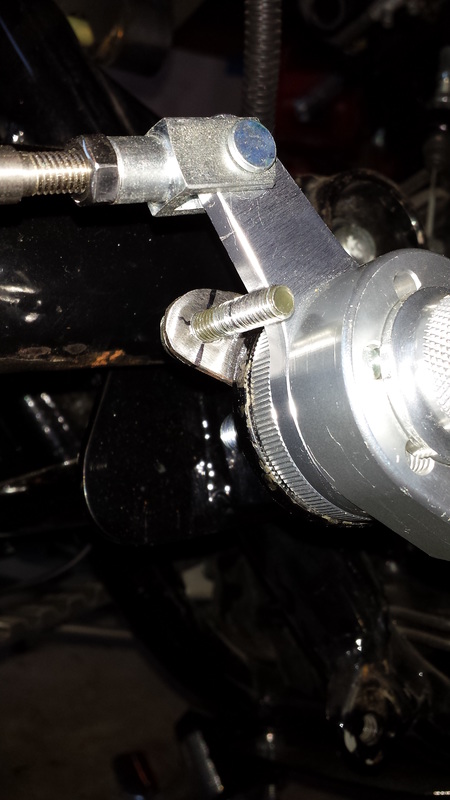
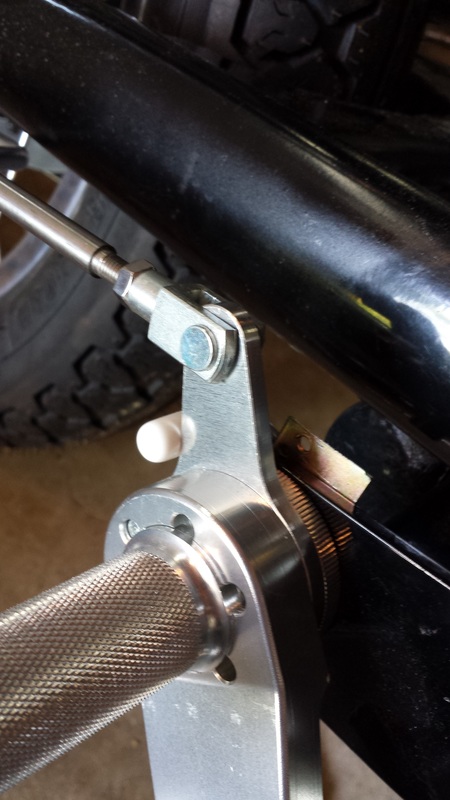
Finally got back to it. The brake retainer bracket that came with the kit was too flimsy and was already starting to bend. I had to do something about it. I had an old bracket I pulled off our Toyota that I found in my scrap box. I don't throw too much away, especially metal! I measured out a piece, bored out the hole to fit the bolt and then cut a piece out slightly larger. I drilled a hole then tapped it. I used the former bolt that was in the brake lever but the threads were a bit galled. I was able to get the bolt through and snugged in. (I later put a nut on the other side with a cap.) It works much better!
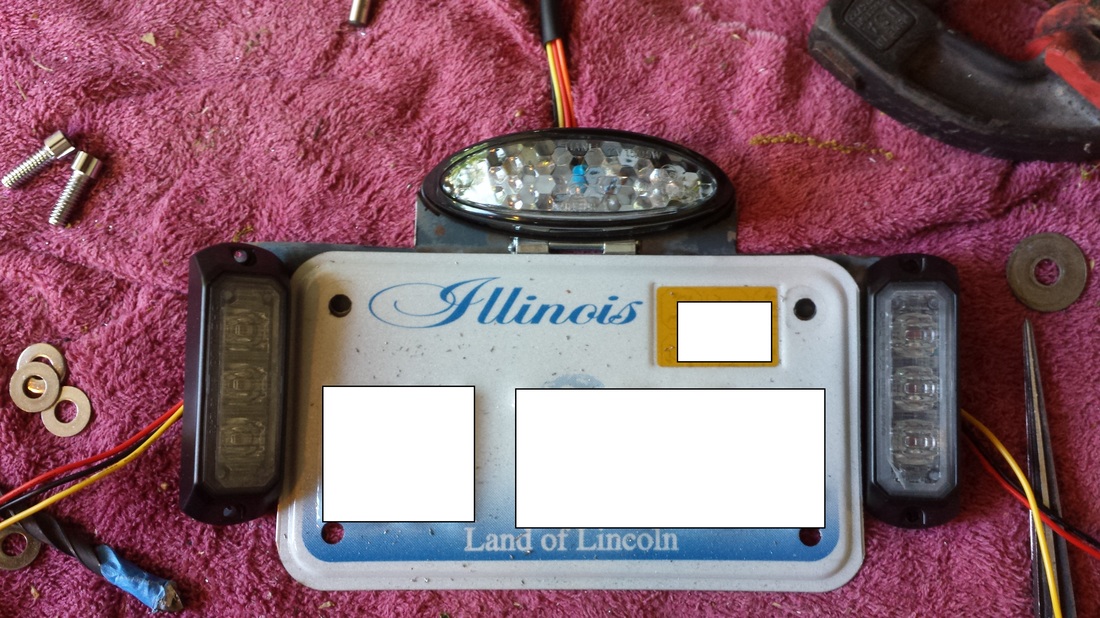
I then made some big headway and got the rear lights and plate installed. I sandwiched the fiberglass with 2 pieces of metal and bolted them together, making sure to countersink the bolts so the seat would fit. Underneath, I ran a bracket back from the plates to the license plate assembly. Welding it up was very tricky as I had to keep everything aligned and then weld in quick bursts so I wouldn't set the fiberglass on fire. It turned out okay but will need a bit of bracing to keep it from bouncing. Will wire it next and then get the brake switch and exhaust in.
Finally got back to it. The brake retainer bracket that came with the kit was too flimsy and was already starting to bend. I had to do something about it. I had an old bracket I pulled off our Toyota that I found in my scrap box. I don't throw too much away, especially metal! I measured out a piece, bored out the hole to fit the bolt and then cut a piece out slightly larger. I drilled a hole then tapped it. I used the former bolt that was in the brake lever but the threads were a bit galled. I was able to get the bolt through and snugged in. (I later put a nut on the other side with a cap.) It works much better!
I then made some big headway and got the rear lights and plate installed. I sandwiched the fiberglass with 2 pieces of metal and bolted them together, making sure to countersink the bolts so the seat would fit. Underneath, I ran a bracket back from the plates to the license plate assembly. Welding it up was very tricky as I had to keep everything aligned and then weld in quick bursts so I wouldn't set the fiberglass on fire. It turned out okay but will need a bit of bracing to keep it from bouncing. Will wire it next and then get the brake switch and exhaust in.
June 4 and 6, 2015
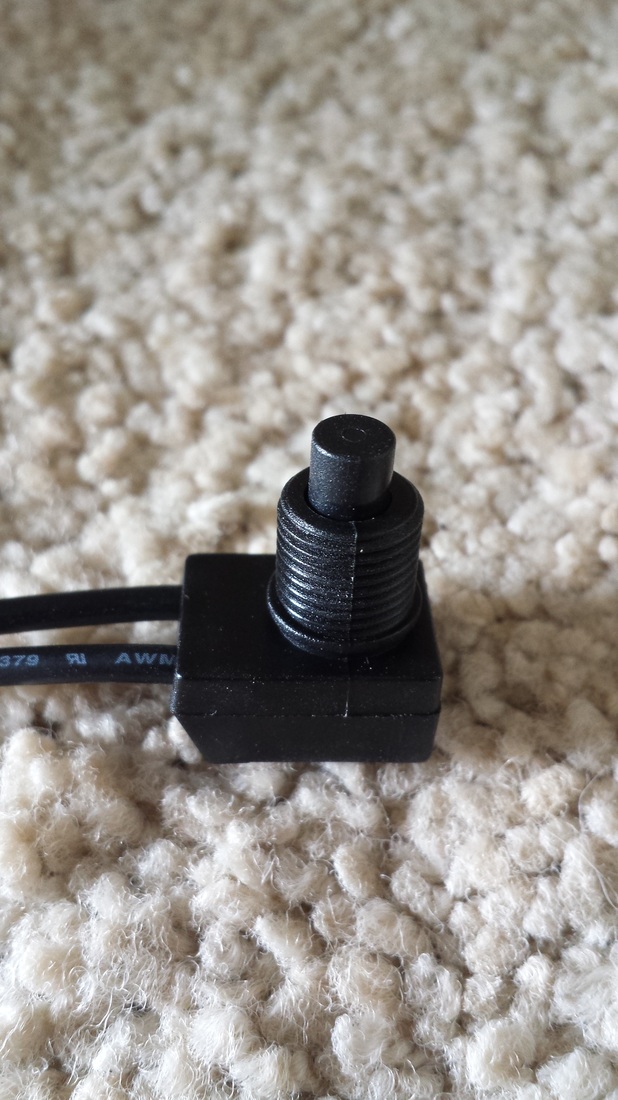
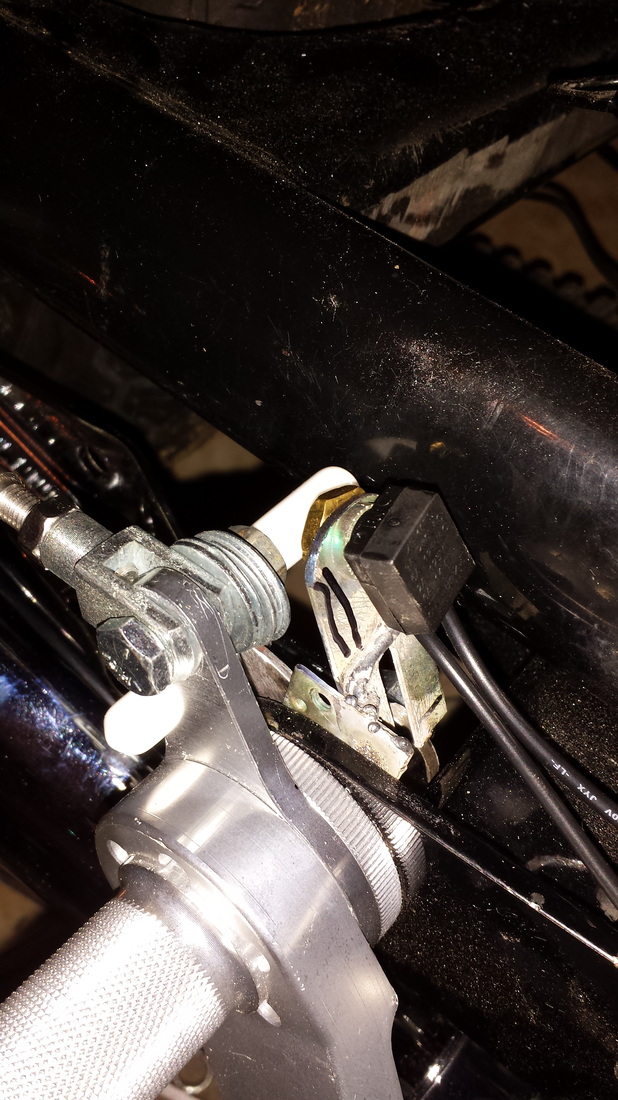
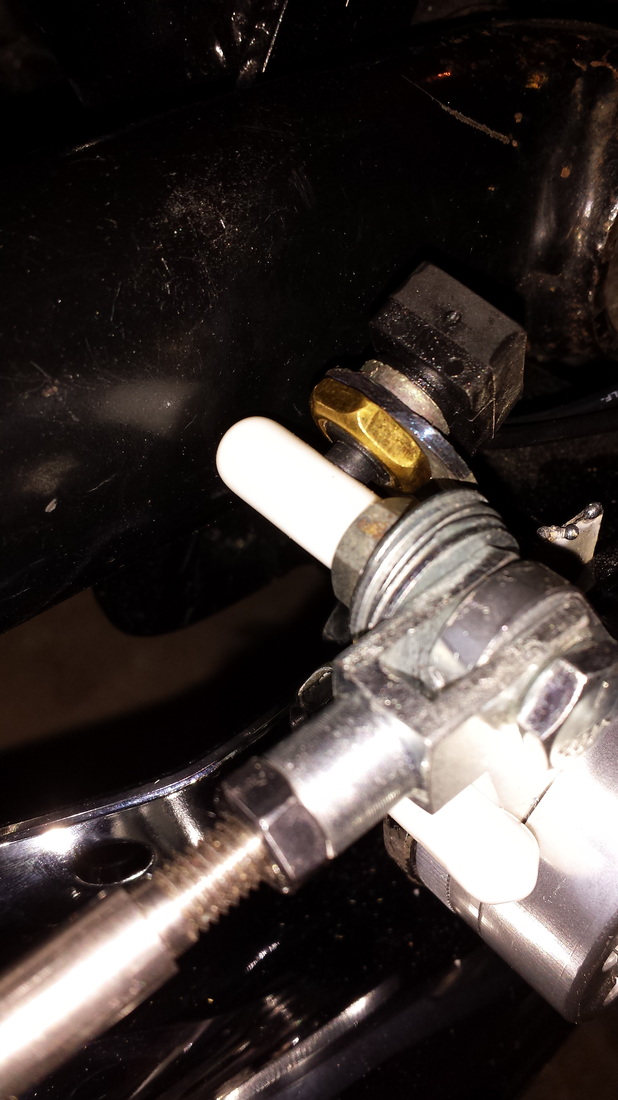
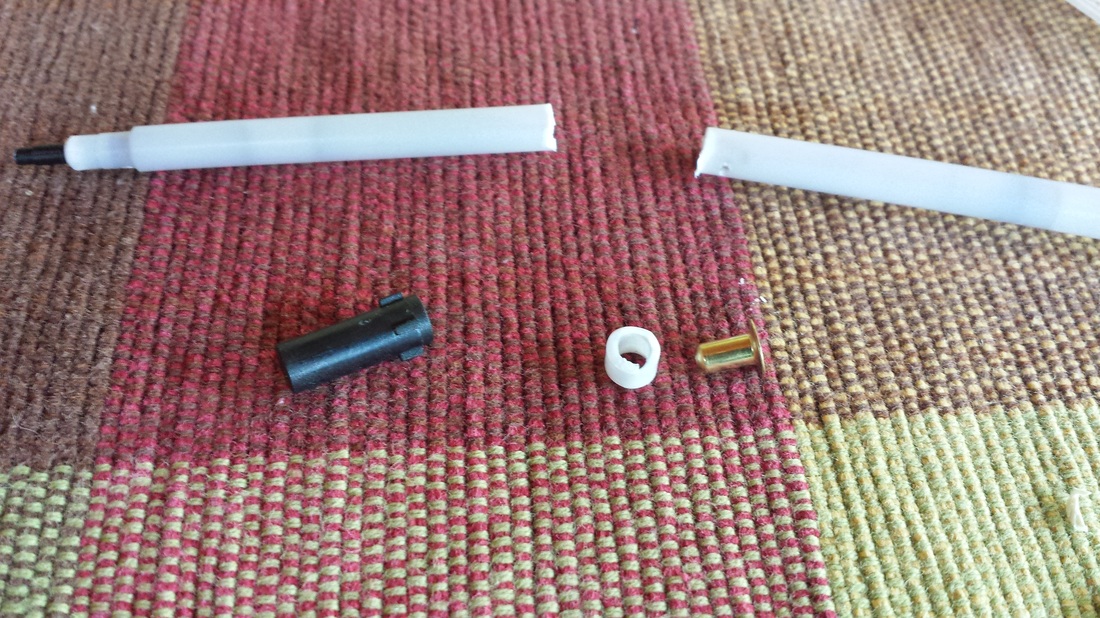
These two days were a bit of a blur as I was working on the exhaust, license plate swing and brake switch all at the same time. I'll get some pics of the license plate swing soon, but I had it on and off the bike so much the other day I didn't get a shot. It works very nicely and I realized the shocks were VERY soft! I did get the main tail, brake and turn lights working! I have to hook up the strobe brake lights but need to get the rear switch in and working first. I wasn't wild about the Ryca hookup of the cable and Bob's was good but left too much hanging down for my taste. I decided to pull it and put a microswitch in it's place. I found one at Lowe's for ceiling fans. I tried it out and it works quite well. Since it was made for interior lighting, the threads matched the lighting support brackets. I threaded it in, cut off one end and now have a bracket I need to figure out how to mount. I used one of the same support brackets for the plate swing wheel attachment. All of this is prototype and I'll replace it with better made stuff in the future. Right now I just want to get it to work. I was going to put the switch underneath the pedal but I soon figured out that the exhaust would probably melt it!
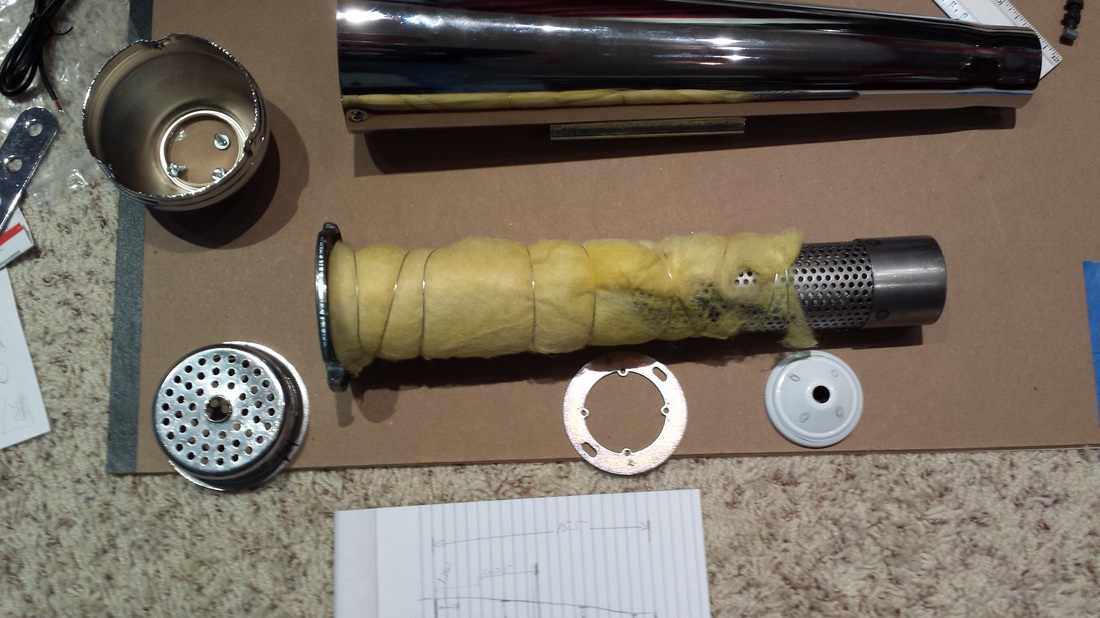
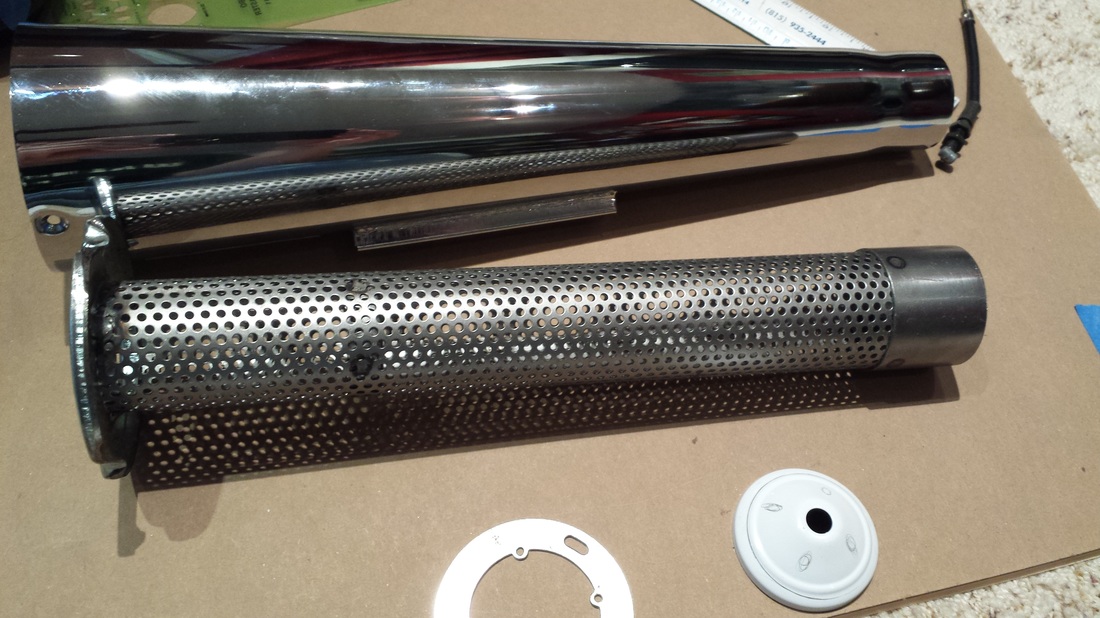
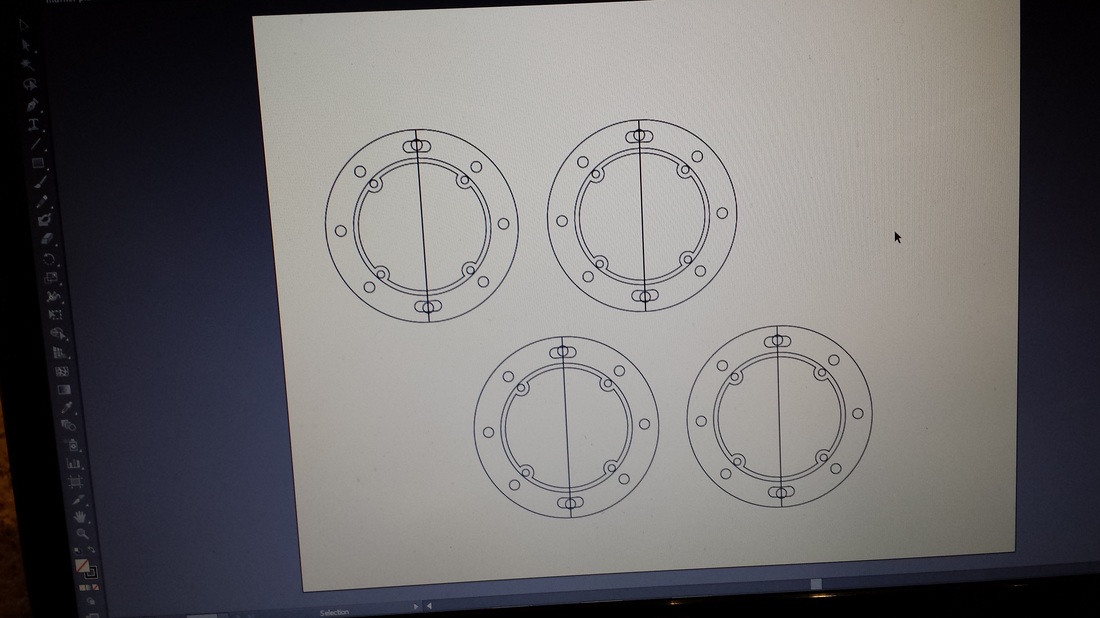
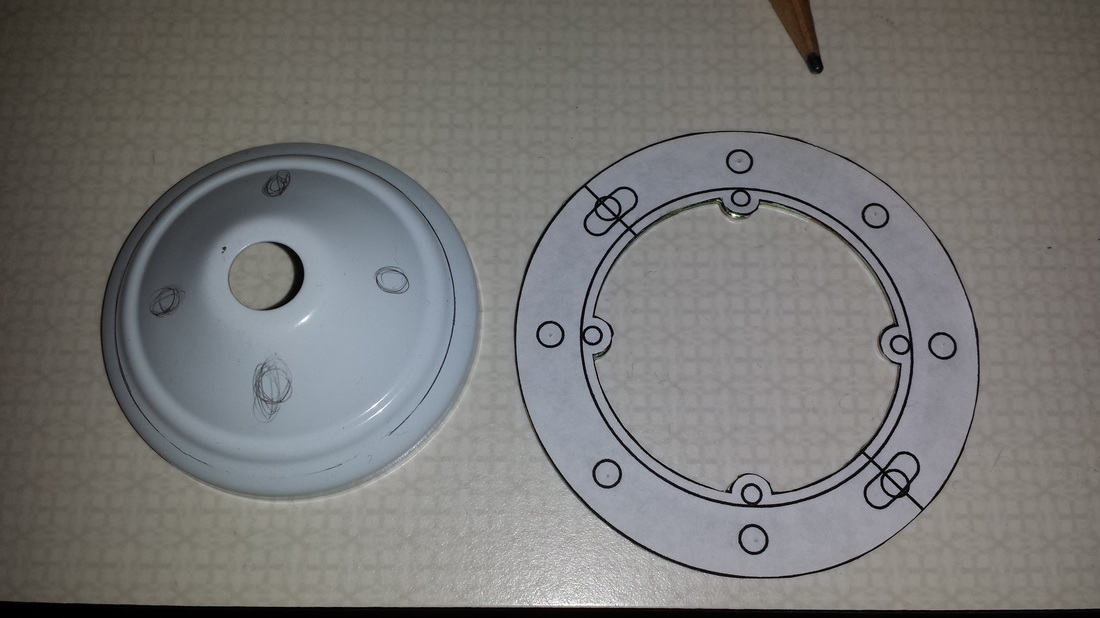
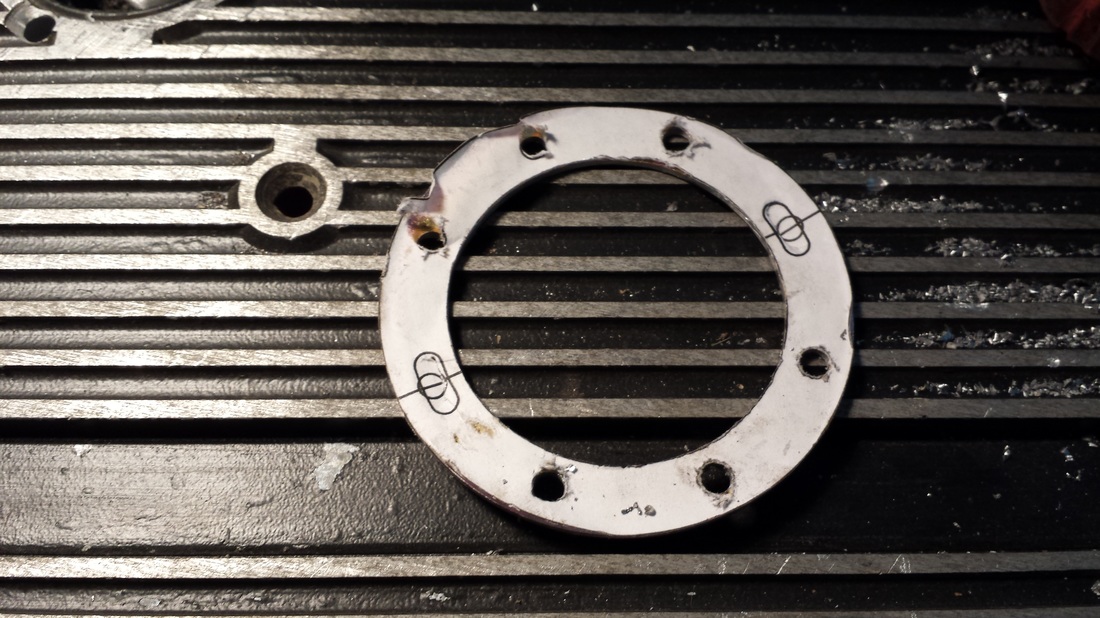
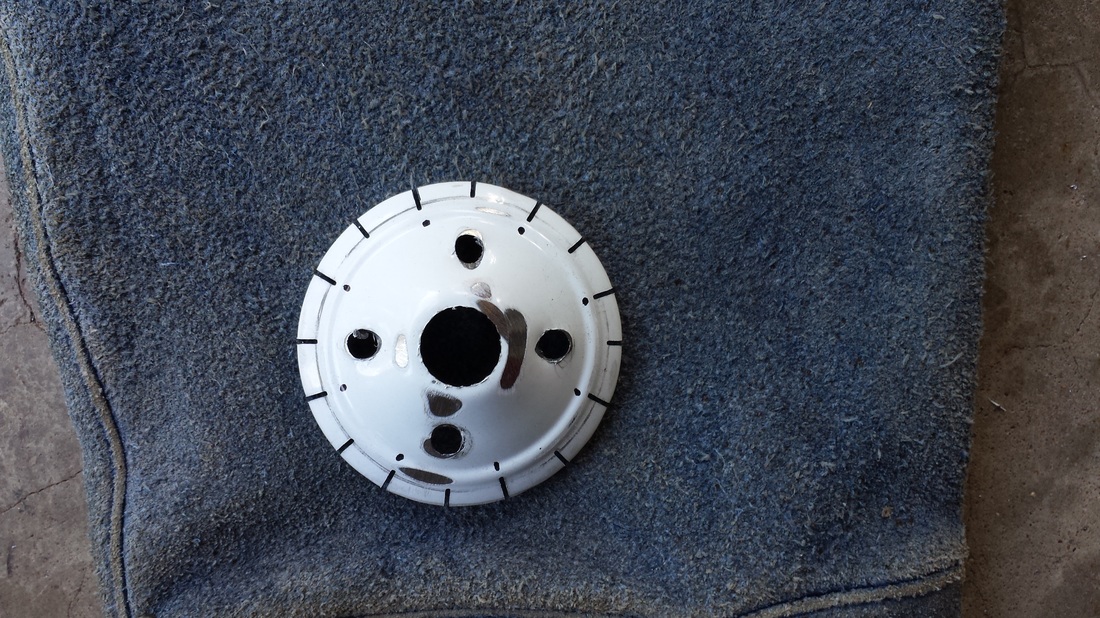
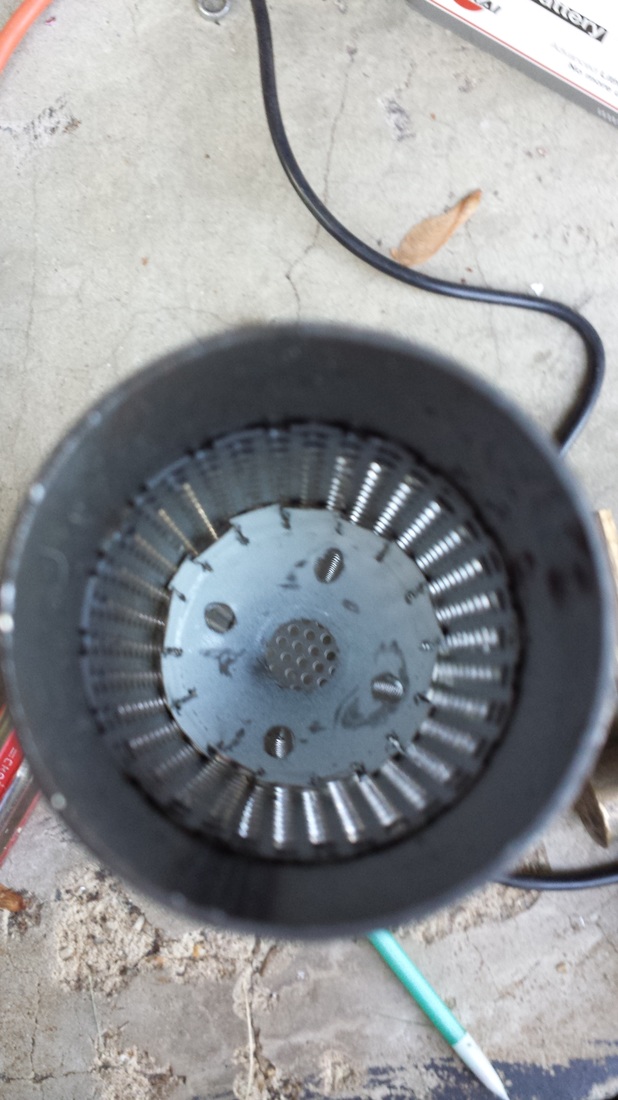
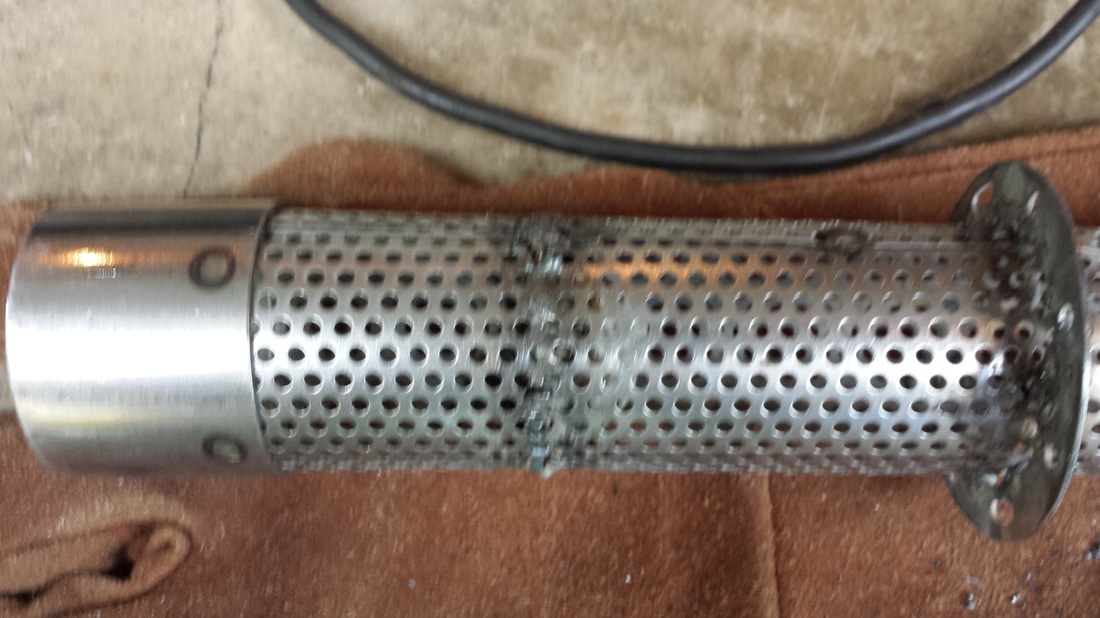
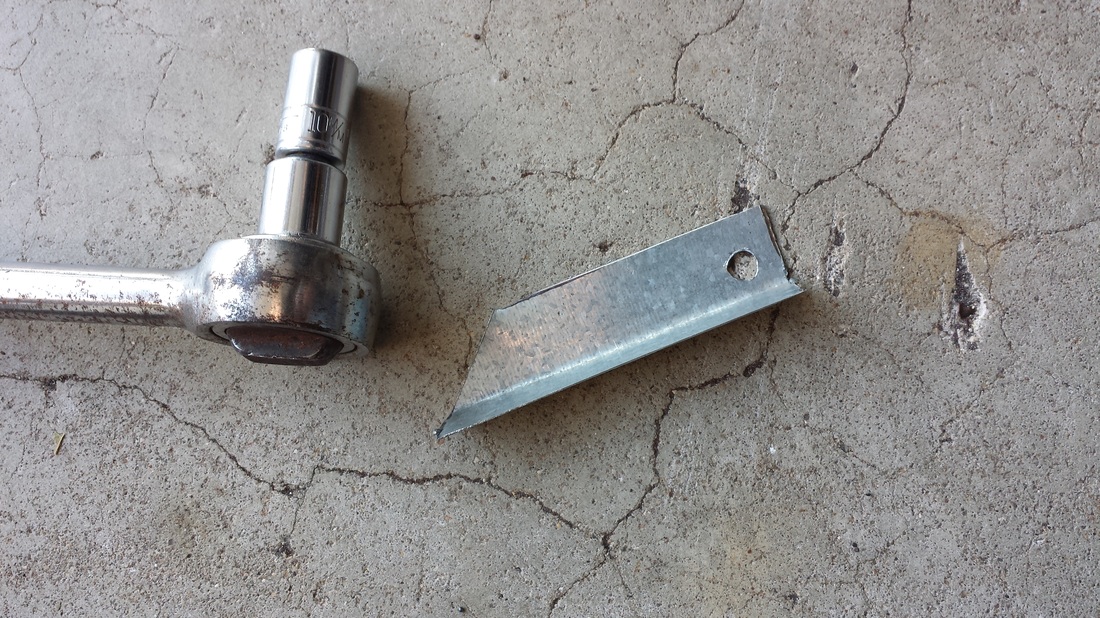
I finally started on the muffler mods. The parts I used were once again from around the house. The baffle ring is an old phone jack support I hogged out and bored holes into. The internal baffle was a decorative finial from a hanging light kit. A little cutting, a little grinding, a few bends and ta-da! Exhaust baffles! I did draw up a lot of it in AutoCAD so I knew how far down to weld the outer baffle on. If it was too far, it wouldn't let the internal pipe fit. If it was too short, all the exhaust would just go around it. Did some math stuff, measured a bunch of stuff and found the sweet spot was about 6.25" into the exhaust. Got the crumb cup mod welded on too. That was as simple as going to Target, getting a drain cover, pulling the plastic center out, notching it in 3 spots then welding the heck out of it. Not bad for a little 110 flux-core welder with only a high and low setting.
These two days were a bit of a blur as I was working on the exhaust, license plate swing and brake switch all at the same time. I'll get some pics of the license plate swing soon, but I had it on and off the bike so much the other day I didn't get a shot. It works very nicely and I realized the shocks were VERY soft! I did get the main tail, brake and turn lights working! I have to hook up the strobe brake lights but need to get the rear switch in and working first. I wasn't wild about the Ryca hookup of the cable and Bob's was good but left too much hanging down for my taste. I decided to pull it and put a microswitch in it's place. I found one at Lowe's for ceiling fans. I tried it out and it works quite well. Since it was made for interior lighting, the threads matched the lighting support brackets. I threaded it in, cut off one end and now have a bracket I need to figure out how to mount. I used one of the same support brackets for the plate swing wheel attachment. All of this is prototype and I'll replace it with better made stuff in the future. Right now I just want to get it to work. I was going to put the switch underneath the pedal but I soon figured out that the exhaust would probably melt it!
I finally started on the muffler mods. The parts I used were once again from around the house. The baffle ring is an old phone jack support I hogged out and bored holes into. The internal baffle was a decorative finial from a hanging light kit. A little cutting, a little grinding, a few bends and ta-da! Exhaust baffles! I did draw up a lot of it in AutoCAD so I knew how far down to weld the outer baffle on. If it was too far, it wouldn't let the internal pipe fit. If it was too short, all the exhaust would just go around it. Did some math stuff, measured a bunch of stuff and found the sweet spot was about 6.25" into the exhaust. Got the crumb cup mod welded on too. That was as simple as going to Target, getting a drain cover, pulling the plastic center out, notching it in 3 spots then welding the heck out of it. Not bad for a little 110 flux-core welder with only a high and low setting.


June 7, 2015
Brakes, tanks and exhaust, oh my!
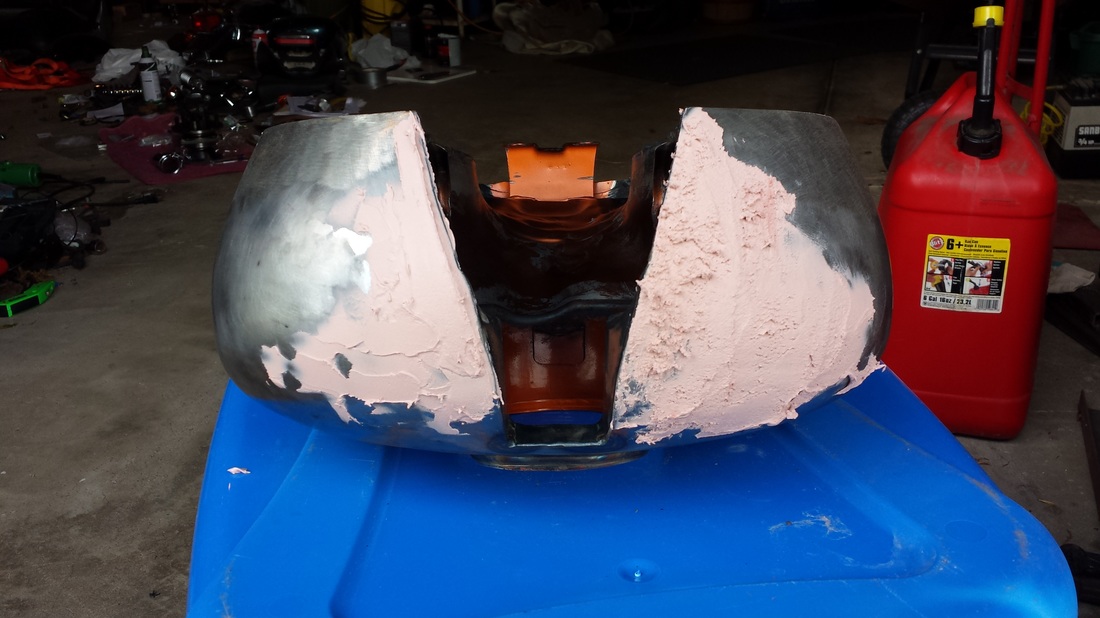
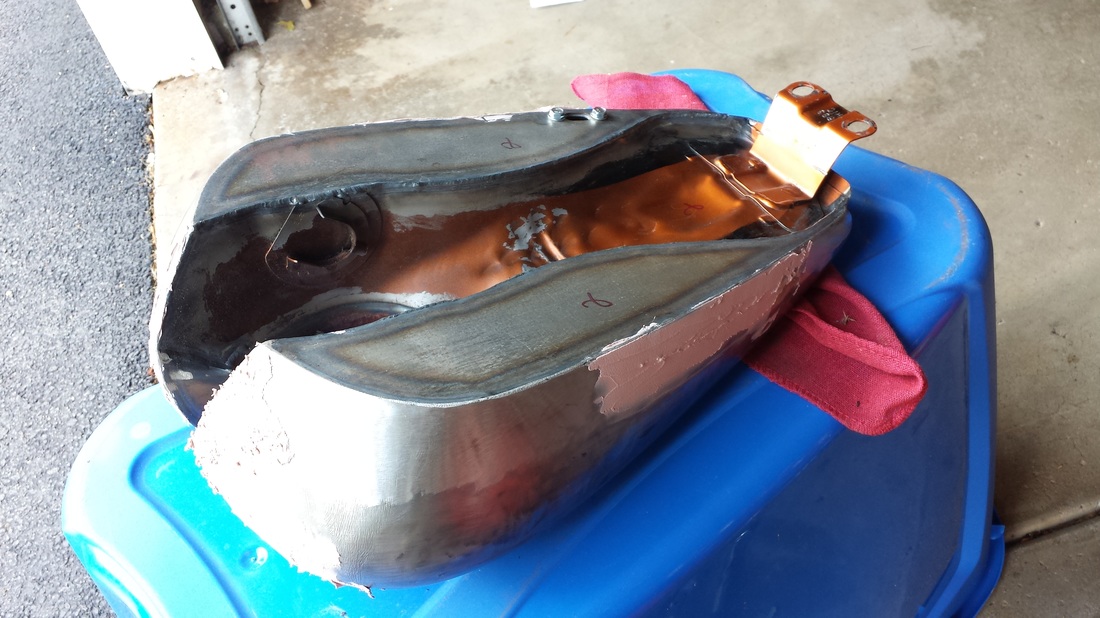
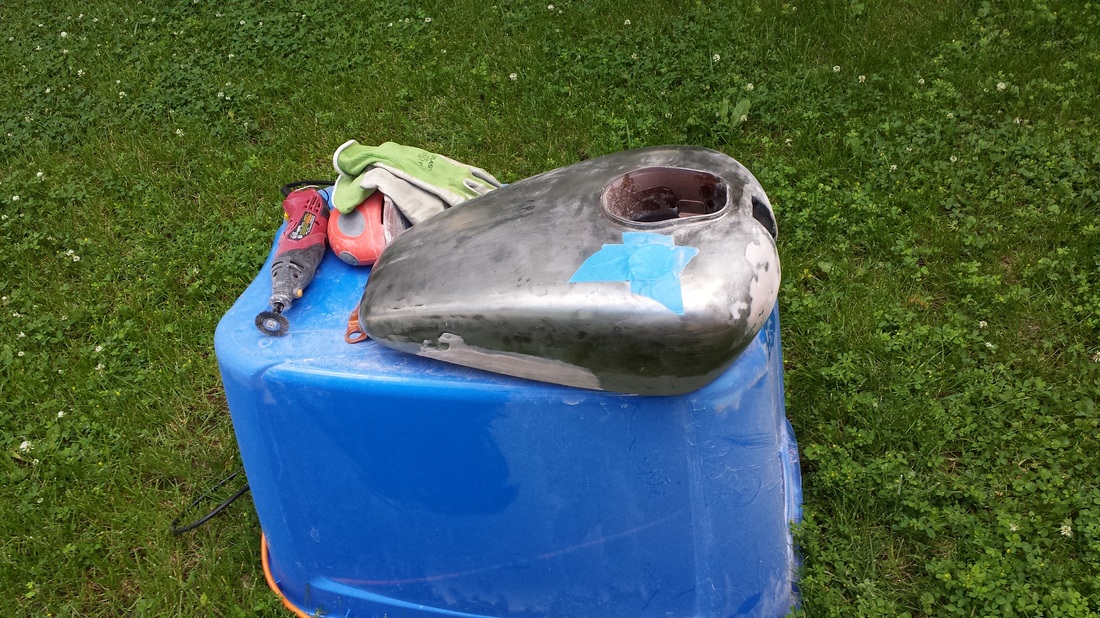
Got started on the tank. First time working with bondo. Interesting stuff. Probably put it on too thick, but the sanding wheel on the angle grinder and the sanding pad on the Mouse cut it down quick. Had to quit for a bit as it was spitting rain and I was doing all the messy stuff outside.
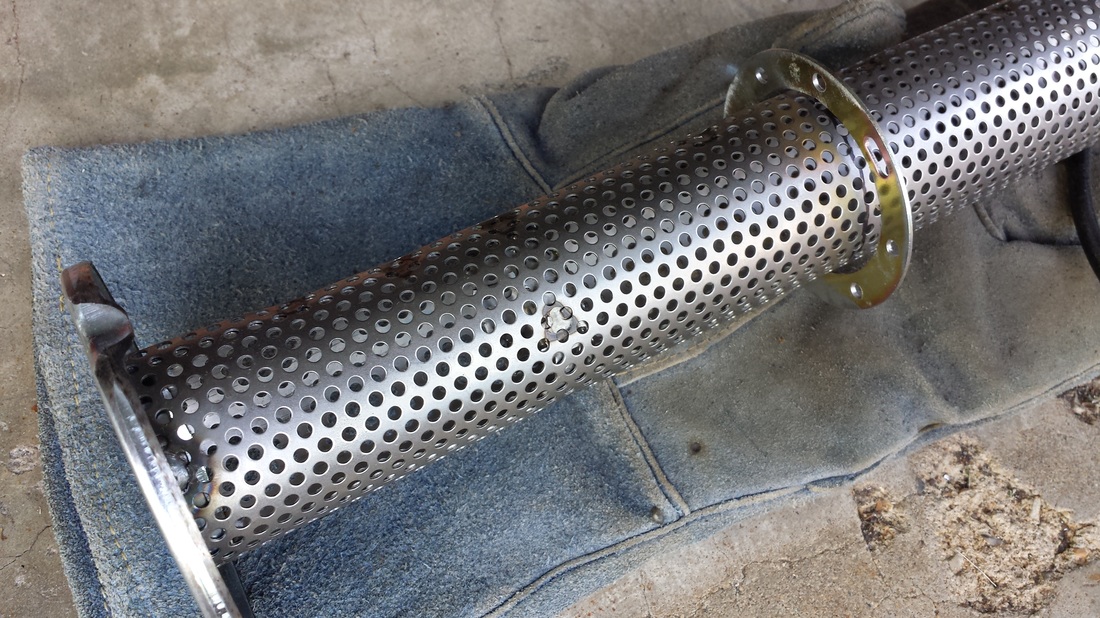
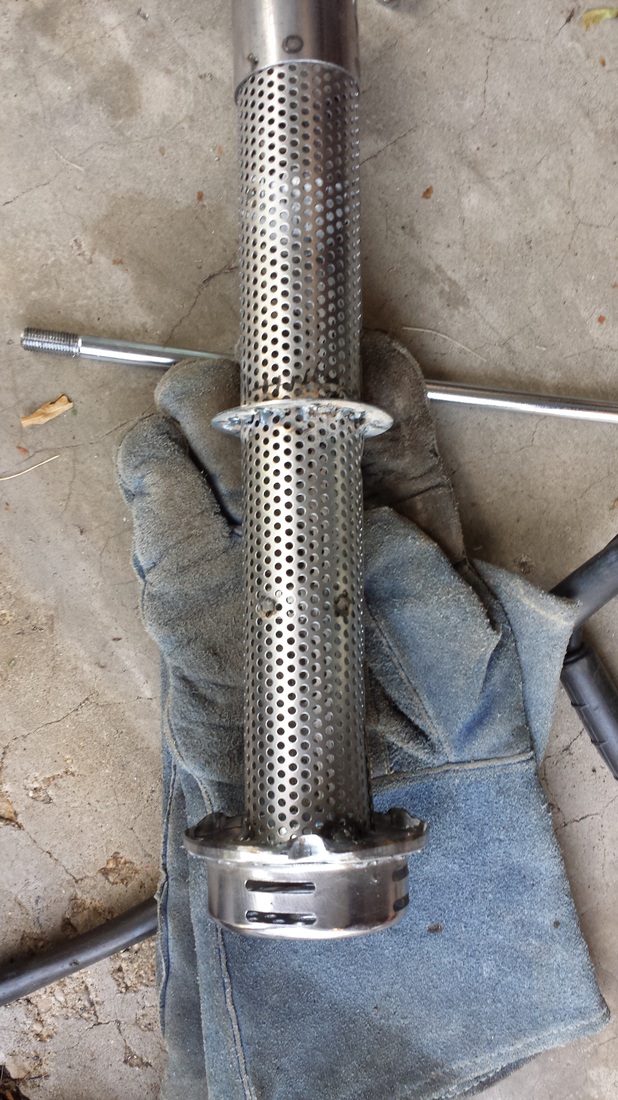
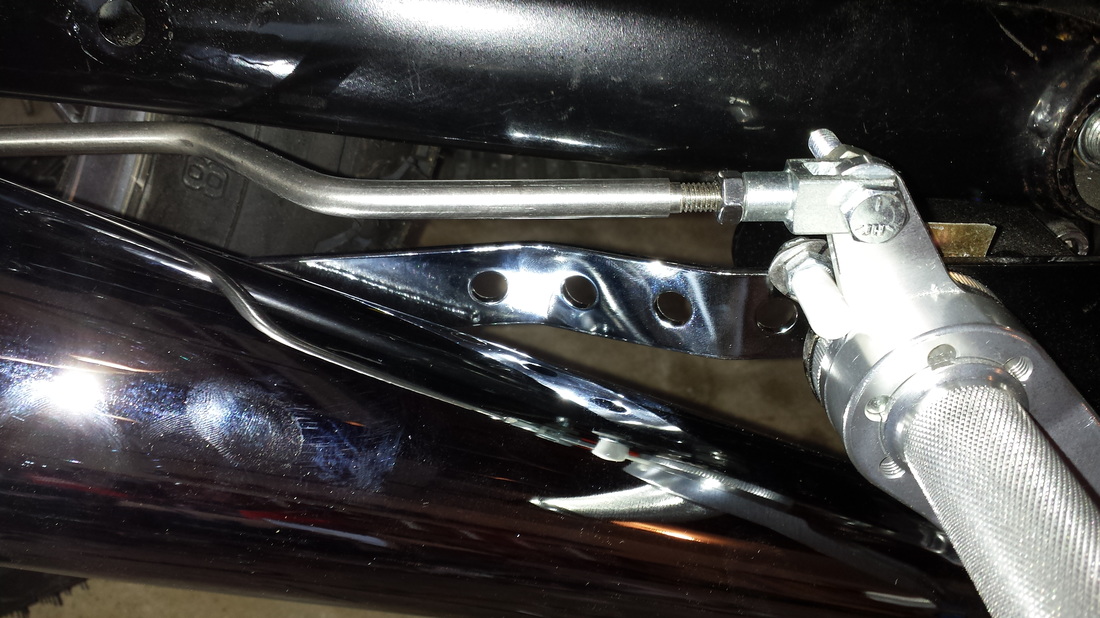
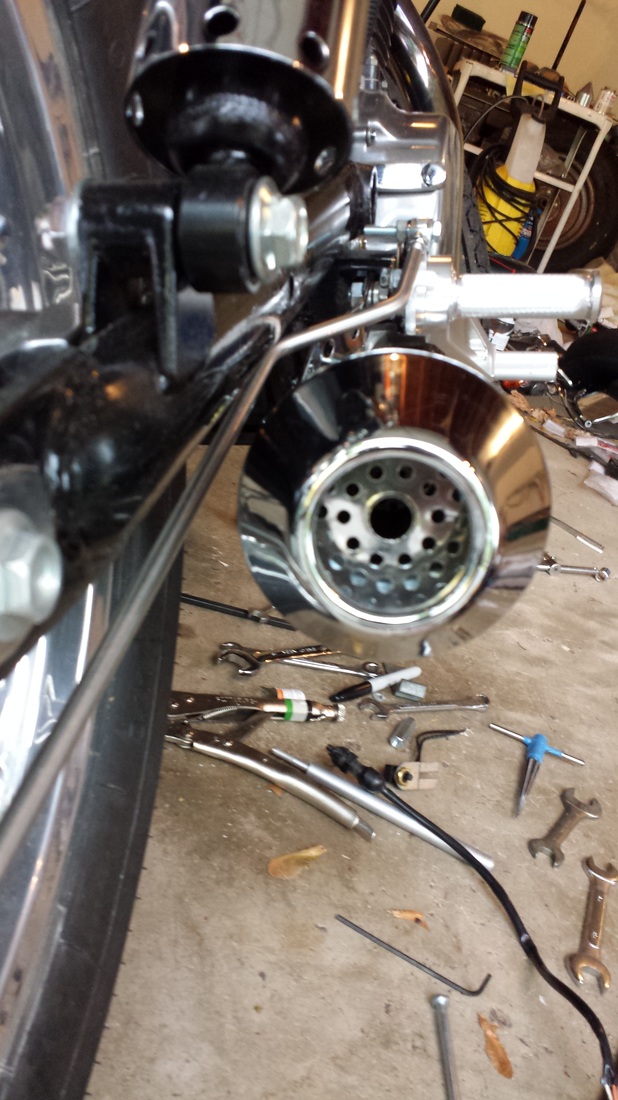
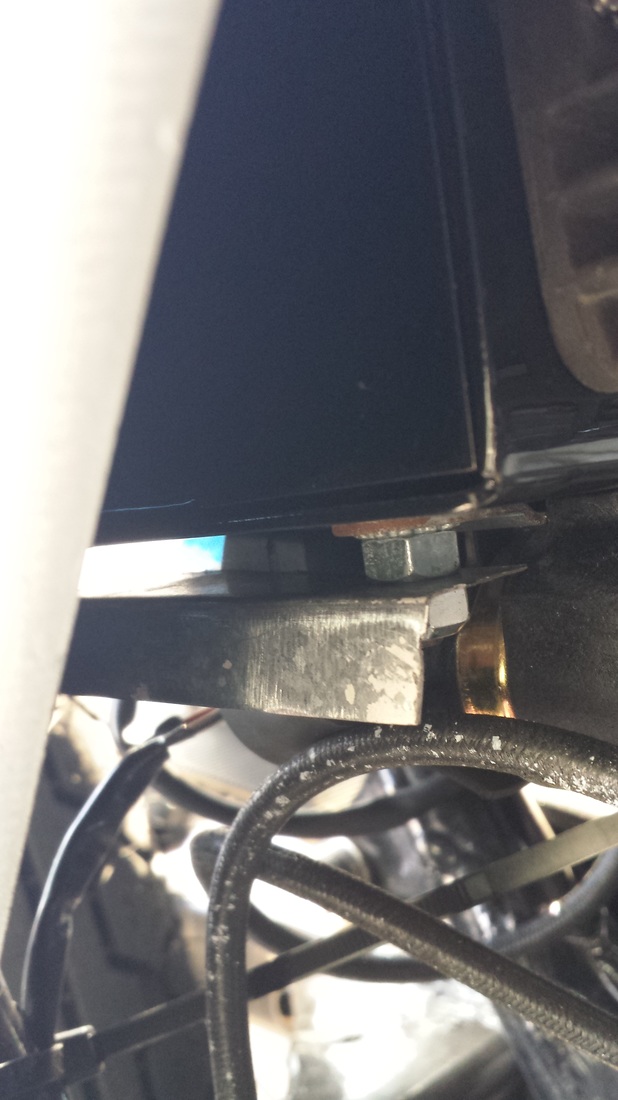
Got the inner baffle welded in. I had to sand down the cone end so it would fit in the end of the exhaust as it was bumping against the welds on the crumb cup. Tapped it all together and the 3 screws went right in! I then got it mounted. It went on very easily but you have to bend the bracket a bit to make it fit. I found that if you overbend it a bit, it allows a little extra pressure on the exhaust and pushes it out from the trailing arm and brake rod a bit.
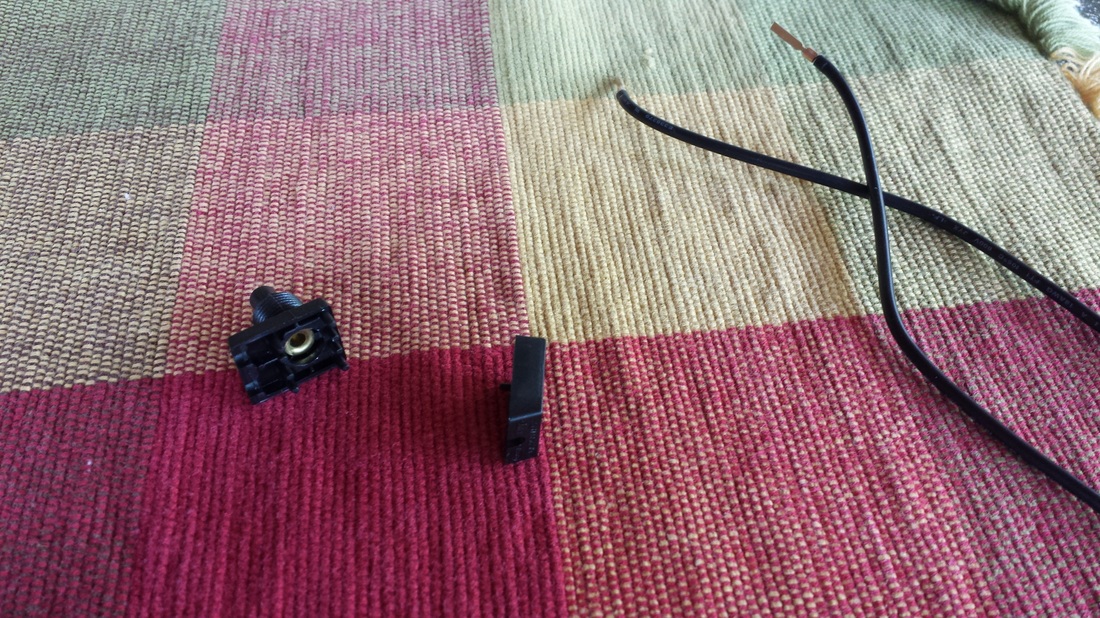
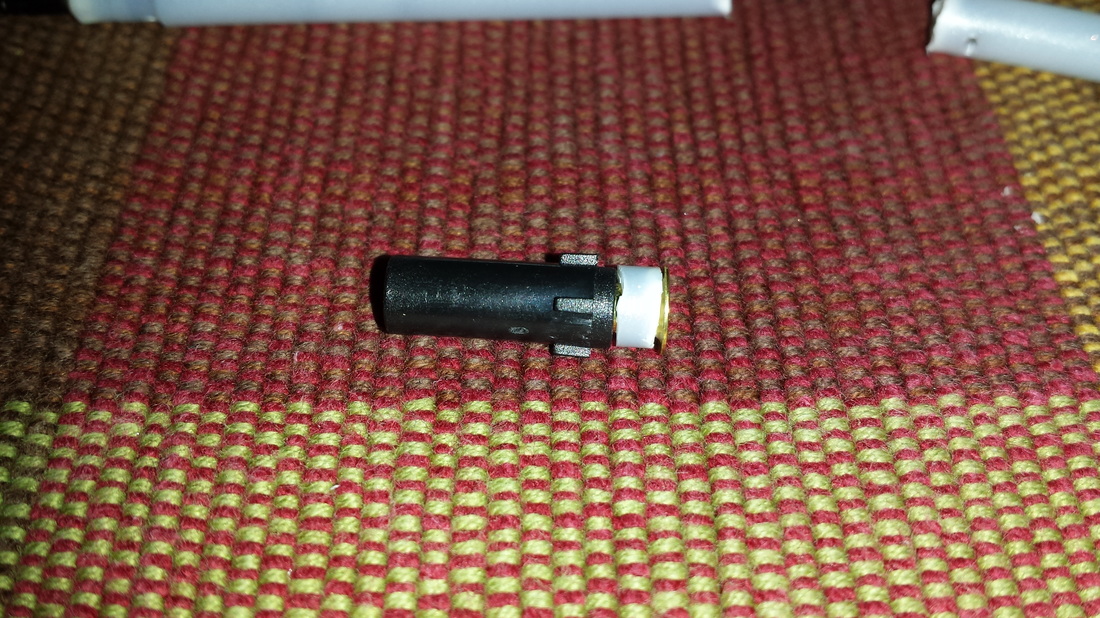
I then started working on the brake switch. It was all going just fine until I tested it out and blew the back off the switch, sending the tiny spring somewhere in the garage. Oh well, fix it or on to idea #2!
Brakes, tanks and exhaust, oh my!
Got started on the tank. First time working with bondo. Interesting stuff. Probably put it on too thick, but the sanding wheel on the angle grinder and the sanding pad on the Mouse cut it down quick. Had to quit for a bit as it was spitting rain and I was doing all the messy stuff outside.
Got the inner baffle welded in. I had to sand down the cone end so it would fit in the end of the exhaust as it was bumping against the welds on the crumb cup. Tapped it all together and the 3 screws went right in! I then got it mounted. It went on very easily but you have to bend the bracket a bit to make it fit. I found that if you overbend it a bit, it allows a little extra pressure on the exhaust and pushes it out from the trailing arm and brake rod a bit.
I then started working on the brake switch. It was all going just fine until I tested it out and blew the back off the switch, sending the tiny spring somewhere in the garage. Oh well, fix it or on to idea #2!


June 9, 2015
Tried fixing the switch; wasn't going well. I tried putting a pen spring first and then cut down an eraser. The spring would bind and the eraser was too hard and wouldn't compress enough. I tried to put a spacer in but it just created too much pressure. Ordered another switch from McMaster-Carr but will try to fab something with the original switch first. I want to try and hide the massive thing. I think I can drop it down behind the pedal mount.
Tried fixing the switch; wasn't going well. I tried putting a pen spring first and then cut down an eraser. The spring would bind and the eraser was too hard and wouldn't compress enough. I tried to put a spacer in but it just created too much pressure. Ordered another switch from McMaster-Carr but will try to fab something with the original switch first. I want to try and hide the massive thing. I think I can drop it down behind the pedal mount.

June 12 and 13, 2015
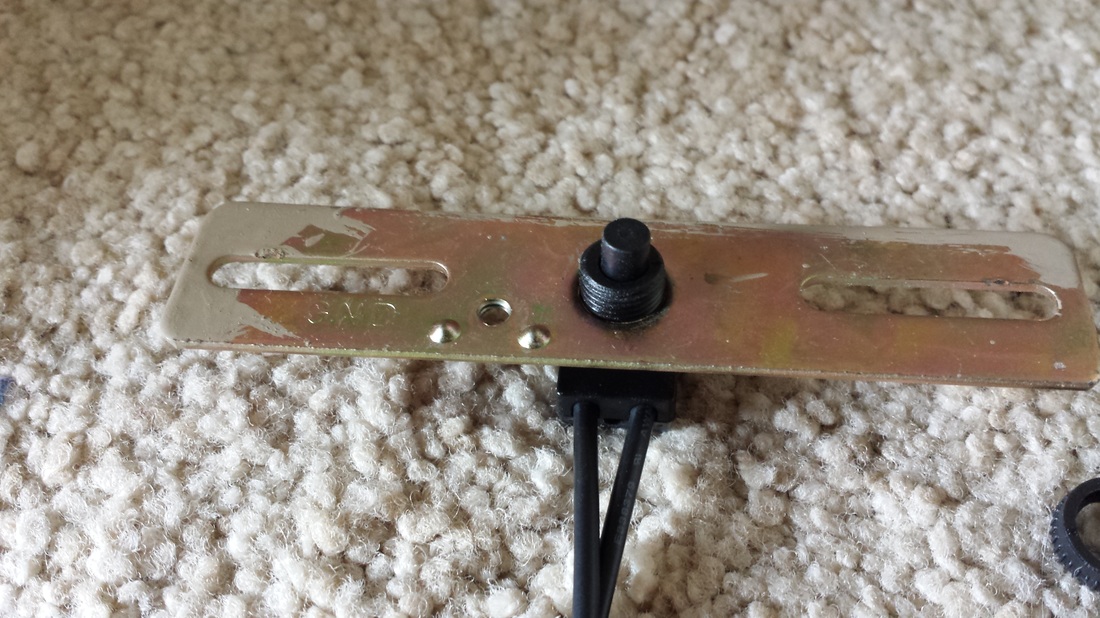
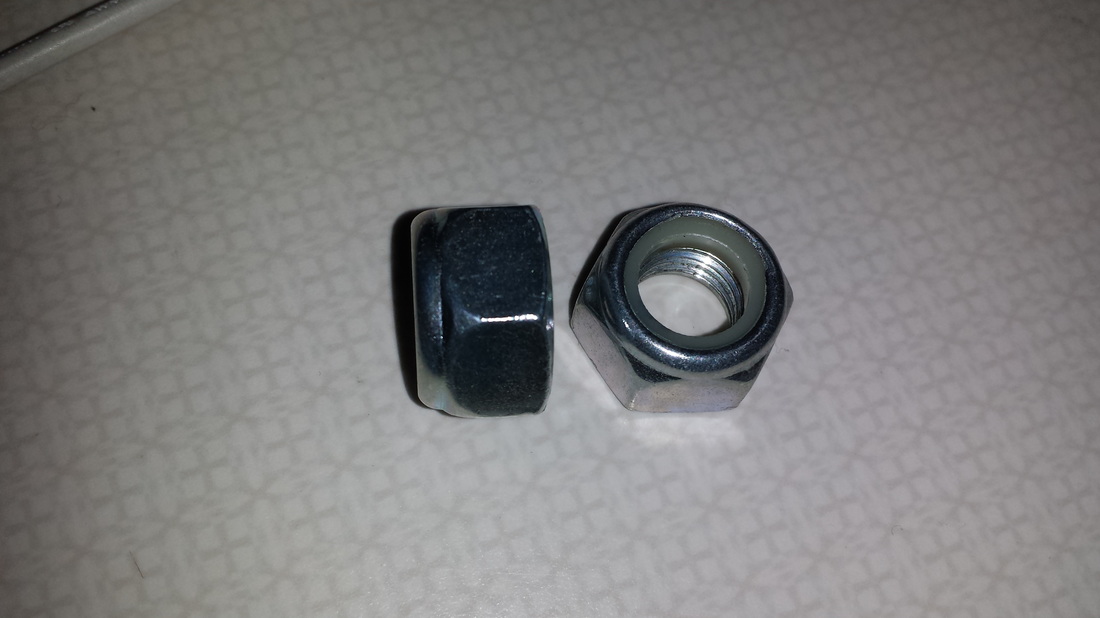
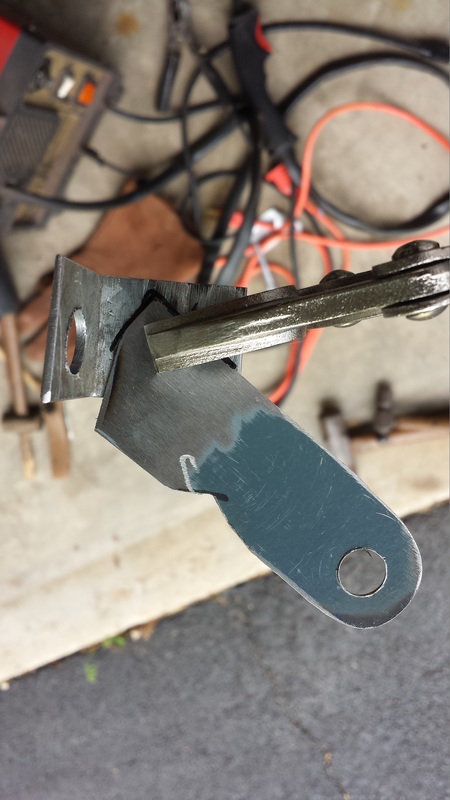
Started on the new bracket for the brake switch. Got a pair of 12mm 1.5 pitch locknuts and ground the lock part off. Regular nuts were $1.50 each, while the locknuts were .80 cents; go figure. I had some leftover metal from the tail light bracket, so I made the switch bracket from it and another piece of scrap I had. I kind of wanted to hide it, so I tucked it behind the rod and above the exhaust bracket. Welded the metal up, bolted it on and it worked the first time out; no adjustments necessary!
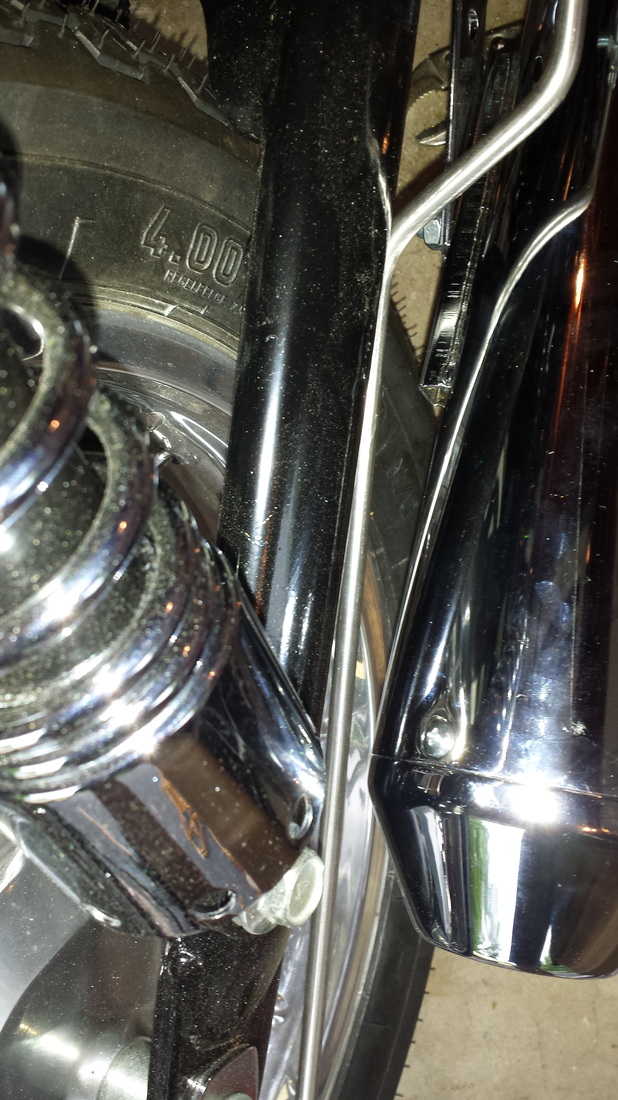
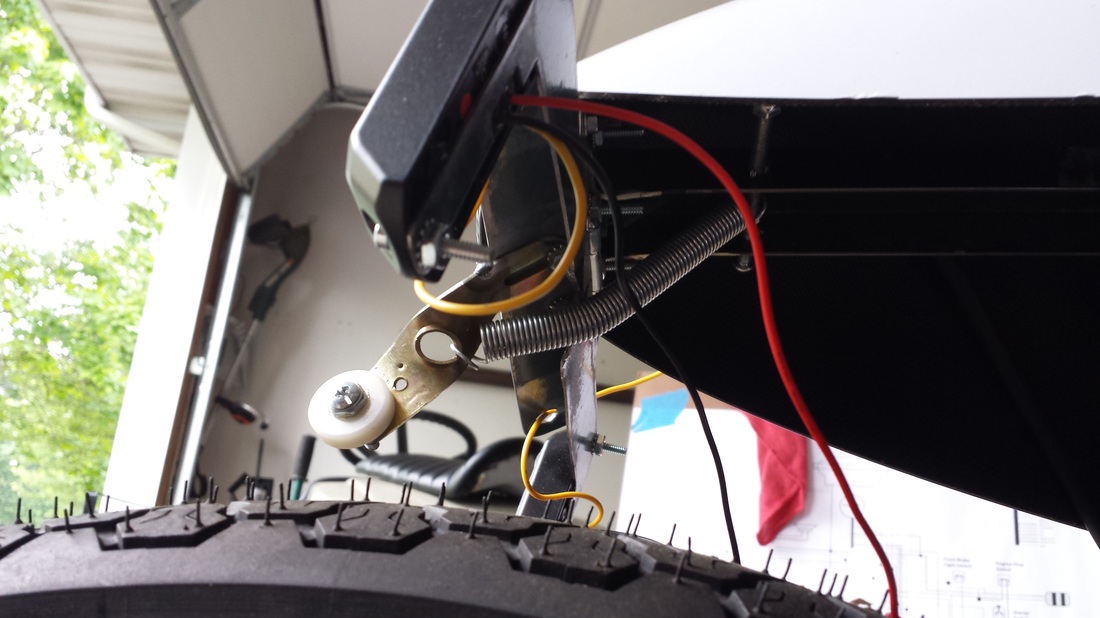
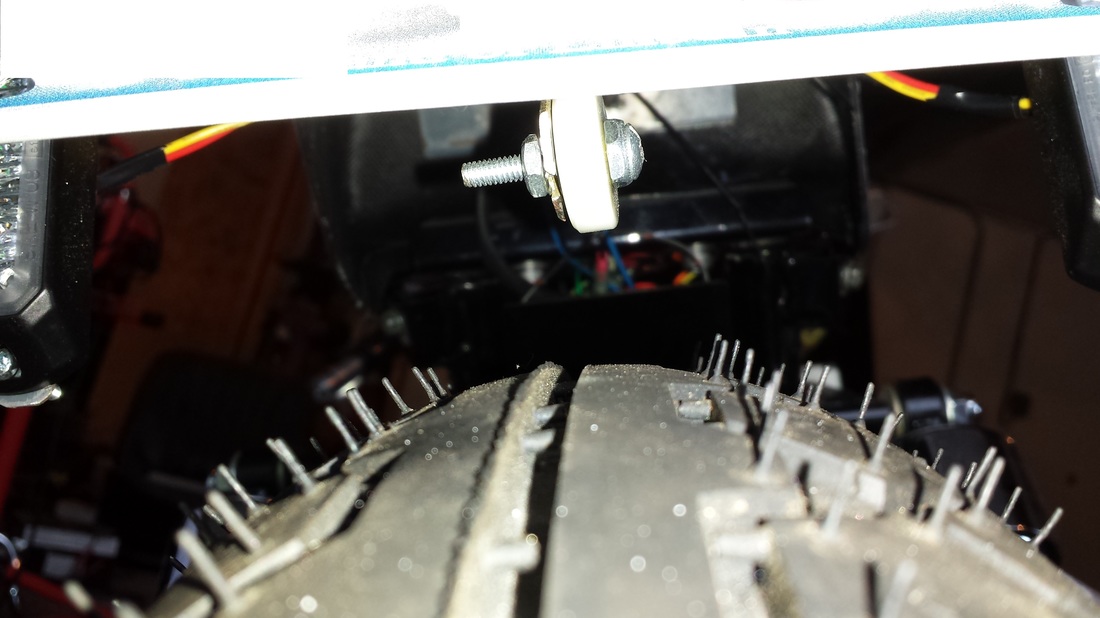
The next day I synced up the strobe brake lights so they did the same function. They are REALLY bright! I got all the wires fitted around and bolted up the plate. You can see how close the roller wheel is to the plate and the clearance of the tire. It gets much closer when I plop my fat butt in the seat! :) I'll be cutting the bolt on the roller wheel so if it bent it wouldn't cut the tire.
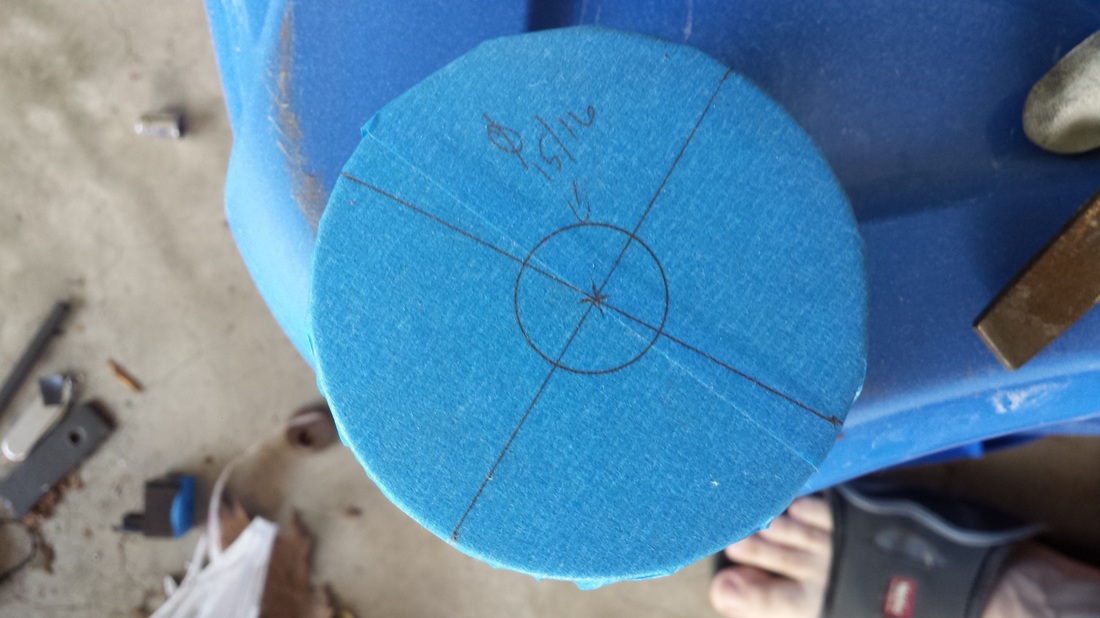
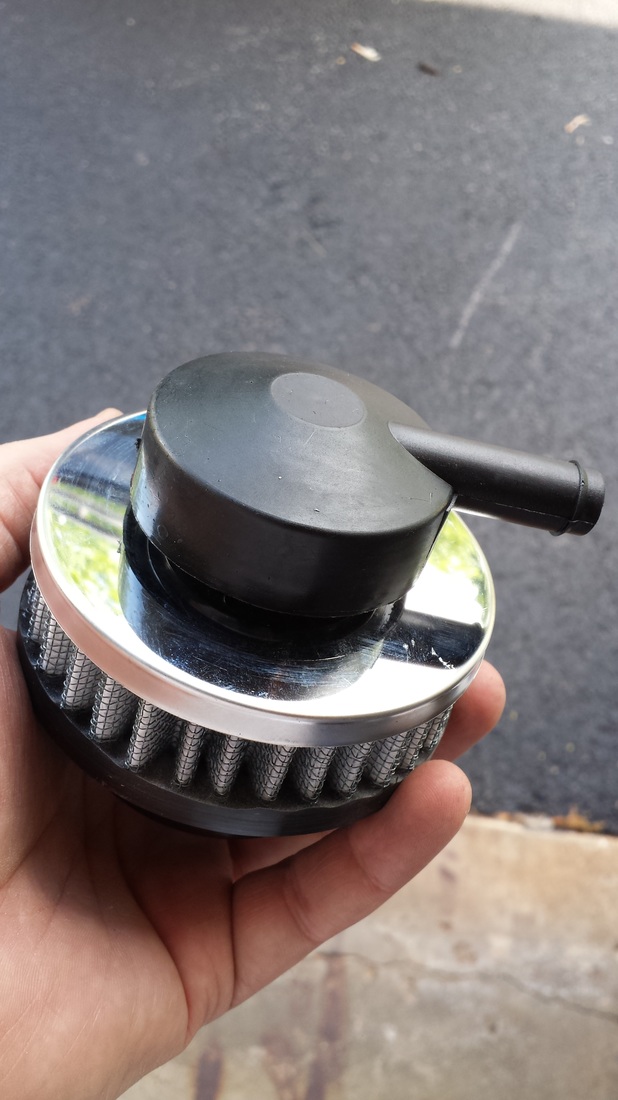
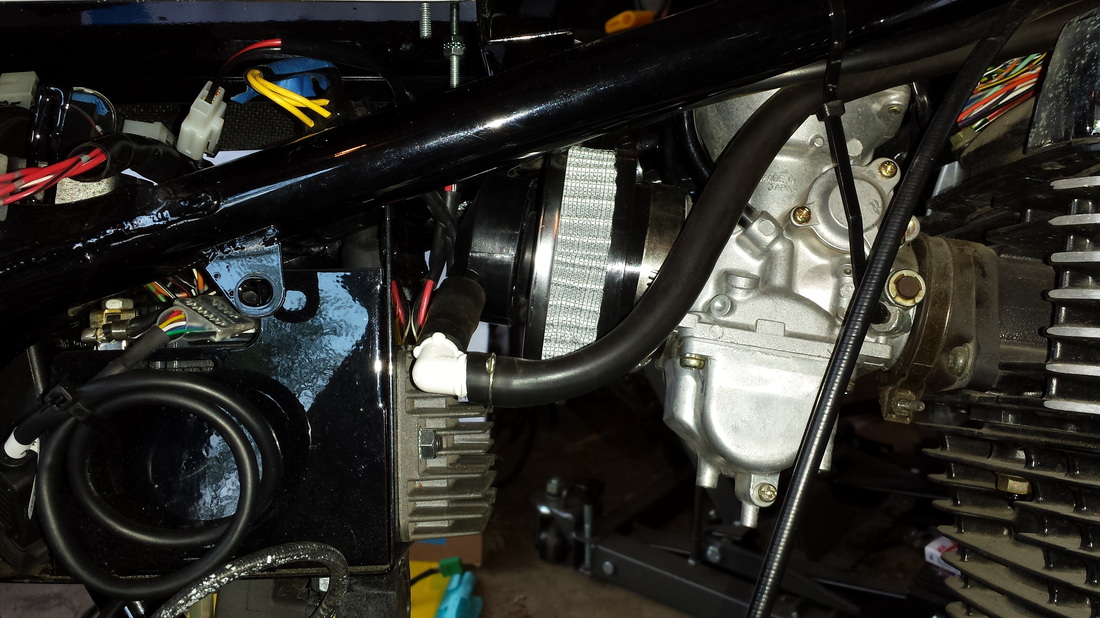
I then bored the hole in the air filter and attached all the parts the same way Bob did. The back of that air cleaner is thick! All of that will be covered with the side panels, but I'm going to leave those off for now while I get the bugs sorted out of the bike the rest of this season.
All I need to do now is finish bondoing the tank, seal it, primer coat, install the petcock and fuel line, bolt the keyplate in place, install a mirror and it should be good to go!
Started on the new bracket for the brake switch. Got a pair of 12mm 1.5 pitch locknuts and ground the lock part off. Regular nuts were $1.50 each, while the locknuts were .80 cents; go figure. I had some leftover metal from the tail light bracket, so I made the switch bracket from it and another piece of scrap I had. I kind of wanted to hide it, so I tucked it behind the rod and above the exhaust bracket. Welded the metal up, bolted it on and it worked the first time out; no adjustments necessary!
The next day I synced up the strobe brake lights so they did the same function. They are REALLY bright! I got all the wires fitted around and bolted up the plate. You can see how close the roller wheel is to the plate and the clearance of the tire. It gets much closer when I plop my fat butt in the seat! :) I'll be cutting the bolt on the roller wheel so if it bent it wouldn't cut the tire.
I then bored the hole in the air filter and attached all the parts the same way Bob did. The back of that air cleaner is thick! All of that will be covered with the side panels, but I'm going to leave those off for now while I get the bugs sorted out of the bike the rest of this season.
All I need to do now is finish bondoing the tank, seal it, primer coat, install the petcock and fuel line, bolt the keyplate in place, install a mirror and it should be good to go!


June 14, 2015
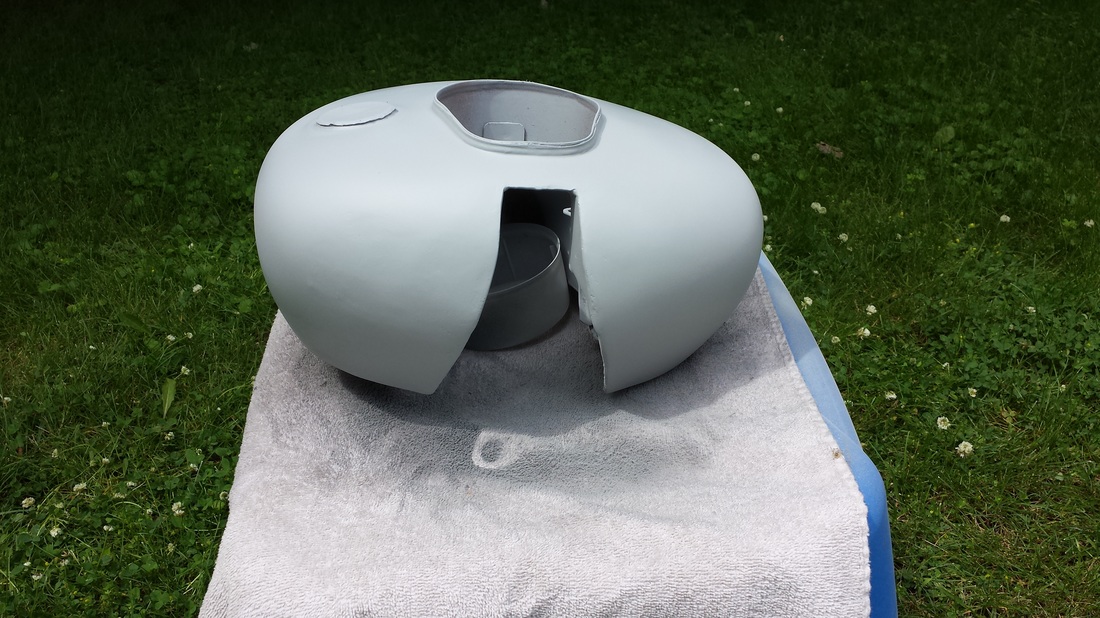
Bondoed the tank after sanding. Put another skim coat on and will be sanding tomorrow.
Bondoed the tank after sanding. Put another skim coat on and will be sanding tomorrow.
June 18, 2015
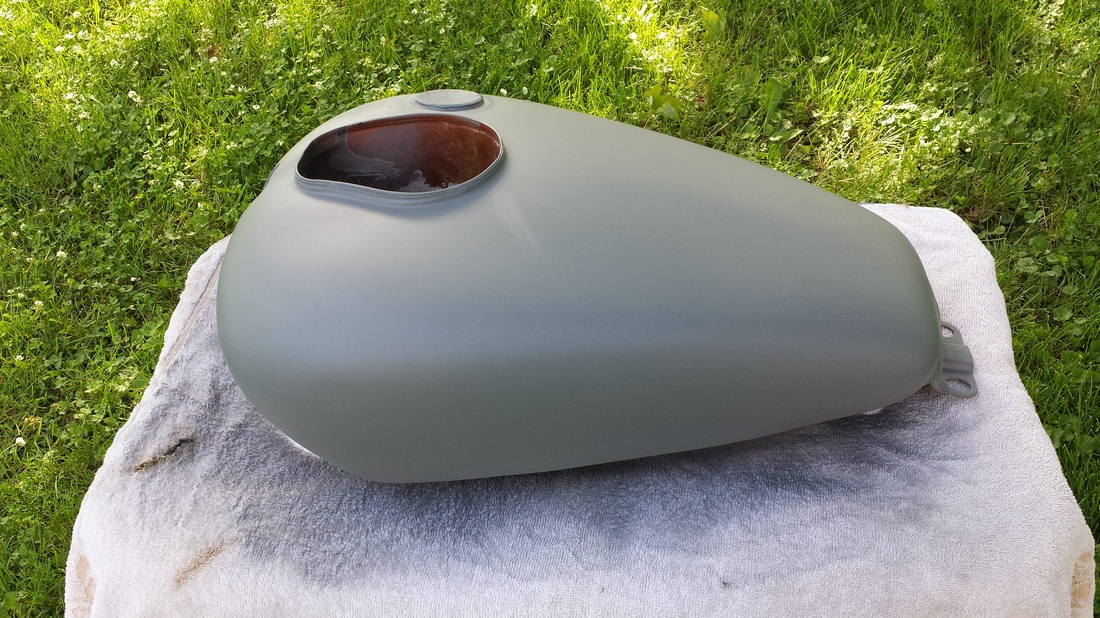
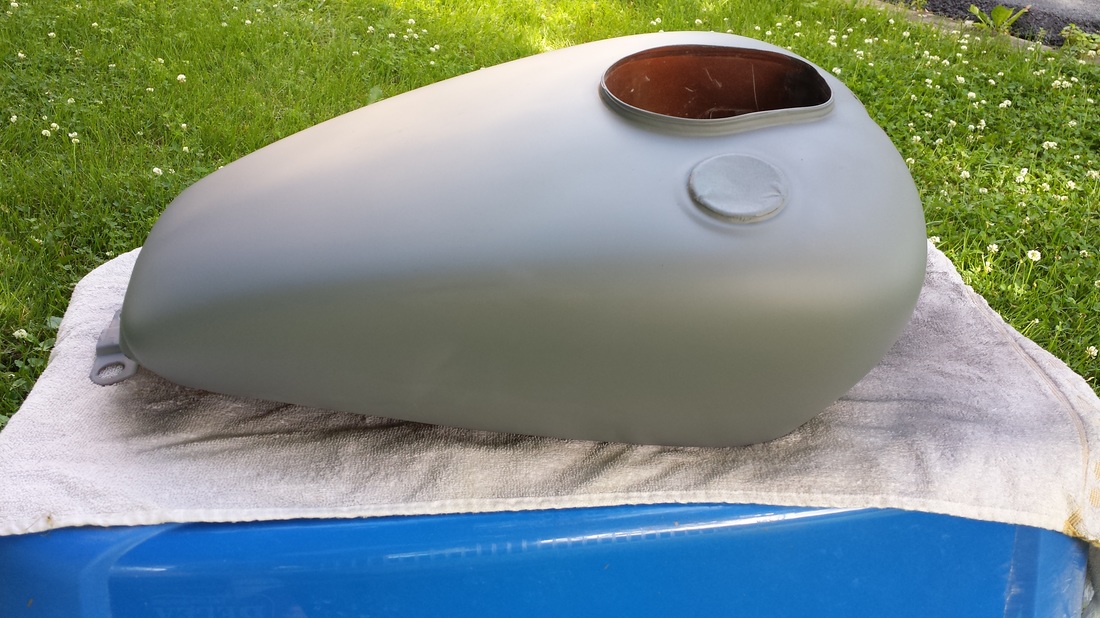
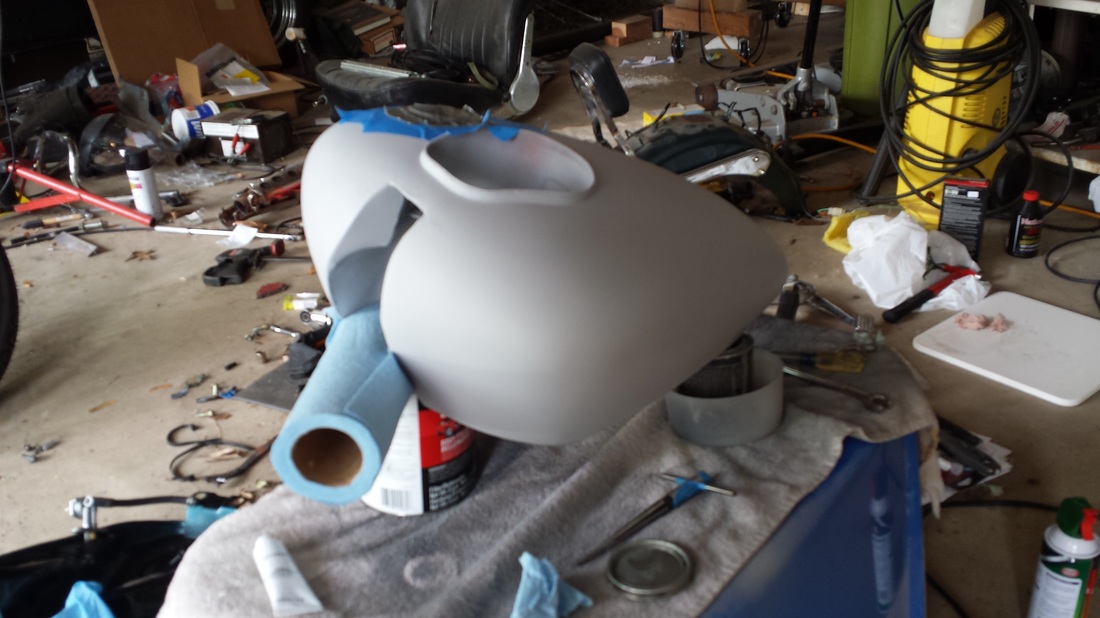
Got the final coats of primer on after sanding the past few days. Started with a dark gray primer but switched to a lighter gray to match the tailpiece and sides for now.
Got the final coats of primer on after sanding the past few days. Started with a dark gray primer but switched to a lighter gray to match the tailpiece and sides for now.
June 19, 2015
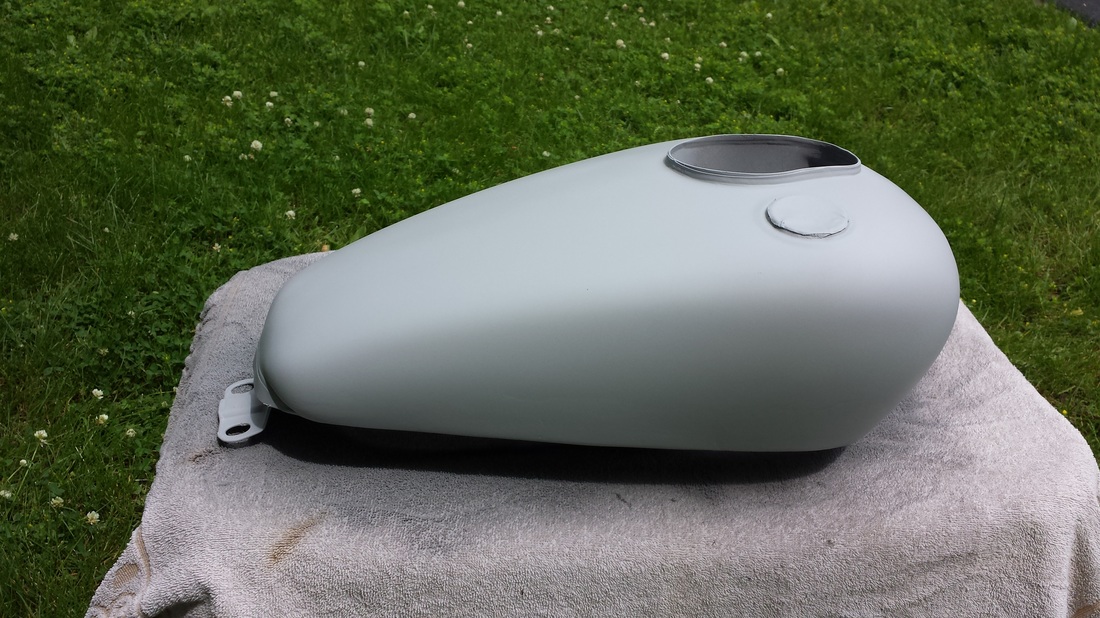
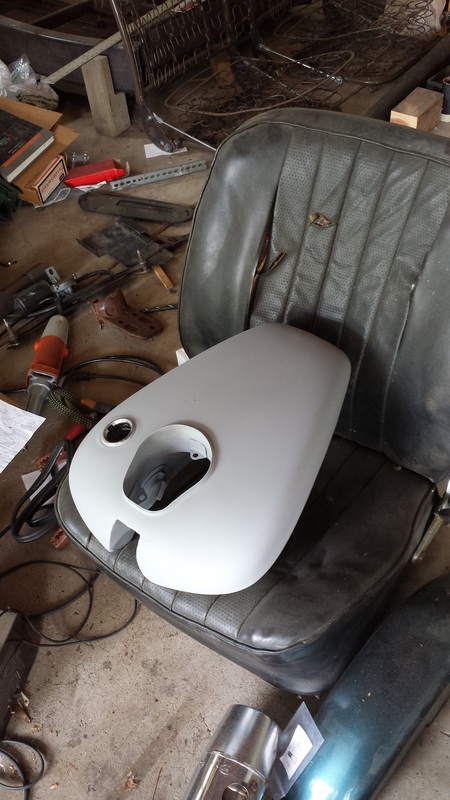
Sealing the tank up! Messy but not too hard. Need to wait 4 days for it to cure...
Sealing the tank up! Messy but not too hard. Need to wait 4 days for it to cure...

June 20, 2015
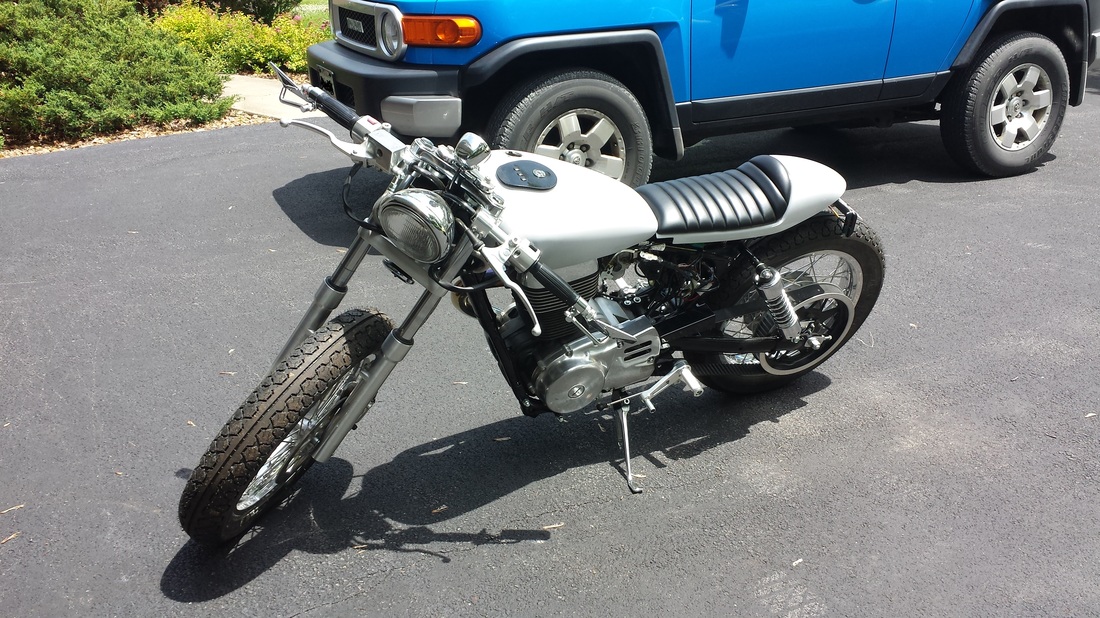
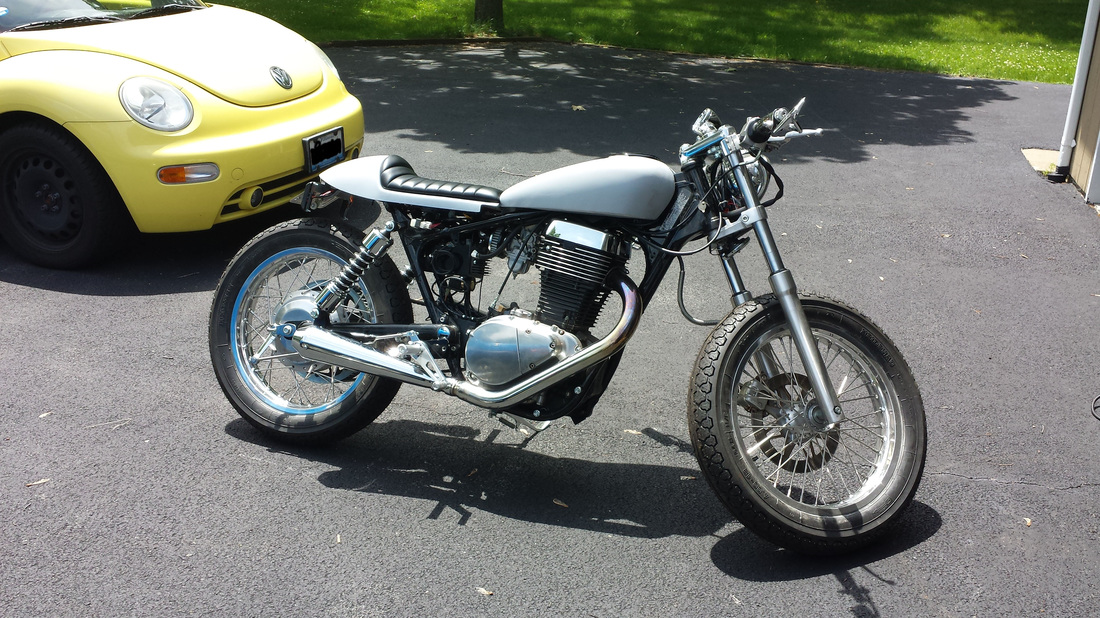
Decided to bolt the tank on while it is curing. Got the left side mirror on. I'll be putting the side covers on later in the season. Thought I should do a few before and after shots.
Before...
Decided to bolt the tank on while it is curing. Got the left side mirror on. I'll be putting the side covers on later in the season. Thought I should do a few before and after shots.
Before...
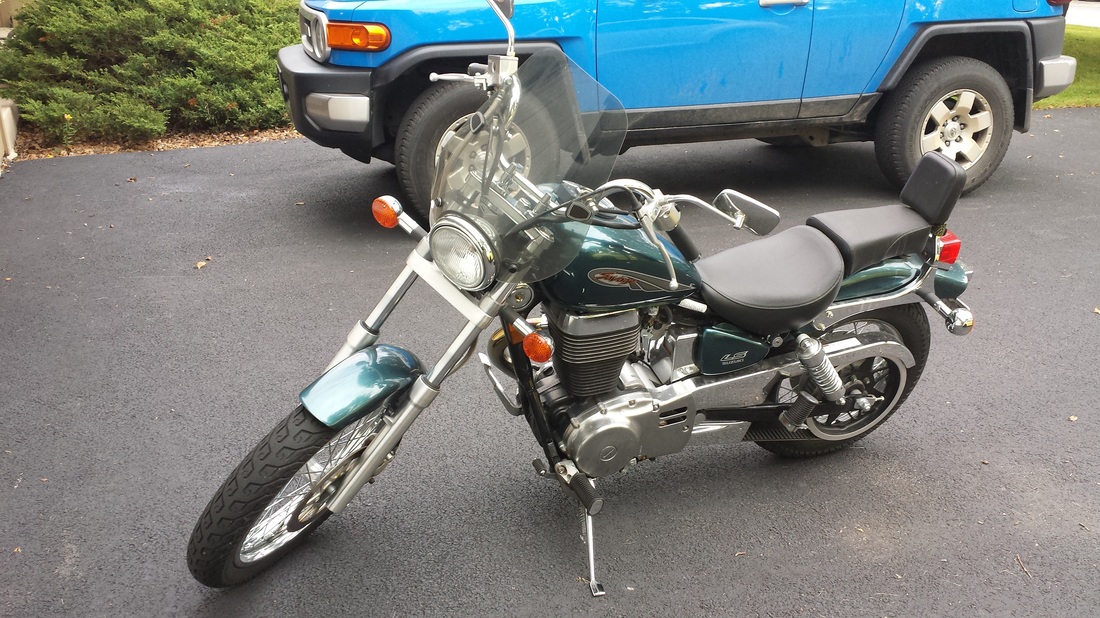
After!
June 23, 2015
Took it out for it's first ride today! Handles great! My hands and hip hurts but I'll just have to get used to it. :) Everything fired up and ran perfectly! I moved the throttle cable from the right to the left side of the frame as it was binding. The decomp works amazing! The only bad thing was that the wheel on the plate mechanism blew off and the plate got tucked under the wheel! Oh well, just one of the bugs to work out. Flattened out the plate and will fix it up tomorrow.
Took it out for it's first ride today! Handles great! My hands and hip hurts but I'll just have to get used to it. :) Everything fired up and ran perfectly! I moved the throttle cable from the right to the left side of the frame as it was binding. The decomp works amazing! The only bad thing was that the wheel on the plate mechanism blew off and the plate got tucked under the wheel! Oh well, just one of the bugs to work out. Flattened out the plate and will fix it up tomorrow.

February 27, 2016
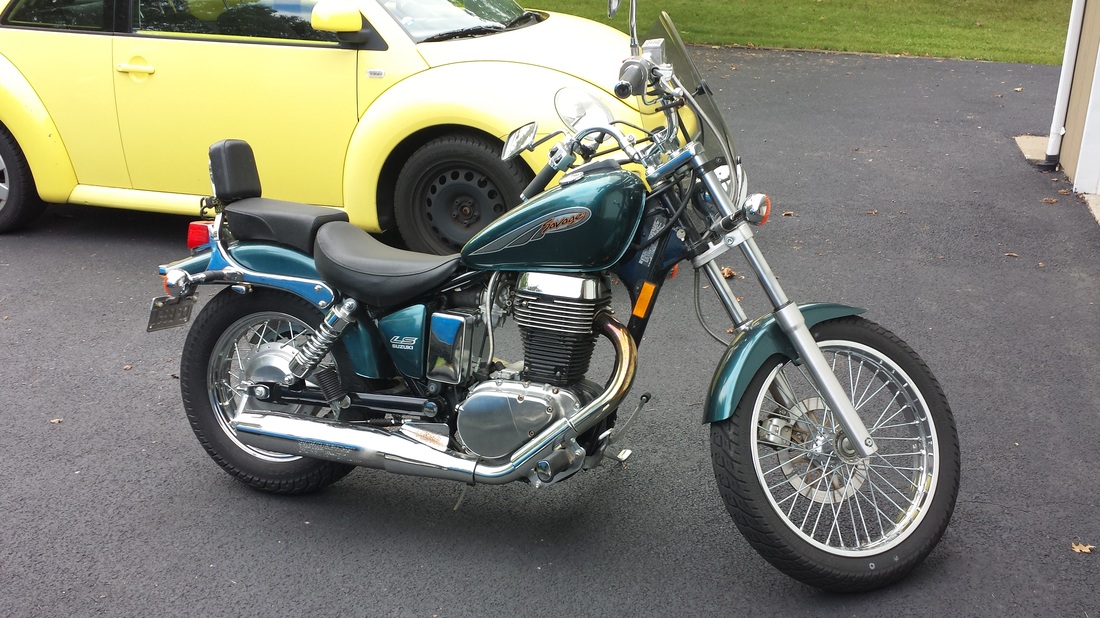
YAWN! Ahh, finally out of hibernation! I had put the bike in the garage in October after adding a good 100 miles on it. It is great way to get to work, and I've gotten several thumbs-up from people. I actually had a guy follow me home and come up my driveway to ask what it was!
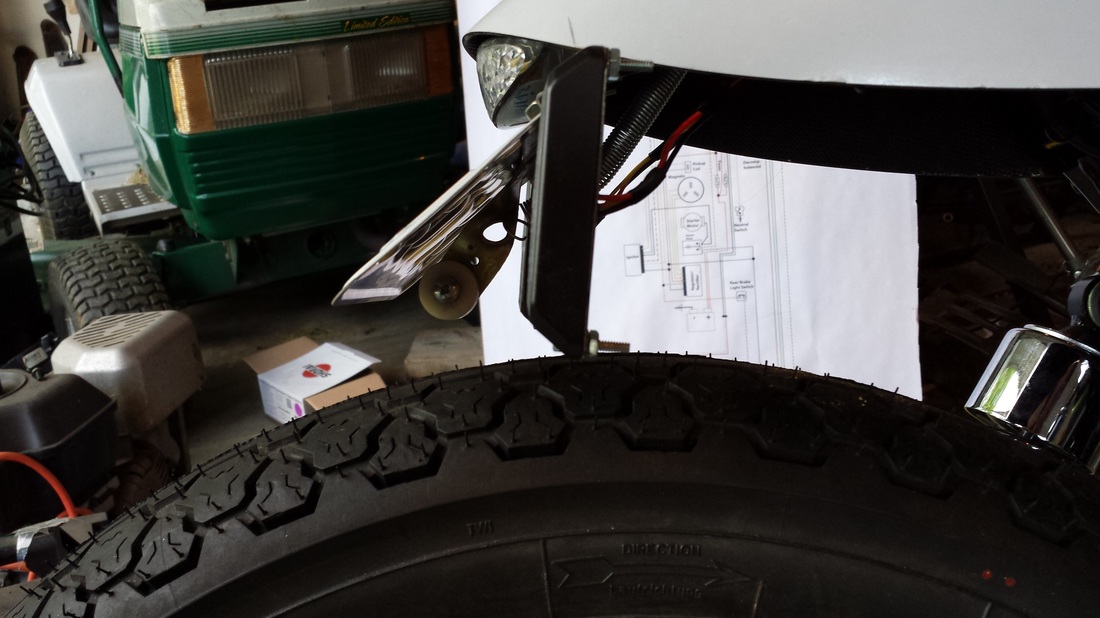
I was able to make the plate stay up in place with the hinge welded in place and a screw pushing it up from the rear so it would only drop down so far.
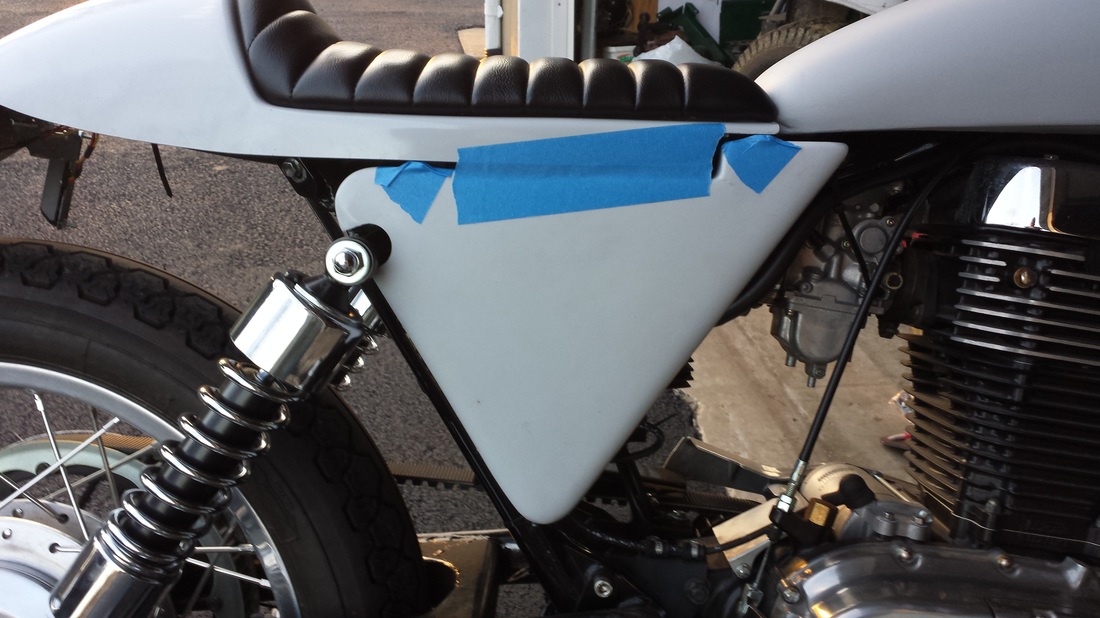
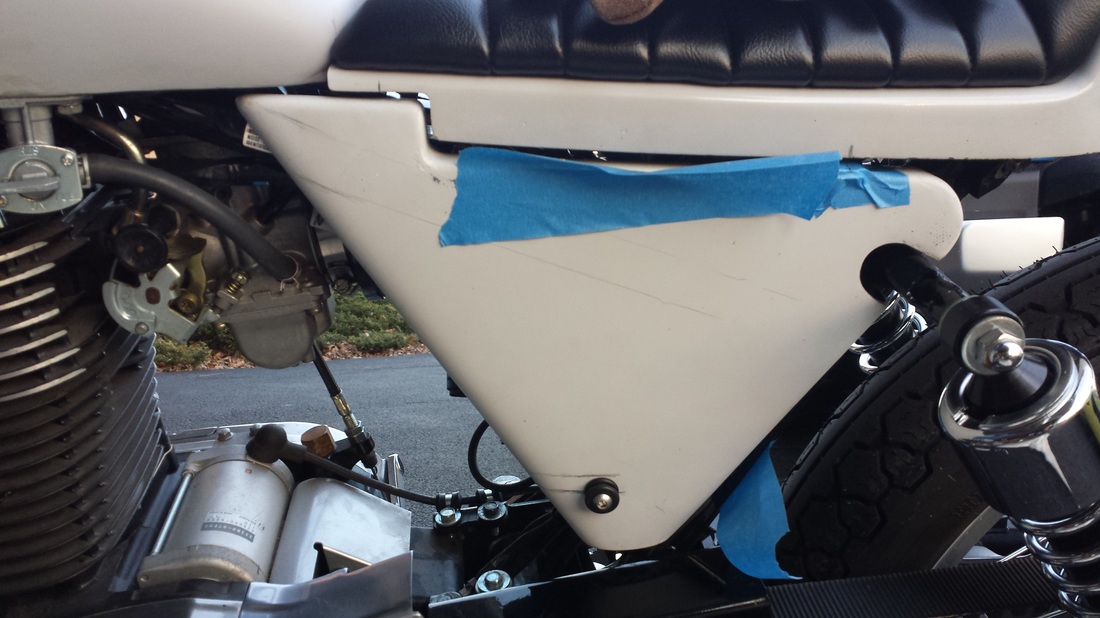
I have a shop lined up to do the paint but I need to get the side panels on first. Ryca's way was to bolt these brackets on then glue the panels to them. From the vibrations I've felt and the nuts and bolts that have come loose, I wasn't in the mood to trust glue. Dave bolted his on and it looked like a good idea. I ordered a pack of grommets, bought some bolts and connectors and got busy today.
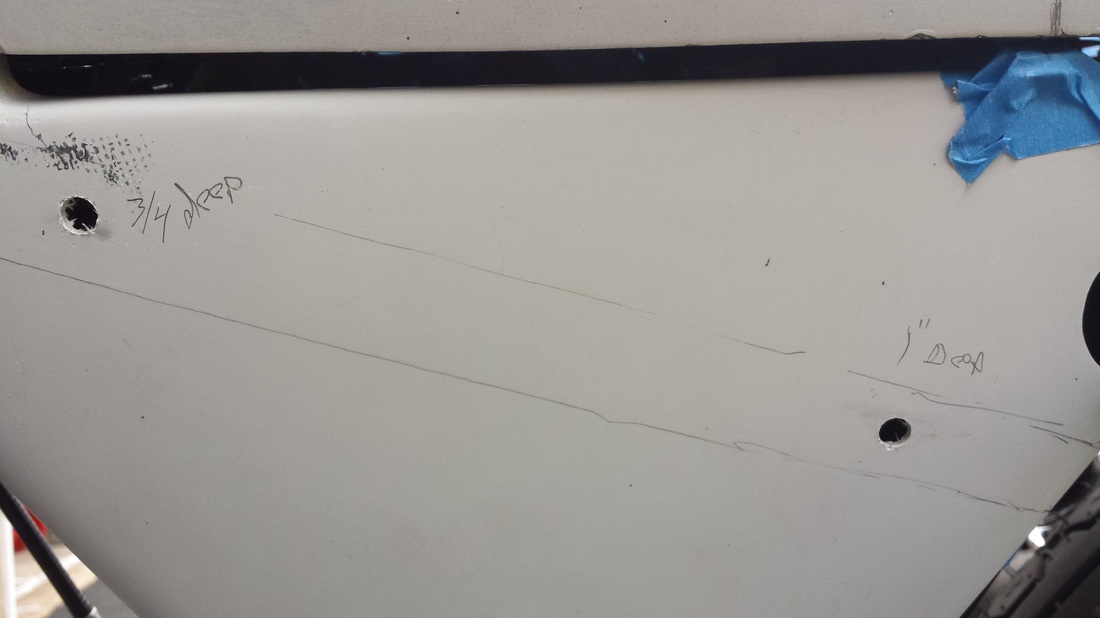
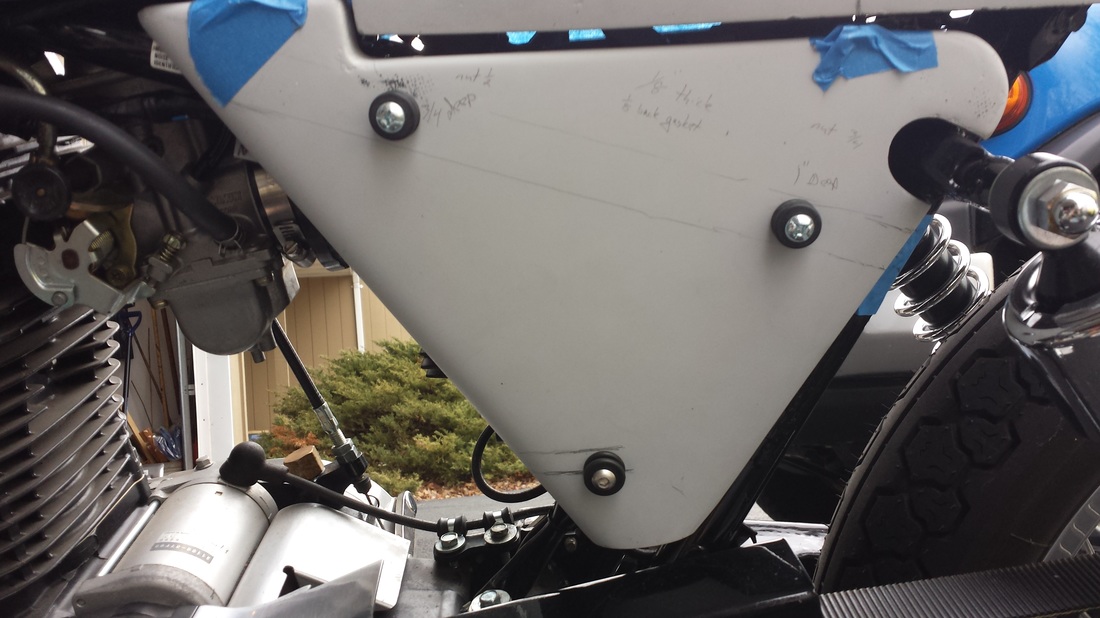
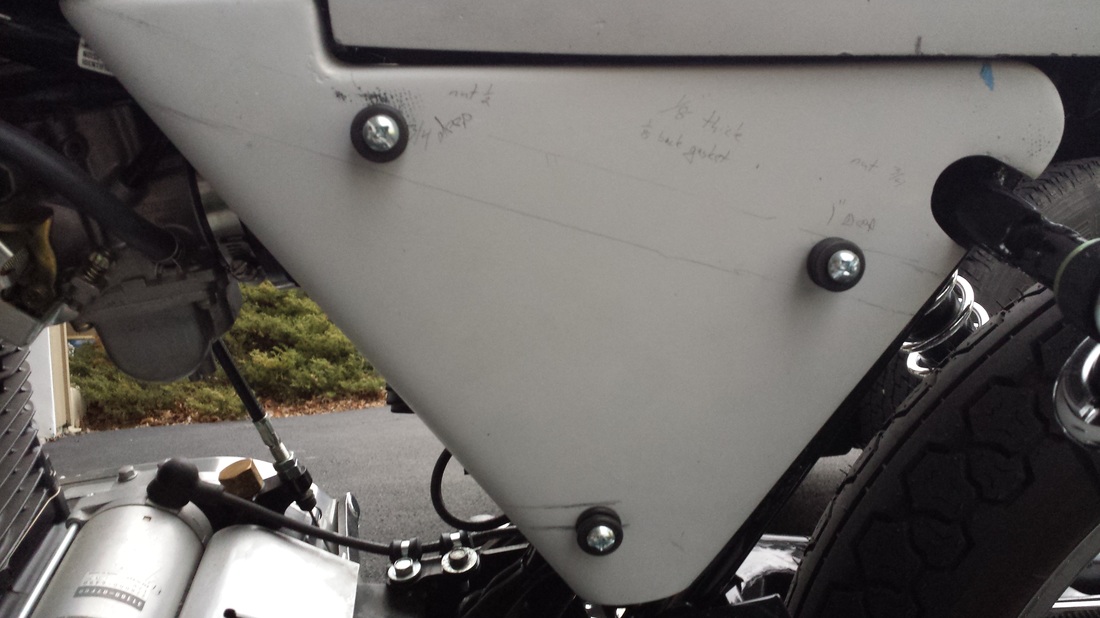
The first thing I had to do was figure out the placement of the panels. I noticed the the fuse block got in the way. Luckily I can tuck that under the seat. I made some spacers around the top edge to make everything look even and then sat back to figure out where to drill and how to mount it. What I did was to make 2 small brackets from some 22ga steel. I drilled a hole in each end and mounted them to the exposed studs under the battery box. I had just enough thread to put a locking nut on it. From there I measured back on the panel and bored a .25" hole. I then put a 2" rod connector to the back and bolted it to the bracket and panel. Boom, one side done. The left side was harder as I had a lot of wiring to clear, but other than me trying to do stuff left-handed, it went easier than the first. I'll be figuring out the top mounts tomorrow. Once everything is good, I'll replace the lower bracketry with something more substantial. In the pictures below, you can see that the panels sag a little. That's just due to the thin brackets slightly bending. Once the top ones are in it will look much better. After that, it will be time to tear it down for paint.
YAWN! Ahh, finally out of hibernation! I had put the bike in the garage in October after adding a good 100 miles on it. It is great way to get to work, and I've gotten several thumbs-up from people. I actually had a guy follow me home and come up my driveway to ask what it was!
I was able to make the plate stay up in place with the hinge welded in place and a screw pushing it up from the rear so it would only drop down so far.
I have a shop lined up to do the paint but I need to get the side panels on first. Ryca's way was to bolt these brackets on then glue the panels to them. From the vibrations I've felt and the nuts and bolts that have come loose, I wasn't in the mood to trust glue. Dave bolted his on and it looked like a good idea. I ordered a pack of grommets, bought some bolts and connectors and got busy today.
The first thing I had to do was figure out the placement of the panels. I noticed the the fuse block got in the way. Luckily I can tuck that under the seat. I made some spacers around the top edge to make everything look even and then sat back to figure out where to drill and how to mount it. What I did was to make 2 small brackets from some 22ga steel. I drilled a hole in each end and mounted them to the exposed studs under the battery box. I had just enough thread to put a locking nut on it. From there I measured back on the panel and bored a .25" hole. I then put a 2" rod connector to the back and bolted it to the bracket and panel. Boom, one side done. The left side was harder as I had a lot of wiring to clear, but other than me trying to do stuff left-handed, it went easier than the first. I'll be figuring out the top mounts tomorrow. Once everything is good, I'll replace the lower bracketry with something more substantial. In the pictures below, you can see that the panels sag a little. That's just due to the thin brackets slightly bending. Once the top ones are in it will look much better. After that, it will be time to tear it down for paint.


I also wanted to mention that I just got a backpack so I'll be able to take my laptop to work. It was tricky finding one since my laptop is about 17" x 11". I found one at Micro Center. It was listed at $180, but I was able to find it for $153 on line and they price matched it in the store. The pack was highly rated and I'm looking forward to using it. It's an Everki EKP120 Titan. Here is a link to it.
February 29, 2016
Got the left side on. It's just tacked but all the holes in the panels lined up. I did the left first as all the wiring is on that side. I'll line the holes up on the other panel and get that mounted next. I had to do the math to see how deep I needed to make the bolts so the panels would be flush.
Got the left side on. It's just tacked but all the holes in the panels lined up. I did the left first as all the wiring is on that side. I'll line the holes up on the other panel and get that mounted next. I had to do the math to see how deep I needed to make the bolts so the panels would be flush.