April 9, 2015
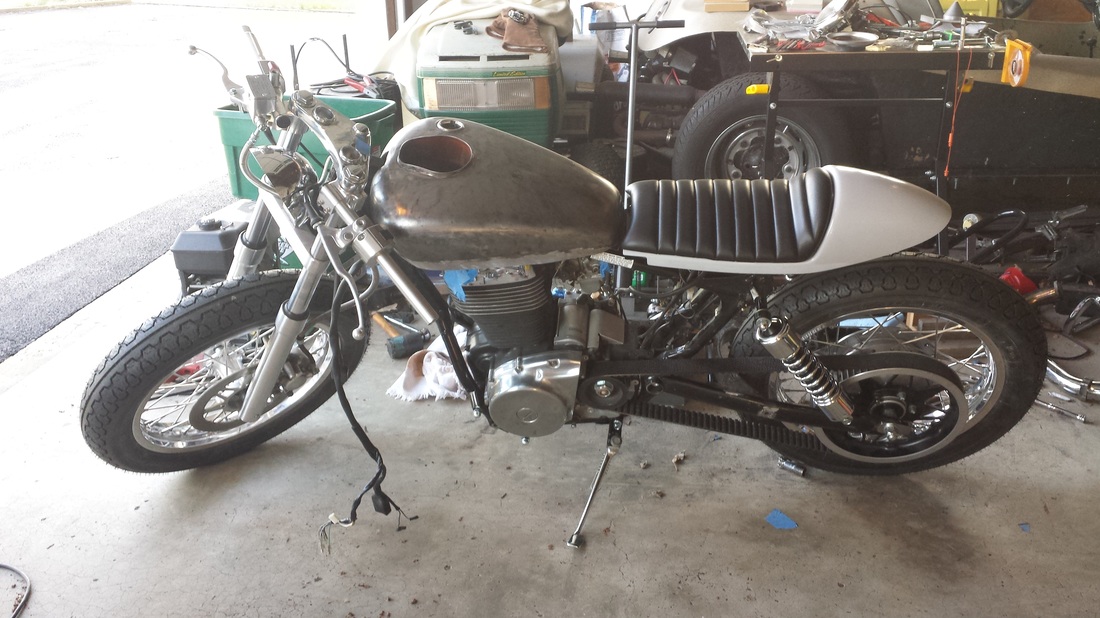
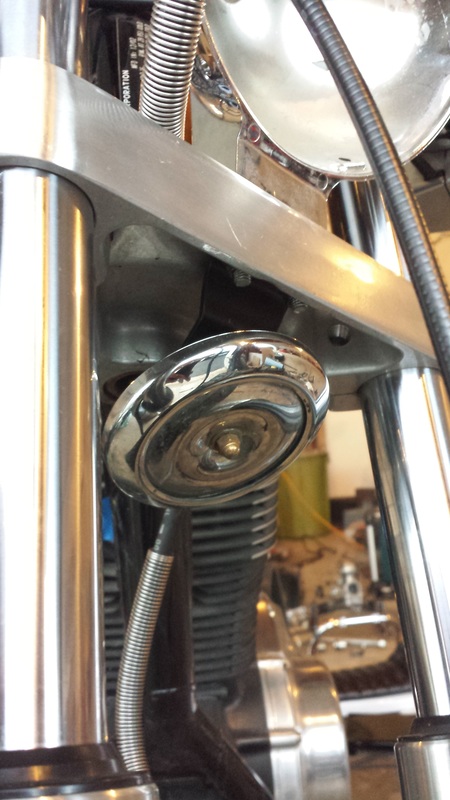
Not a lot of pictures today but I did get some things done. I was able to get the last bolt off of the front rotor. I had it soaking with PB Blaster for about two weeks, giving it a few taps here and there to hope that the liquid would soak in and loosen things. I tried tightening it a hair then backing it off. It finally broke free and I was able to swap it over to the new 18" front wheel and get it mounted in the forks. Trust me when I tell you that getting the front axle through and screwed in isn't the easiest thing to do! I bolted the caliper back in and will be putting the shorter brake line on near the end. For now I have it pulled back out of the way. I'm also going to need to get shorter clutch and throttle cables as they flop all over the place! :) Under the headlight mount, the bolt spacing is identical to the horn bracket. I bent the bracket down just a little bit and the horn slips right into place.
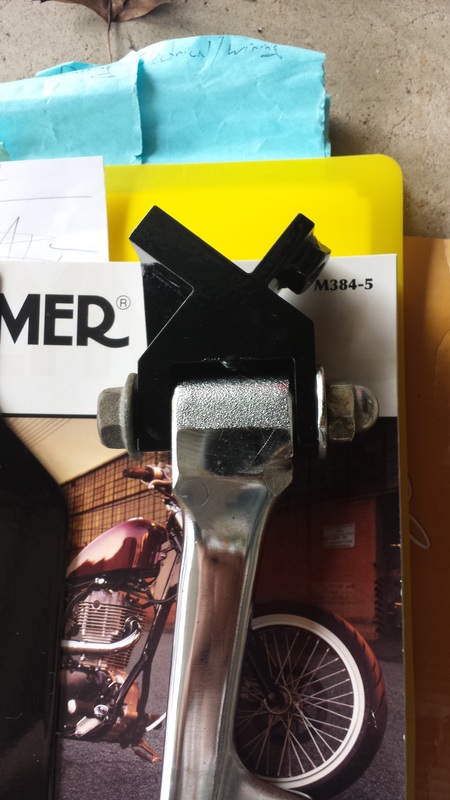
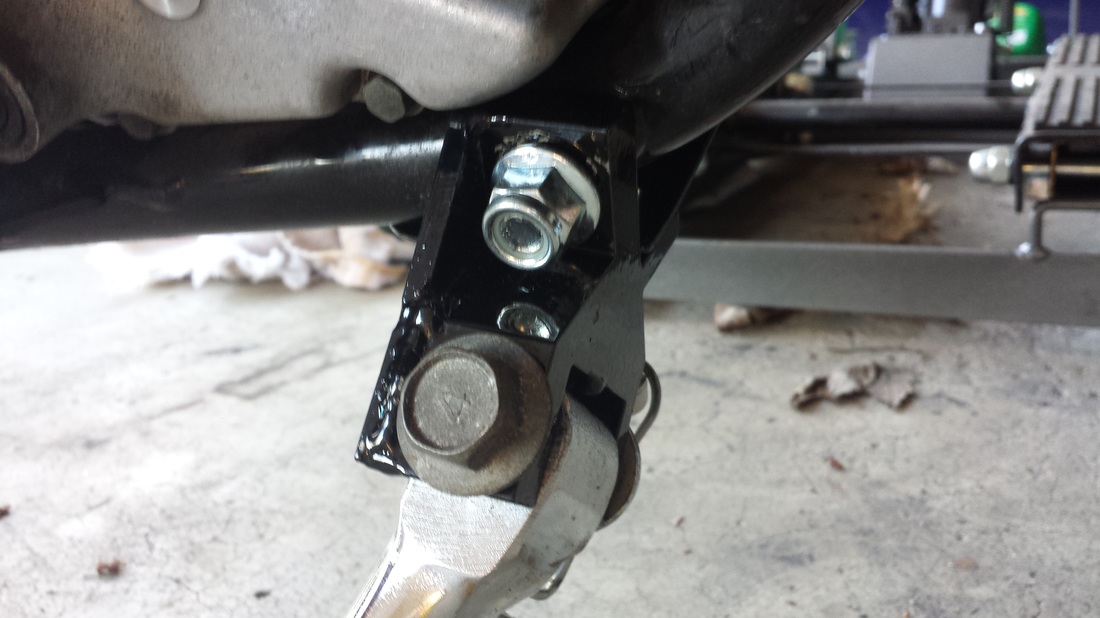
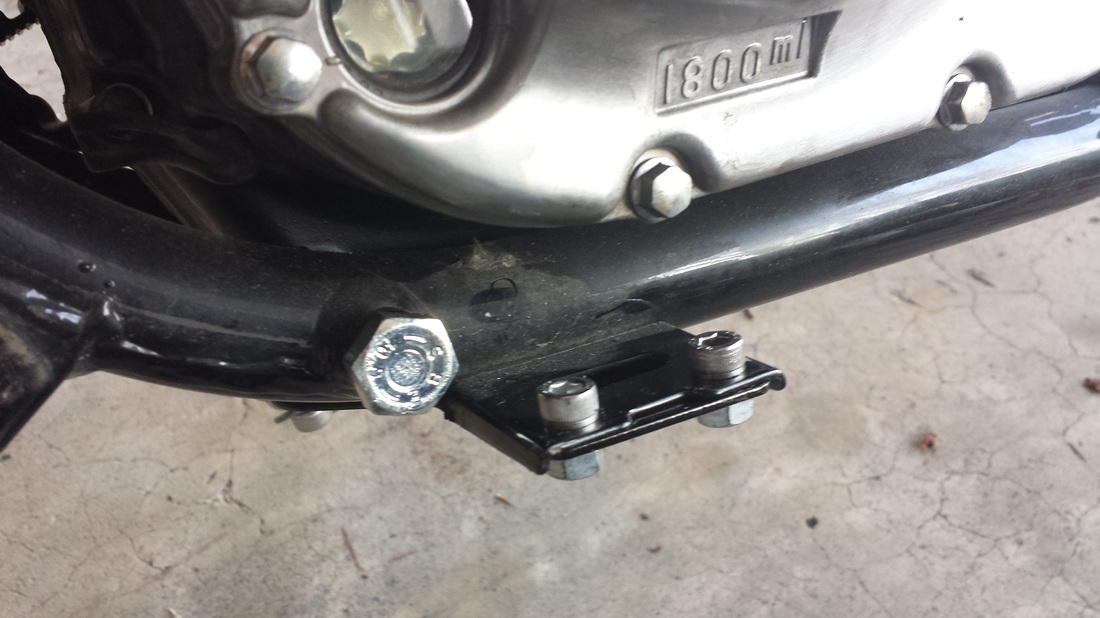
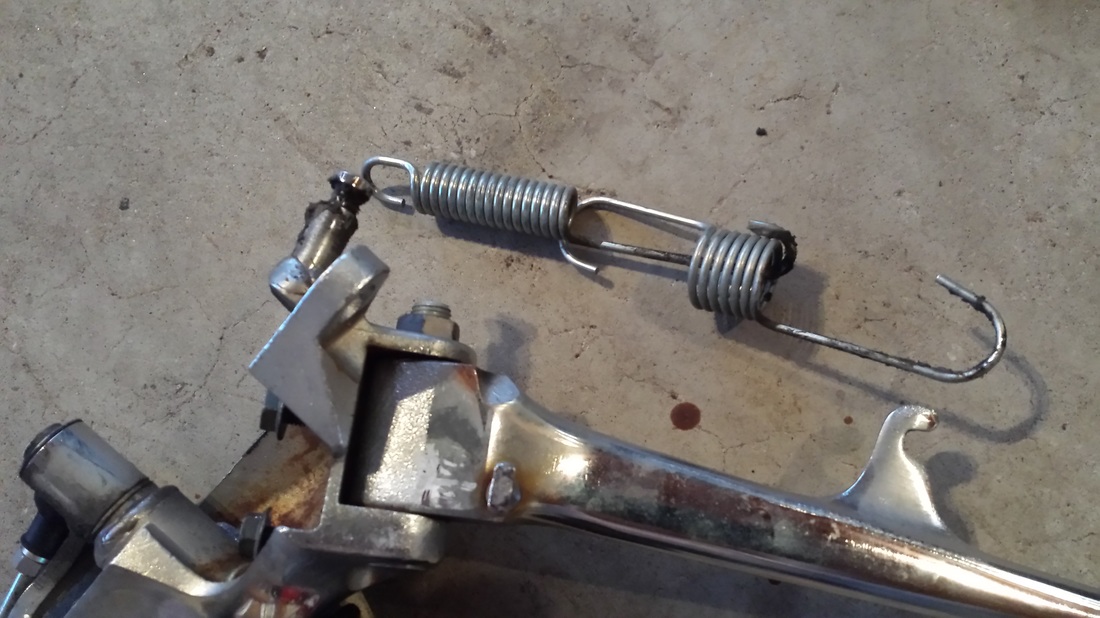
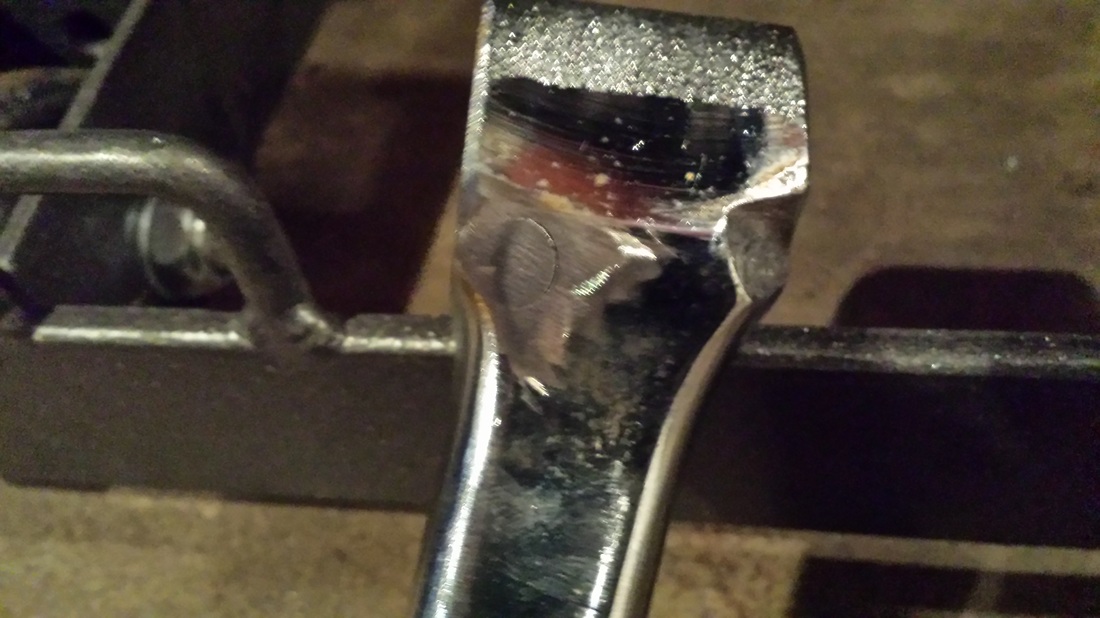
I started on the kickstand mount. It hooks to the rear engine bolt. Broke out the 15 and 17mm sockets and pulled the bolt out, replacing it with the one from the Ryca kit. I then pulled the kickstand off of the front pedal cluster. I pulled the spring off then unscrewed the nut and tried tapping the bolt out. I then found out there was a plastic cap on the end with an allen bolt under it. Ta-da! Seriously trashed the threads! Had just enough to unscrew it but had to cut the end off as I flattened it too much. Looks like I need to find a new bolt. >:(
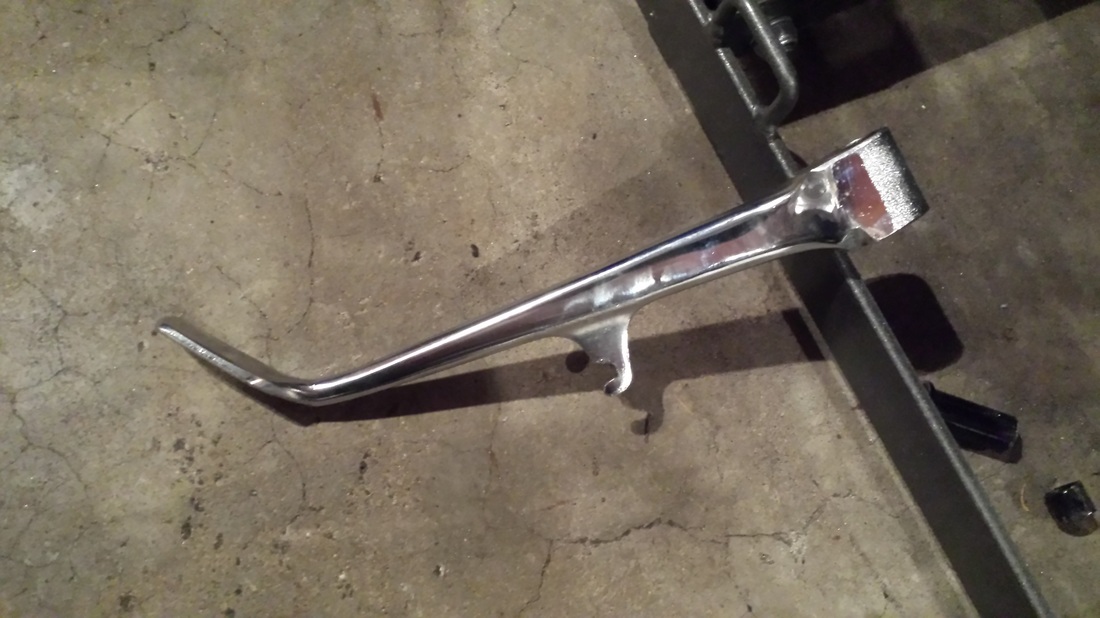
Ryan said to pull out or cut off the tab on the kickstand. I tried to pull it out but it simply snapped off. I just ground it down then sanded it flush. I'll get the kickstand mounted tomorrow and hopefully weld and dress the rear trailing arm, give it a quick coat of paint and get the rear wheel mounted. I'll be drilling the bolt out for the speedo sensor too.
Not a lot of pictures today but I did get some things done. I was able to get the last bolt off of the front rotor. I had it soaking with PB Blaster for about two weeks, giving it a few taps here and there to hope that the liquid would soak in and loosen things. I tried tightening it a hair then backing it off. It finally broke free and I was able to swap it over to the new 18" front wheel and get it mounted in the forks. Trust me when I tell you that getting the front axle through and screwed in isn't the easiest thing to do! I bolted the caliper back in and will be putting the shorter brake line on near the end. For now I have it pulled back out of the way. I'm also going to need to get shorter clutch and throttle cables as they flop all over the place! :) Under the headlight mount, the bolt spacing is identical to the horn bracket. I bent the bracket down just a little bit and the horn slips right into place.
I started on the kickstand mount. It hooks to the rear engine bolt. Broke out the 15 and 17mm sockets and pulled the bolt out, replacing it with the one from the Ryca kit. I then pulled the kickstand off of the front pedal cluster. I pulled the spring off then unscrewed the nut and tried tapping the bolt out. I then found out there was a plastic cap on the end with an allen bolt under it. Ta-da! Seriously trashed the threads! Had just enough to unscrew it but had to cut the end off as I flattened it too much. Looks like I need to find a new bolt. >:(
Ryan said to pull out or cut off the tab on the kickstand. I tried to pull it out but it simply snapped off. I just ground it down then sanded it flush. I'll get the kickstand mounted tomorrow and hopefully weld and dress the rear trailing arm, give it a quick coat of paint and get the rear wheel mounted. I'll be drilling the bolt out for the speedo sensor too.


April 10, 2015
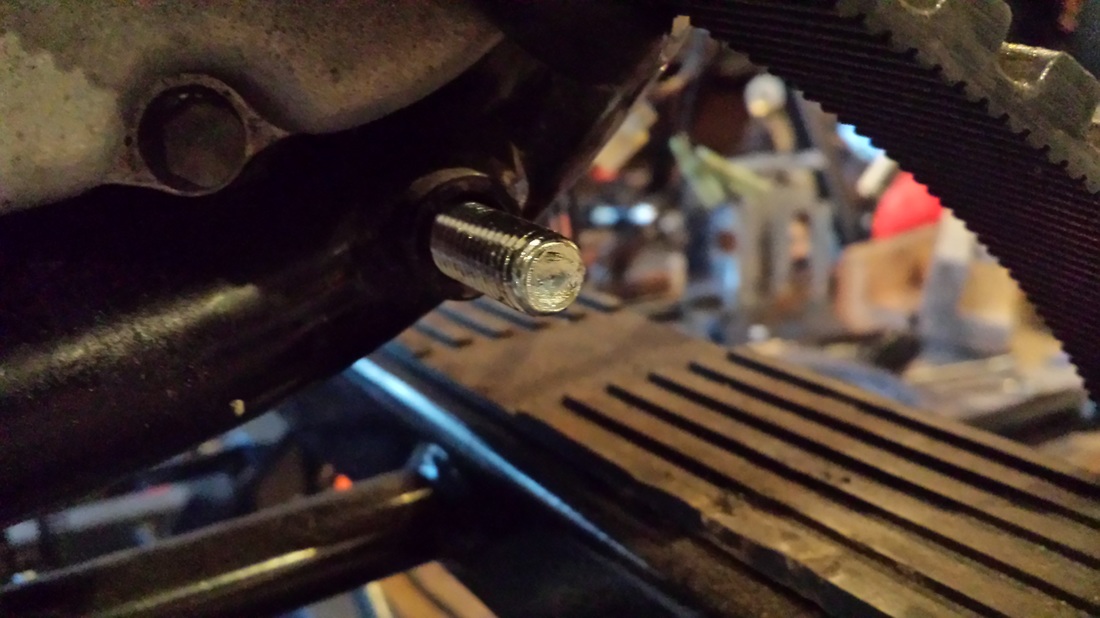
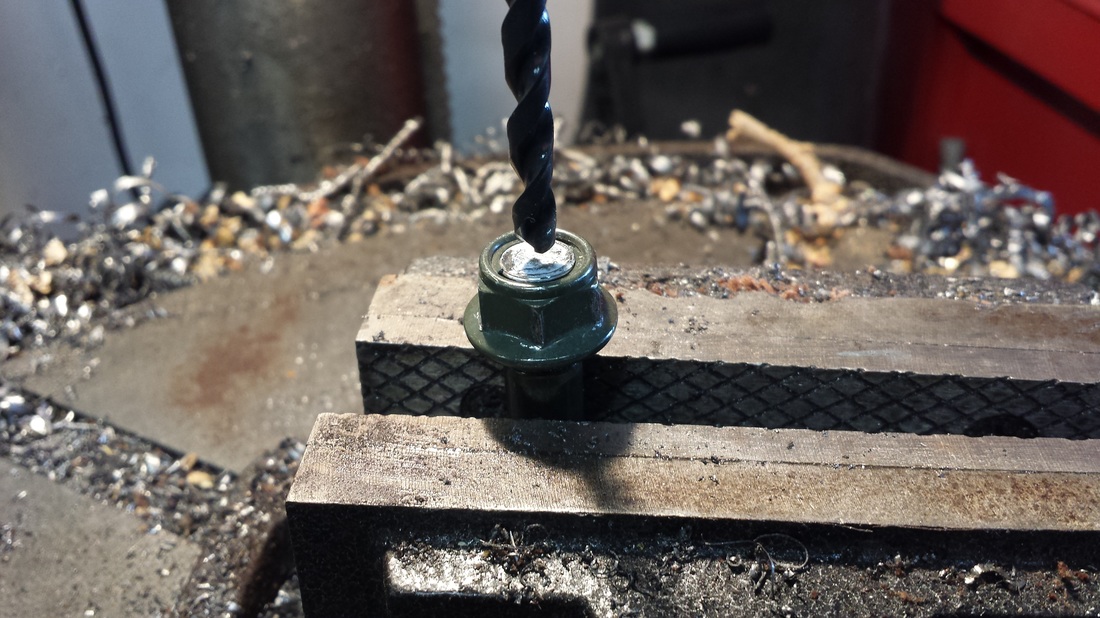
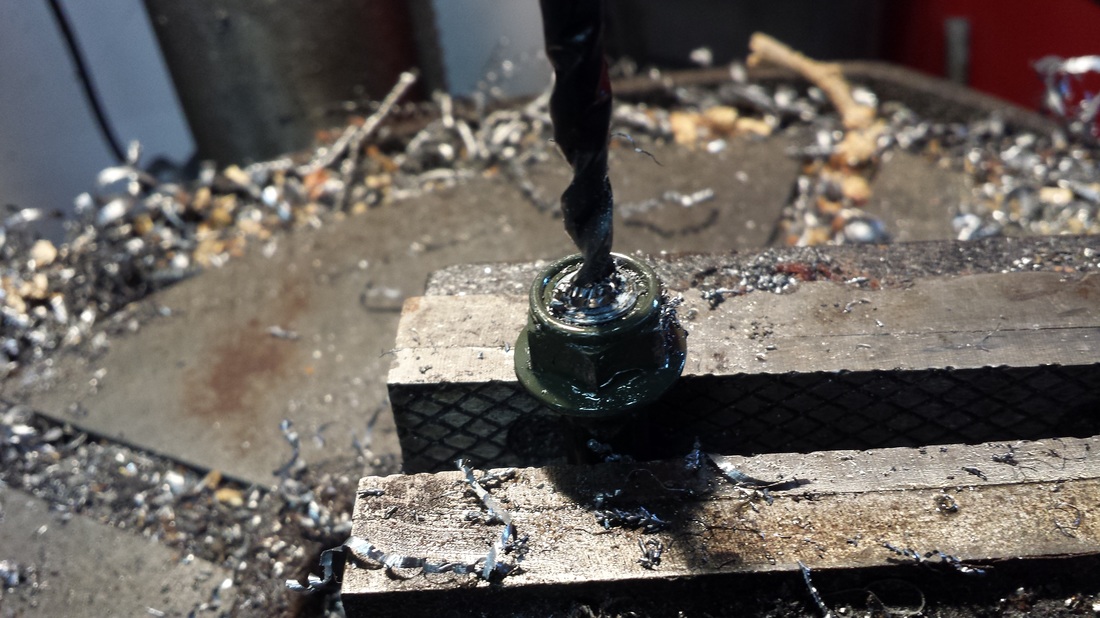
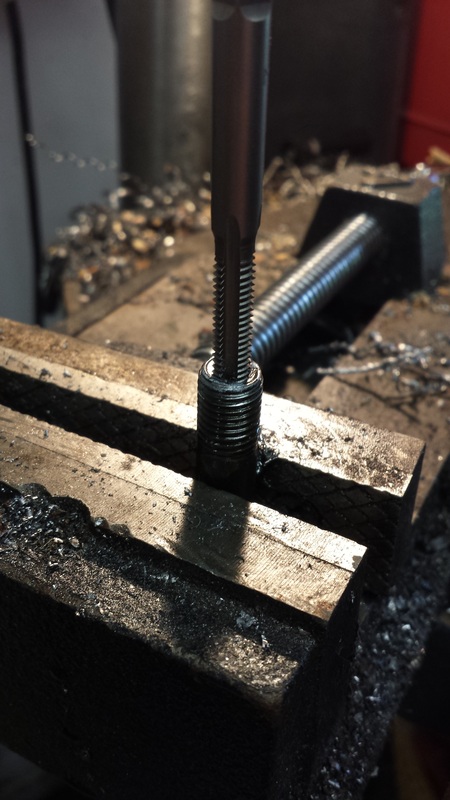
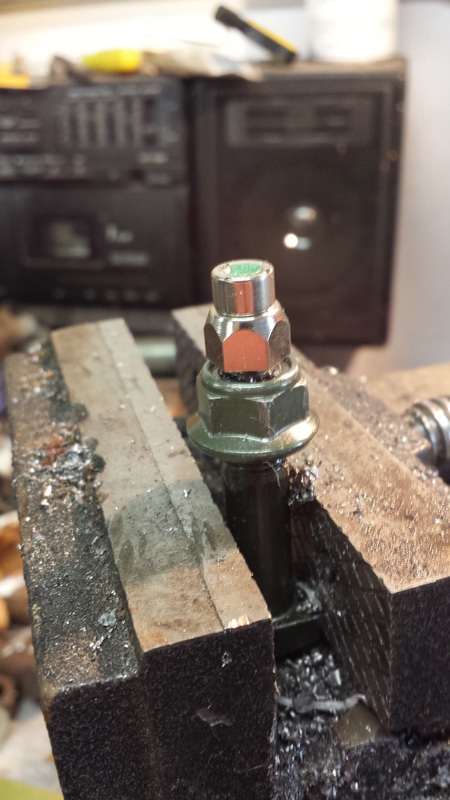
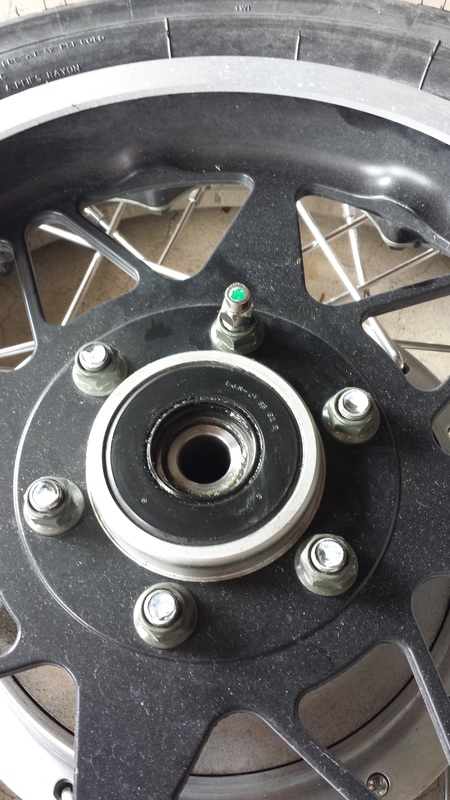
Ordered a new kickstand bolt last night. (groan) Went out to the shop and drilled the rear pulley bolt. The Acewell has a hall sensor for the speedo and I couldn't mount it to the front. I figured I could drill out the center of one of the bolts, tap it and screw the magnet into it. It was going to be a tight fit but I checked the dimensions, squared up the drillpress and went for it. The tap and drill bit came together, the drill bit was VERY sharp and, with a good soaking of WD-40 and a lot of light pressure, the drill went right in. The tap was very tight but I took a lot of time doing it. I've had my share of taps snap off in the hole just when I was about done; not this time! Drilled, tapped and cleaned up; all in about 90 minutes!
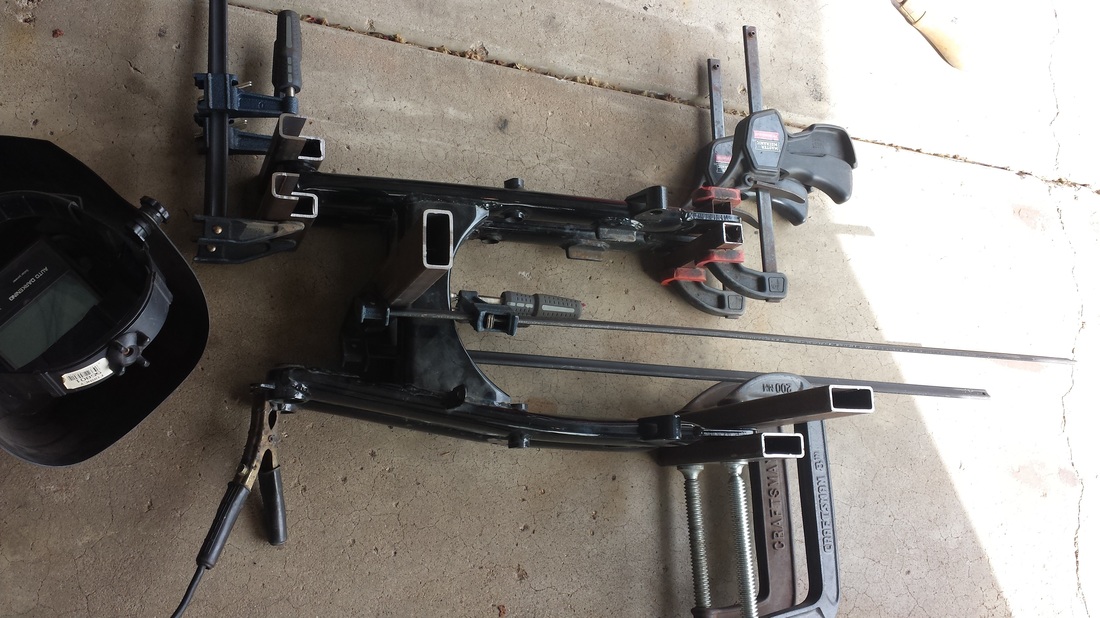
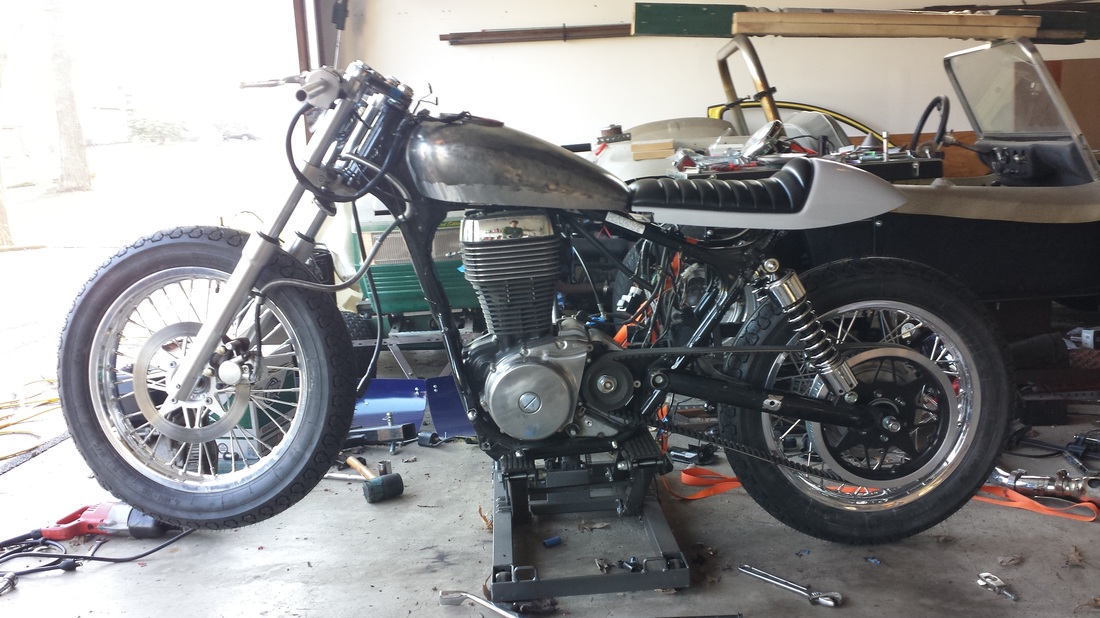
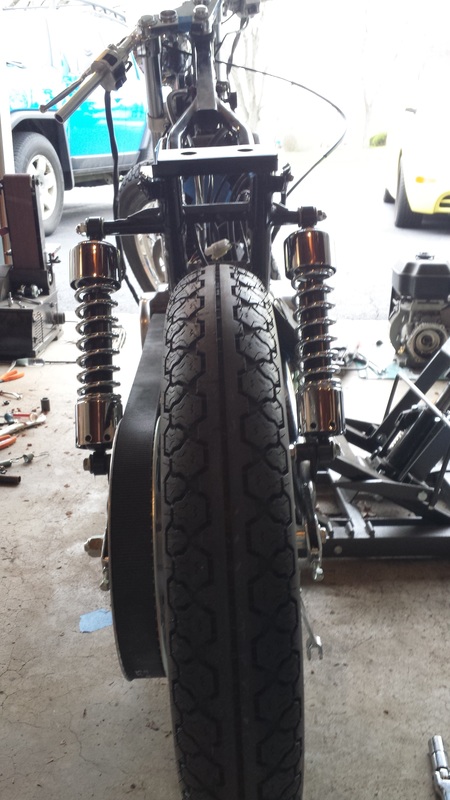
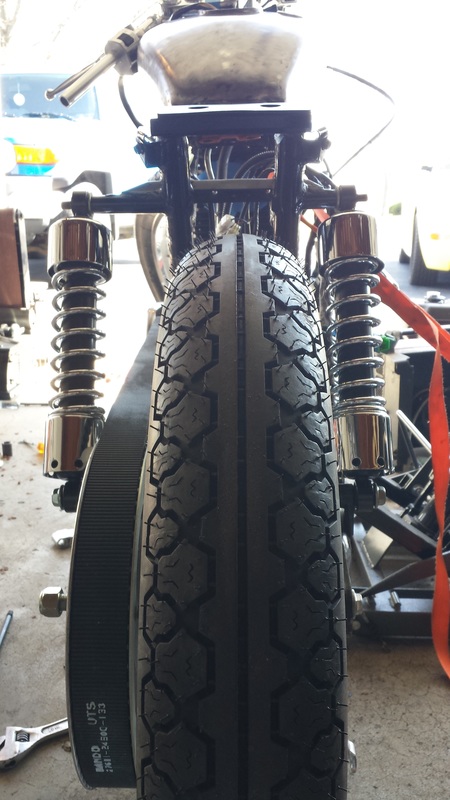
I then turned to the rear trailing arm. It needed finishing and dressing on the cutout. I did some grinding and welding then decided to see how the fit was going to be. I threw it on the bike and noticed that it had pulled in a bit in the back, only about 1/16". I can put it on the jack and spread it a touch. I was still able to put it on the bike and get the wheel in. I put on the shocks and sat the seat section on. I'll be mounting the speedo pickup off of the lower shock mount. It was made as if it was supposed to be there. It's really starting to come together!
Ordered a new kickstand bolt last night. (groan) Went out to the shop and drilled the rear pulley bolt. The Acewell has a hall sensor for the speedo and I couldn't mount it to the front. I figured I could drill out the center of one of the bolts, tap it and screw the magnet into it. It was going to be a tight fit but I checked the dimensions, squared up the drillpress and went for it. The tap and drill bit came together, the drill bit was VERY sharp and, with a good soaking of WD-40 and a lot of light pressure, the drill went right in. The tap was very tight but I took a lot of time doing it. I've had my share of taps snap off in the hole just when I was about done; not this time! Drilled, tapped and cleaned up; all in about 90 minutes!
I then turned to the rear trailing arm. It needed finishing and dressing on the cutout. I did some grinding and welding then decided to see how the fit was going to be. I threw it on the bike and noticed that it had pulled in a bit in the back, only about 1/16". I can put it on the jack and spread it a touch. I was still able to put it on the bike and get the wheel in. I put on the shocks and sat the seat section on. I'll be mounting the speedo pickup off of the lower shock mount. It was made as if it was supposed to be there. It's really starting to come together!
April 11, 2015
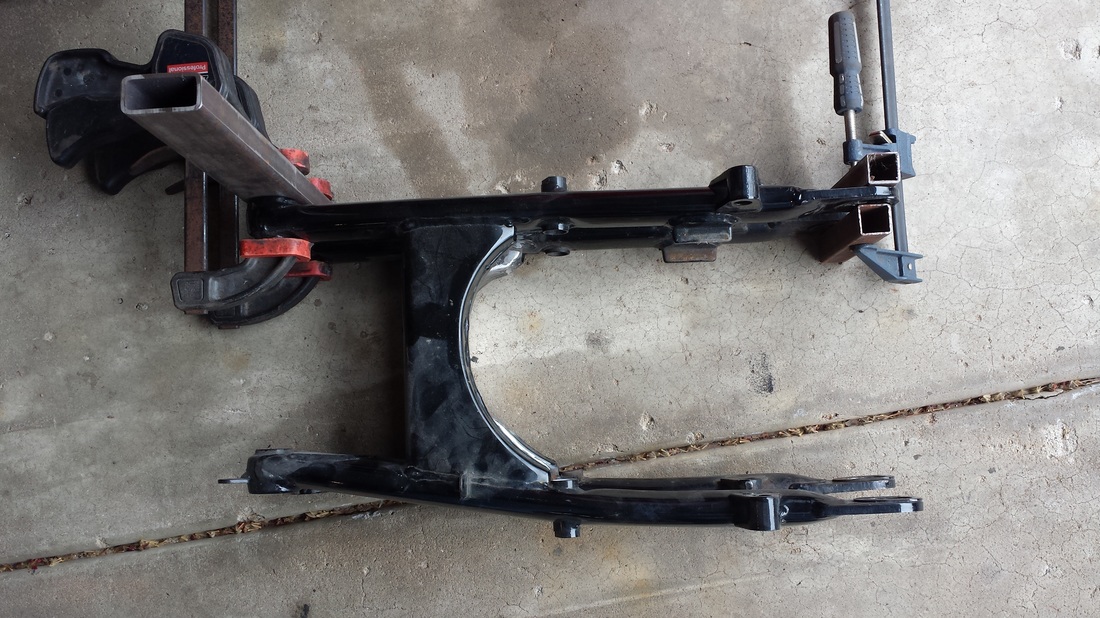
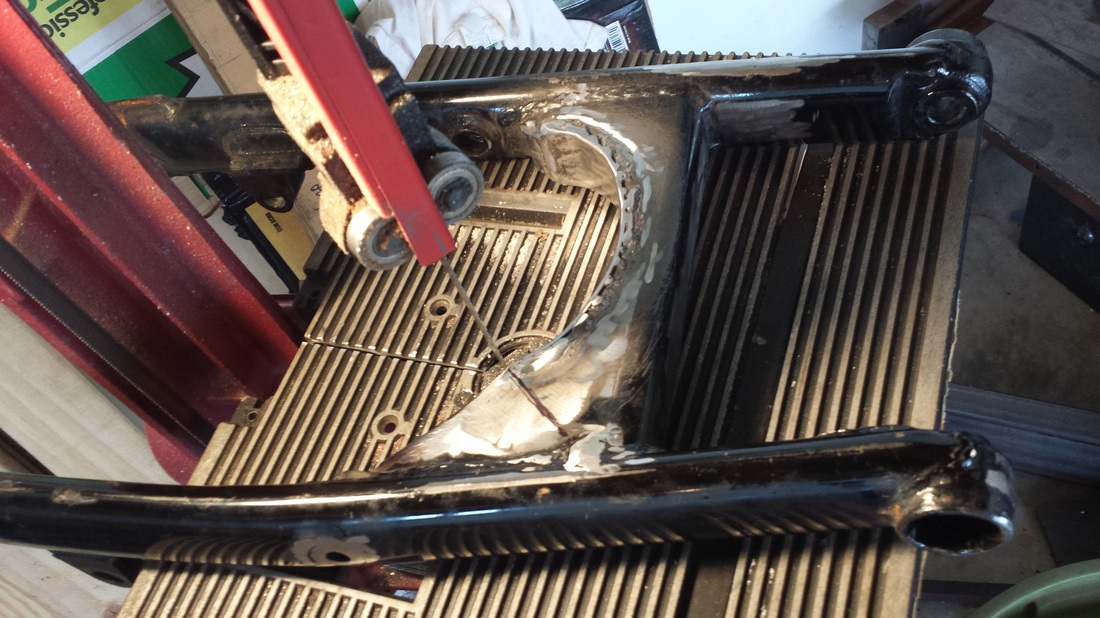
Not a whole lot to mention today. I did notice in my mockup that my trailing arm looked a little odd, given the fact that I couldn't get the wheel in there along with all the spacers and such. I roughed it in in the above shot but noticed the wheel was over to the right a bit. (Shot below) I pulled the arm off and laid the stocker on top of it. Fortunately I modded one that I bought separately so I have the original dimensions to go off of. I noticed that the left rear of the arm had pulled in and the front was out a little. I'm guessing it pulled in when I did the welding. Sounds like chaos but it's only a little frustrating. I'll take it to the bandsaw, split it a bit at it's narrowest, pull it back into alignment and reweld it. I've done this before on VW suspension and it seems to work well. If not, I'll simply mod the other arm but in a much smaller amount.
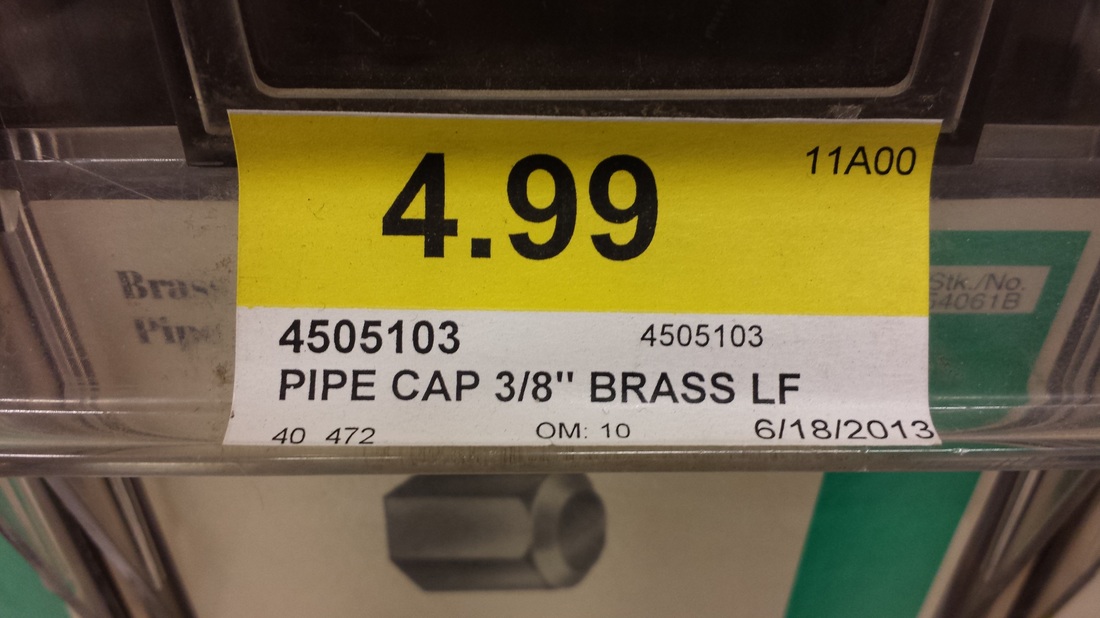
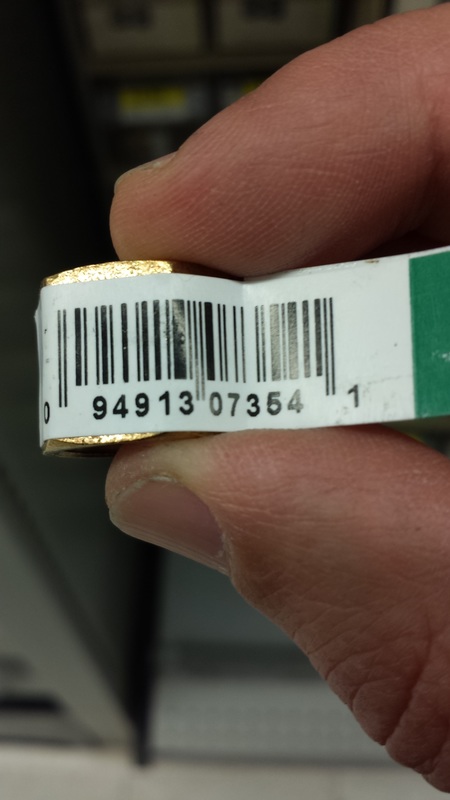
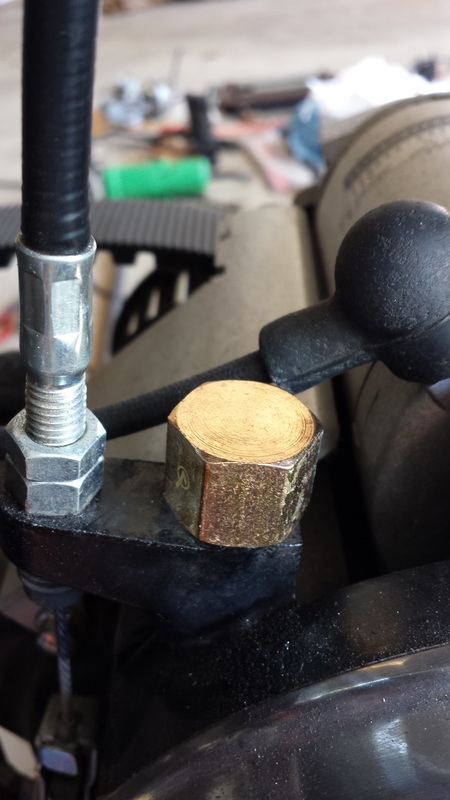
I did make a run to ACE and found the cap that could cover the Speedo hole on the engine case. A little RTV and it fits snug! The price and bar code are pictured below.
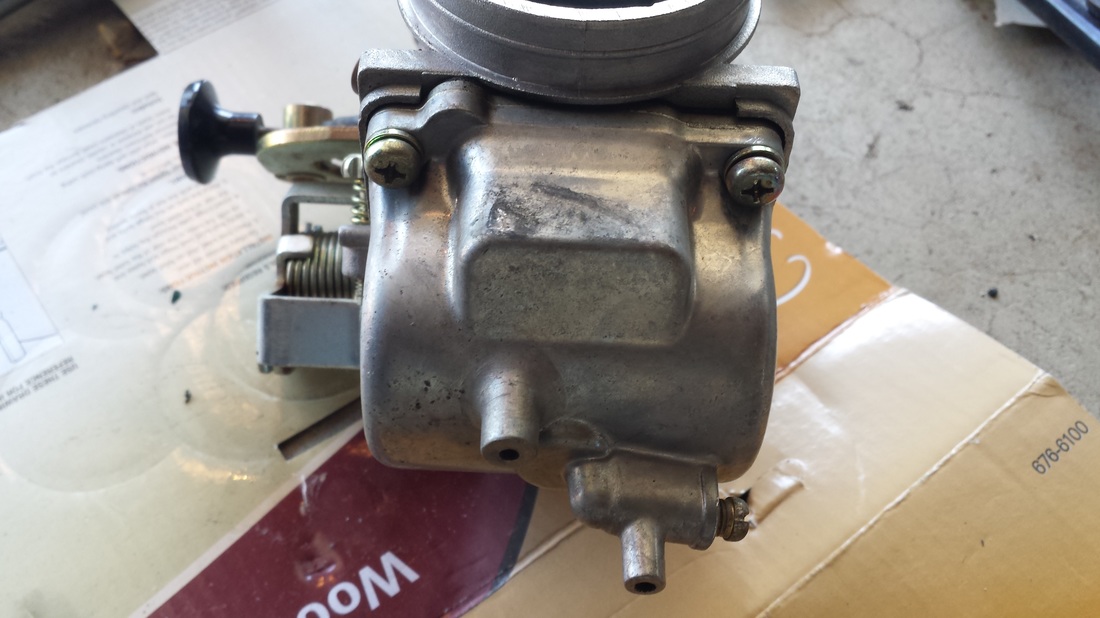
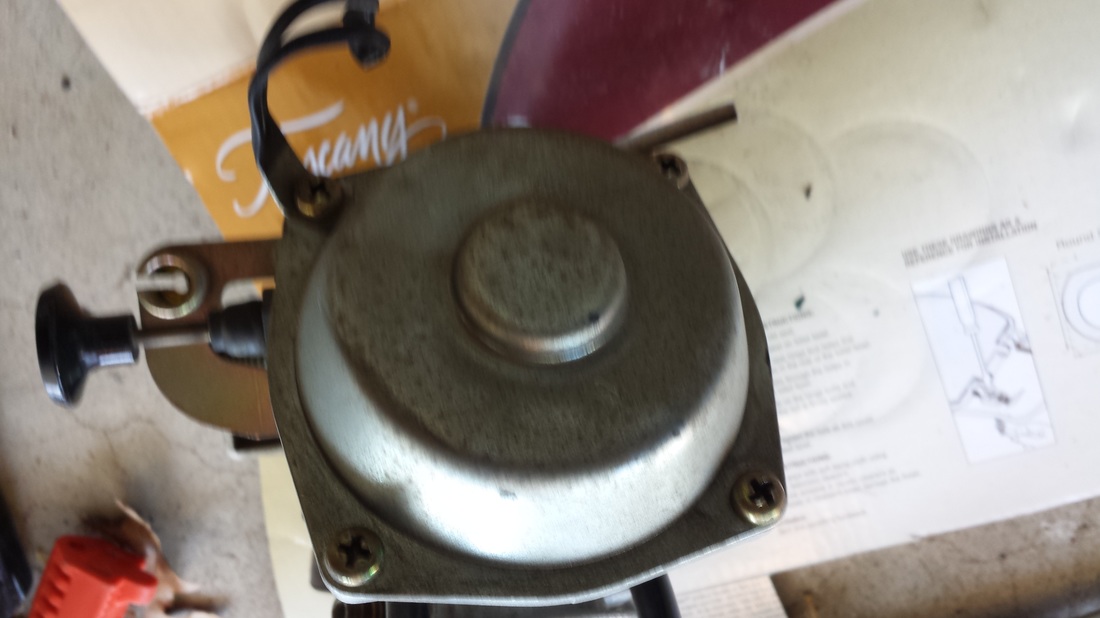
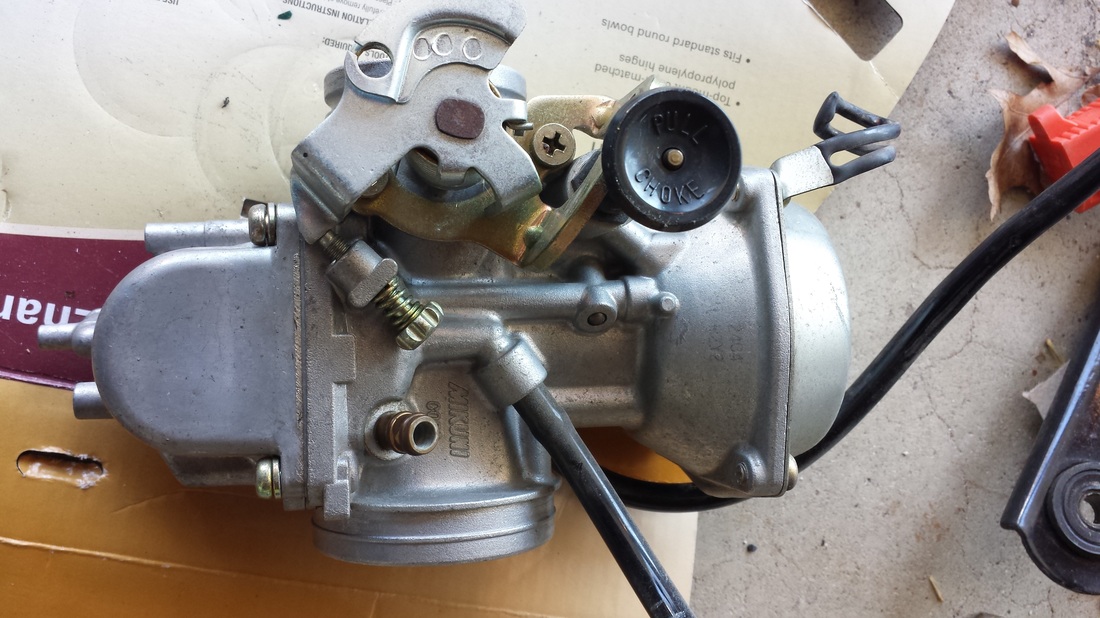
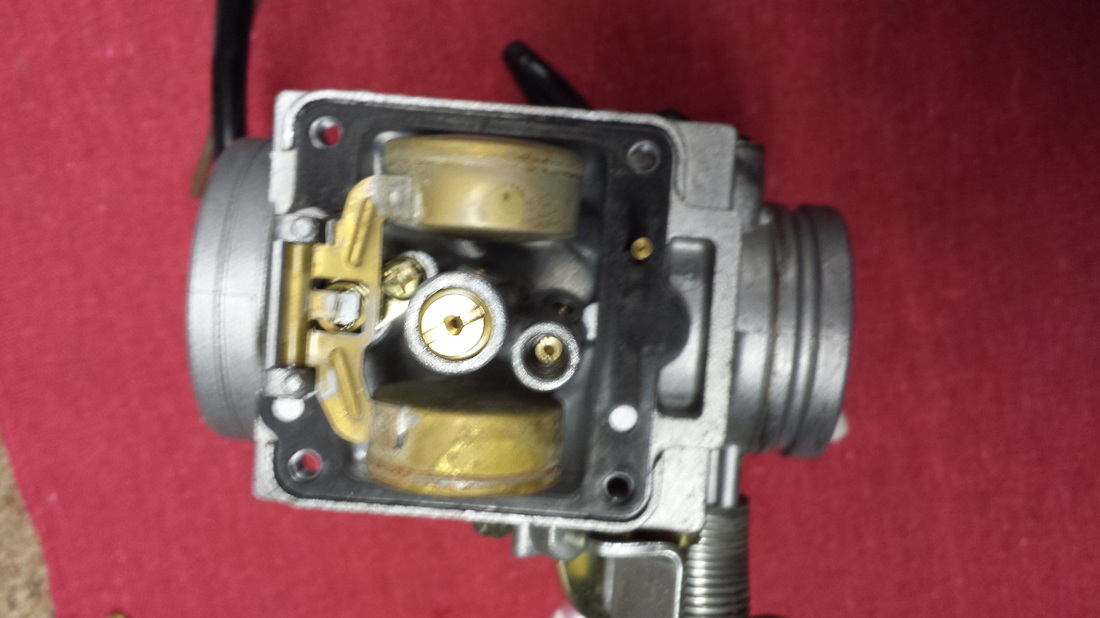
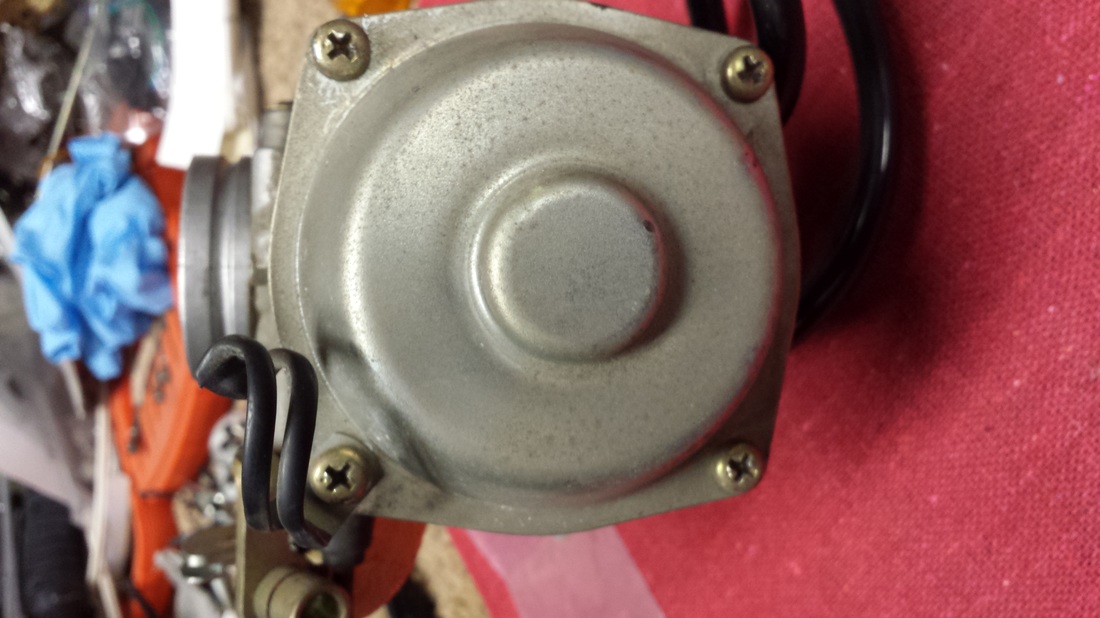
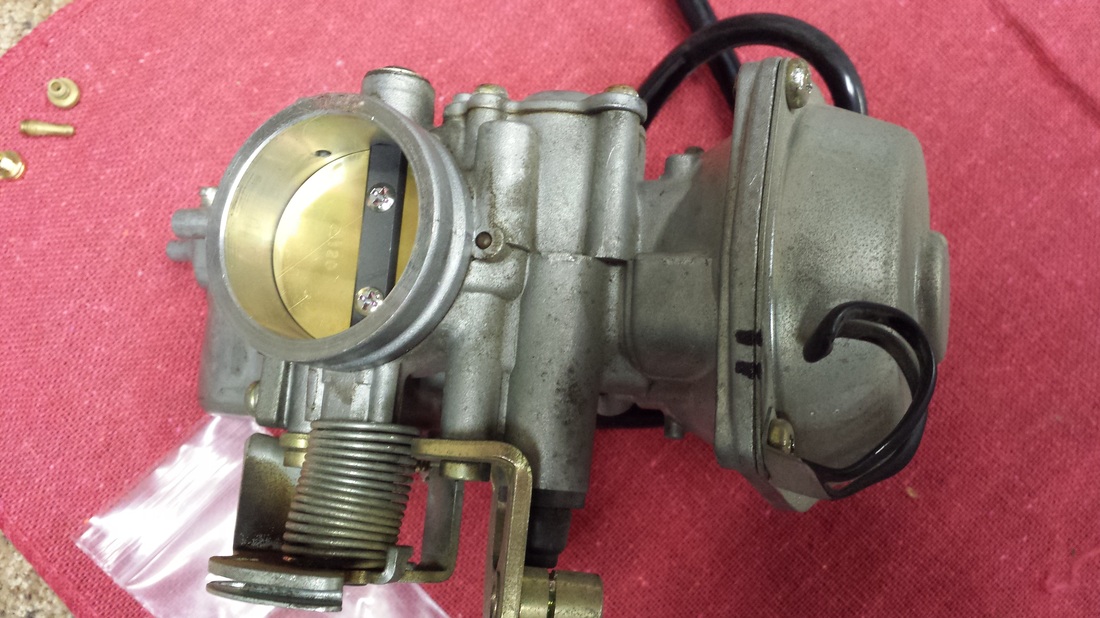
I then took a look at the carb. I'll be modding this in the basement so I made sure it was fully drained. I was able to get the bottom screws off pretty easily but the top ones? Wow, those were REALLY on there! One thing I want to mention is that using a regular Phillips screwdriver is not always the best thing when working on Japanese bikes. Phillips screwdrivers are made to "cam out" when they reach their limits as the inside of the tips are rounded. There are special 4 prong screwdrivers that are squared on the inside so they won't cam out and you can apply more force to them. Well, I don't have any of those so I had to use what I had available. I went to my toolbox and pulled out my ratchet screwdriver that had the pivoting handle so you can apply more force to it. The hard part wasn't so much the twisting but keeping the tip from: 1. Camming out. 2. Trashing the screw head 3. Snapping the screw off 4. Shattering the screwdriver tip. (Yes, I have done that!). So what I did was go through all the Phillips tips I had and found the one that fit VERY snugly in the screws. It was probably too big but I got it in there. With this, I was able to get 2 of them pretty easily, the third took a bit of loud grunting, but the 4th... Lets put it this way, putting the fork caps on was a walk in the park compared to getting this last screw out! I had to hold the carb with one hand (wearing a welders glove so that if I slipped I wouldn't have to dig a screwdriver bit out of my thumb or wrist!) and press and turn with the other. I could seriously feel a vein popping in my temple with the amount of force it took! It finally broke free and all four were out. I think I'm done for the night! The side shots are just for reference.
Not a whole lot to mention today. I did notice in my mockup that my trailing arm looked a little odd, given the fact that I couldn't get the wheel in there along with all the spacers and such. I roughed it in in the above shot but noticed the wheel was over to the right a bit. (Shot below) I pulled the arm off and laid the stocker on top of it. Fortunately I modded one that I bought separately so I have the original dimensions to go off of. I noticed that the left rear of the arm had pulled in and the front was out a little. I'm guessing it pulled in when I did the welding. Sounds like chaos but it's only a little frustrating. I'll take it to the bandsaw, split it a bit at it's narrowest, pull it back into alignment and reweld it. I've done this before on VW suspension and it seems to work well. If not, I'll simply mod the other arm but in a much smaller amount.
I did make a run to ACE and found the cap that could cover the Speedo hole on the engine case. A little RTV and it fits snug! The price and bar code are pictured below.
I then took a look at the carb. I'll be modding this in the basement so I made sure it was fully drained. I was able to get the bottom screws off pretty easily but the top ones? Wow, those were REALLY on there! One thing I want to mention is that using a regular Phillips screwdriver is not always the best thing when working on Japanese bikes. Phillips screwdrivers are made to "cam out" when they reach their limits as the inside of the tips are rounded. There are special 4 prong screwdrivers that are squared on the inside so they won't cam out and you can apply more force to them. Well, I don't have any of those so I had to use what I had available. I went to my toolbox and pulled out my ratchet screwdriver that had the pivoting handle so you can apply more force to it. The hard part wasn't so much the twisting but keeping the tip from: 1. Camming out. 2. Trashing the screw head 3. Snapping the screw off 4. Shattering the screwdriver tip. (Yes, I have done that!). So what I did was go through all the Phillips tips I had and found the one that fit VERY snugly in the screws. It was probably too big but I got it in there. With this, I was able to get 2 of them pretty easily, the third took a bit of loud grunting, but the 4th... Lets put it this way, putting the fork caps on was a walk in the park compared to getting this last screw out! I had to hold the carb with one hand (wearing a welders glove so that if I slipped I wouldn't have to dig a screwdriver bit out of my thumb or wrist!) and press and turn with the other. I could seriously feel a vein popping in my temple with the amount of force it took! It finally broke free and all four were out. I think I'm done for the night! The side shots are just for reference.


April 12, 2015
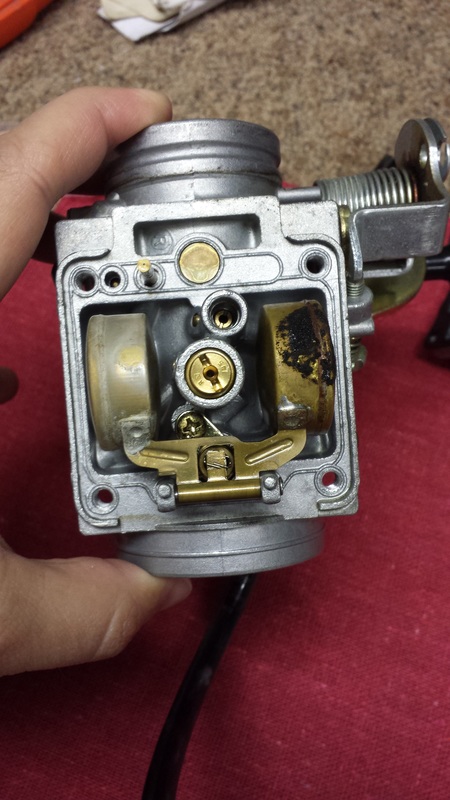
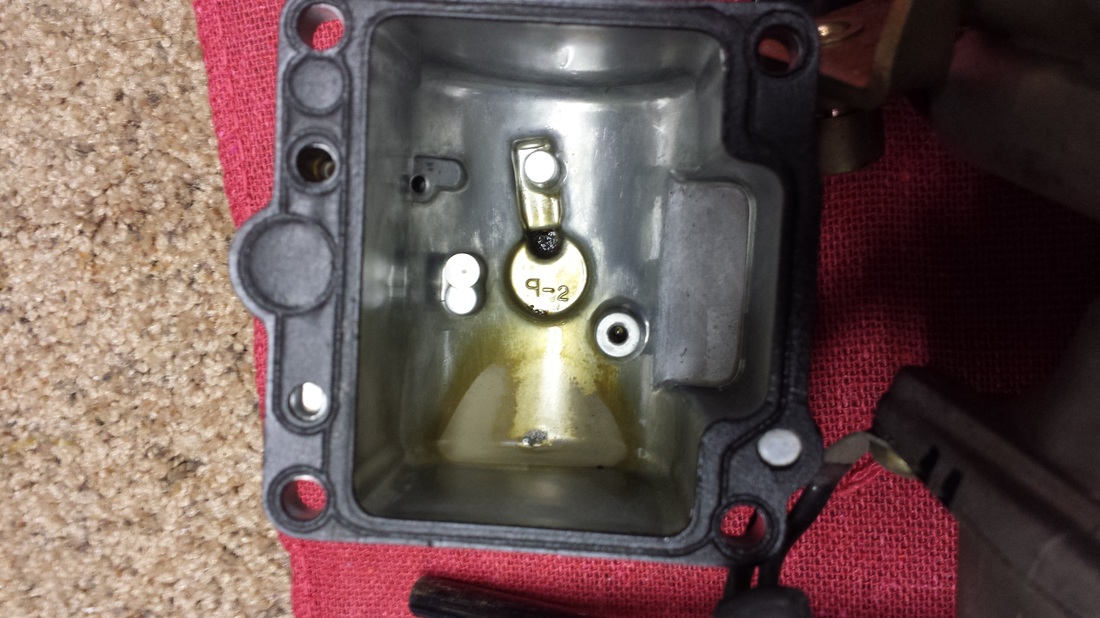
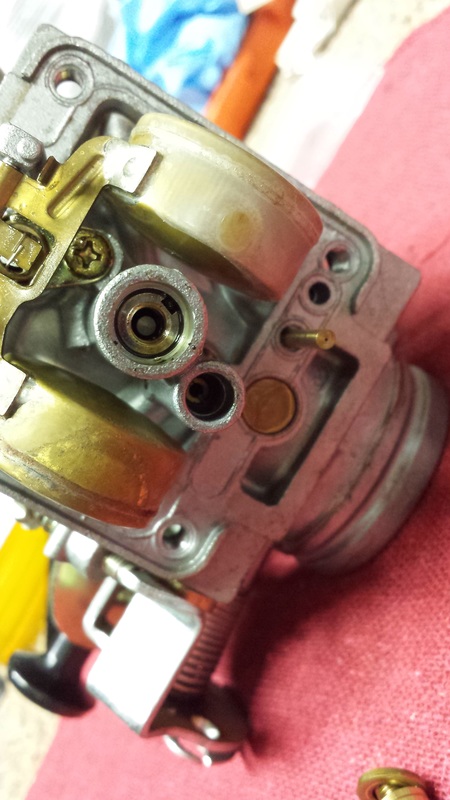
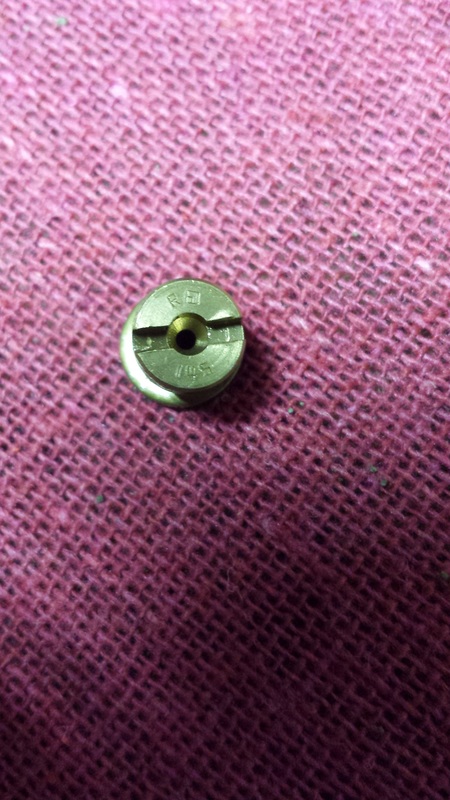
Got the carb pulled apart and rejetted. It wasn't super hard but having the right tools really helps. I used the Ryca carb video to get through. Make sure you put the washer behind the big jet. He mentions a 155 jet but I only got a 152.5 in the kit. I pulled the bottom off and the float was okay except for the one side; very gunked up. A bit of carb cleaner, compressed air and a lint free towel and things were back to normal. Don't push on the float or you might bend it. The bowl wasn't too bad but I gave it a good cleaning. The jets came out easily and were swapped in about 10 minutes.
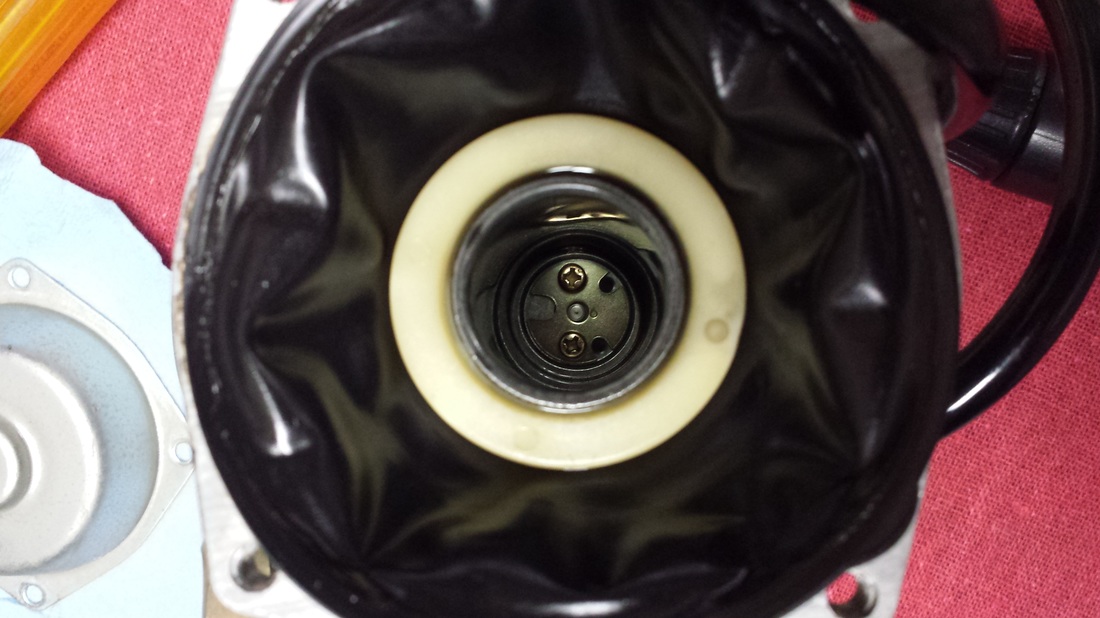
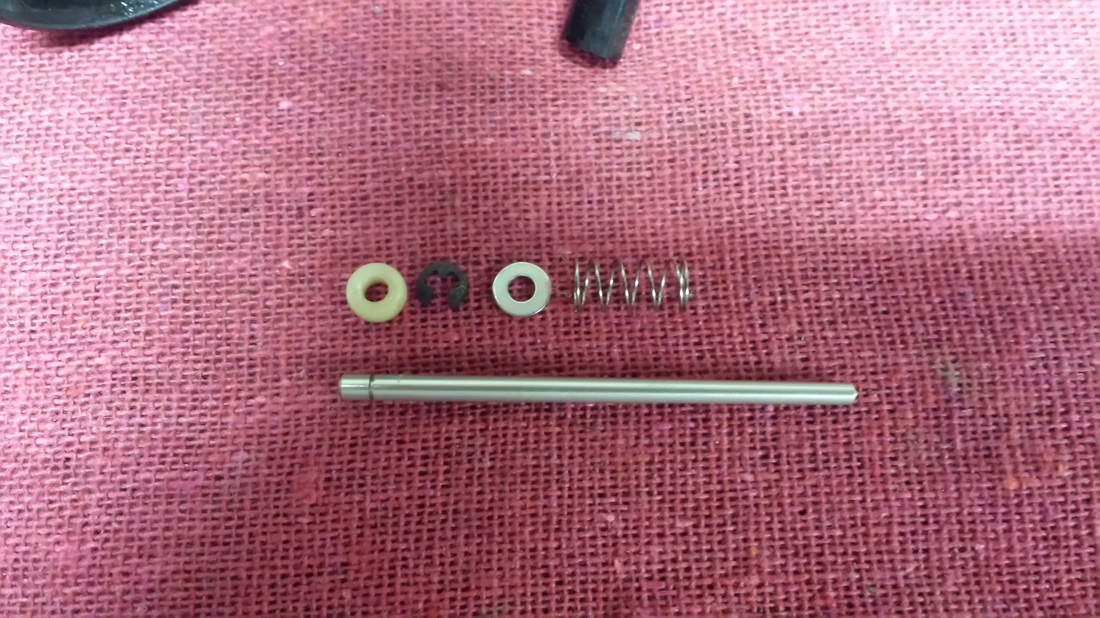
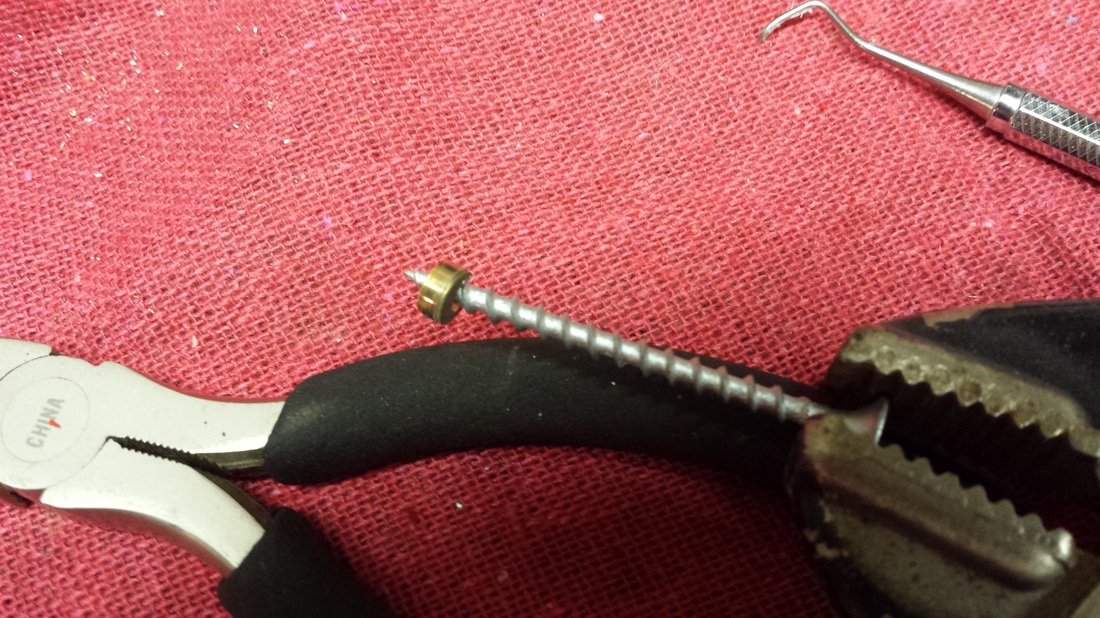
When I got to the top, I marked the direction of the cap so it would go back on the same way. I pulled the spring then GENTLY removed the diaphragm. Getting inside with a magnetic screwdriver made it much easier. Make sure you put it back in with the little dent next to the center cutout facing downwards. The center rod came out easily and went back together okay the forst time, but the spring wouldn't move. What happened is the the washer jammed under the spring and was binding. Pulled it back apart, flipped the spring and it worked fine. NOTE: the 3 washers WILL come off. I suggest putting everything together on the shaft, including the spring, grip the tip with needlenosed pliers, lean the carb over and slide it together, tilt it back up THEN release the pliers. Make sure the pliers aren't magnetized or they will just keep pulling the washers off! From there you simply put the brass retainer back in, making sure the holes are lined up, put the diaphragm back in, lining up the seal indenture, put the spring and cap on and tighten things up. Next you drill out the brass cap. I used a hand drill to be careful. Twist a wood screw in, pop the cap out then adjust the carb per Ryca settings.
I started work on the trailing arm. I think when I welded it together, it warped it inwards, causing the wheel not to fit and to be at an angle. I jigged it up with the original stock arm, gave it a cut and squared it back up. Started tacking it back. It's within .25 degrees so it should be just fine. I'll be putting more bracing on it later.
Got the carb pulled apart and rejetted. It wasn't super hard but having the right tools really helps. I used the Ryca carb video to get through. Make sure you put the washer behind the big jet. He mentions a 155 jet but I only got a 152.5 in the kit. I pulled the bottom off and the float was okay except for the one side; very gunked up. A bit of carb cleaner, compressed air and a lint free towel and things were back to normal. Don't push on the float or you might bend it. The bowl wasn't too bad but I gave it a good cleaning. The jets came out easily and were swapped in about 10 minutes.
When I got to the top, I marked the direction of the cap so it would go back on the same way. I pulled the spring then GENTLY removed the diaphragm. Getting inside with a magnetic screwdriver made it much easier. Make sure you put it back in with the little dent next to the center cutout facing downwards. The center rod came out easily and went back together okay the forst time, but the spring wouldn't move. What happened is the the washer jammed under the spring and was binding. Pulled it back apart, flipped the spring and it worked fine. NOTE: the 3 washers WILL come off. I suggest putting everything together on the shaft, including the spring, grip the tip with needlenosed pliers, lean the carb over and slide it together, tilt it back up THEN release the pliers. Make sure the pliers aren't magnetized or they will just keep pulling the washers off! From there you simply put the brass retainer back in, making sure the holes are lined up, put the diaphragm back in, lining up the seal indenture, put the spring and cap on and tighten things up. Next you drill out the brass cap. I used a hand drill to be careful. Twist a wood screw in, pop the cap out then adjust the carb per Ryca settings.
I started work on the trailing arm. I think when I welded it together, it warped it inwards, causing the wheel not to fit and to be at an angle. I jigged it up with the original stock arm, gave it a cut and squared it back up. Started tacking it back. It's within .25 degrees so it should be just fine. I'll be putting more bracing on it later.


April 14, 2015
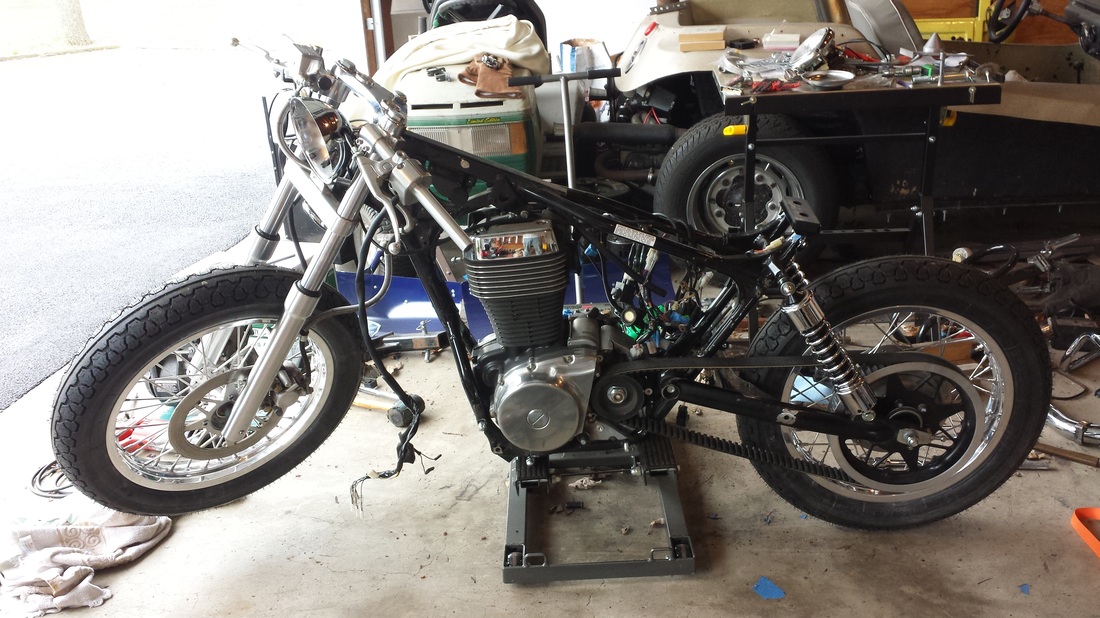
Got the rear arm sorted out. Jigged it up, kept measuring, took it on and off the bike about 4 times, tacked it and let it cool, tacked it again and let it cool. Figured out the throttle and clutch cable routing and got the carb in. I'm still working on the decomp connection. Got the kickstand installed. I found that you can use a lower shock bolt in place of the kickstand bolt until the bolt arrives. (grumble grumble...) The spring is a pain to put on! It felt good to put it on it's own stand today though! I finally got to sit on it and it fits nice!
Got the rear arm sorted out. Jigged it up, kept measuring, took it on and off the bike about 4 times, tacked it and let it cool, tacked it again and let it cool. Figured out the throttle and clutch cable routing and got the carb in. I'm still working on the decomp connection. Got the kickstand installed. I found that you can use a lower shock bolt in place of the kickstand bolt until the bolt arrives. (grumble grumble...) The spring is a pain to put on! It felt good to put it on it's own stand today though! I finally got to sit on it and it fits nice!