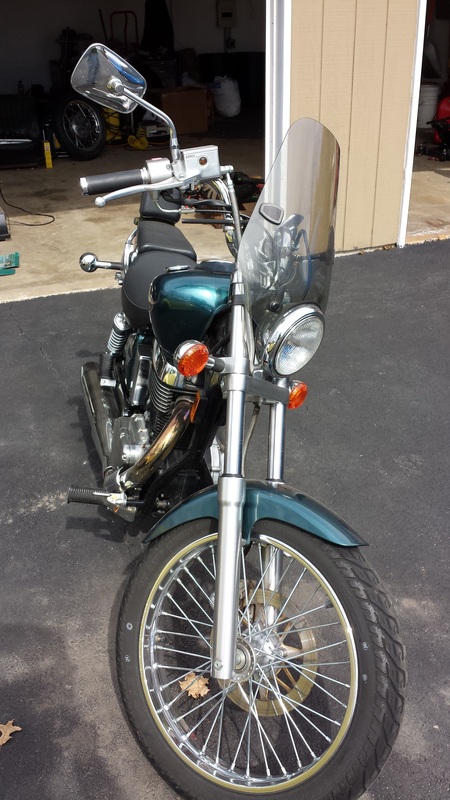
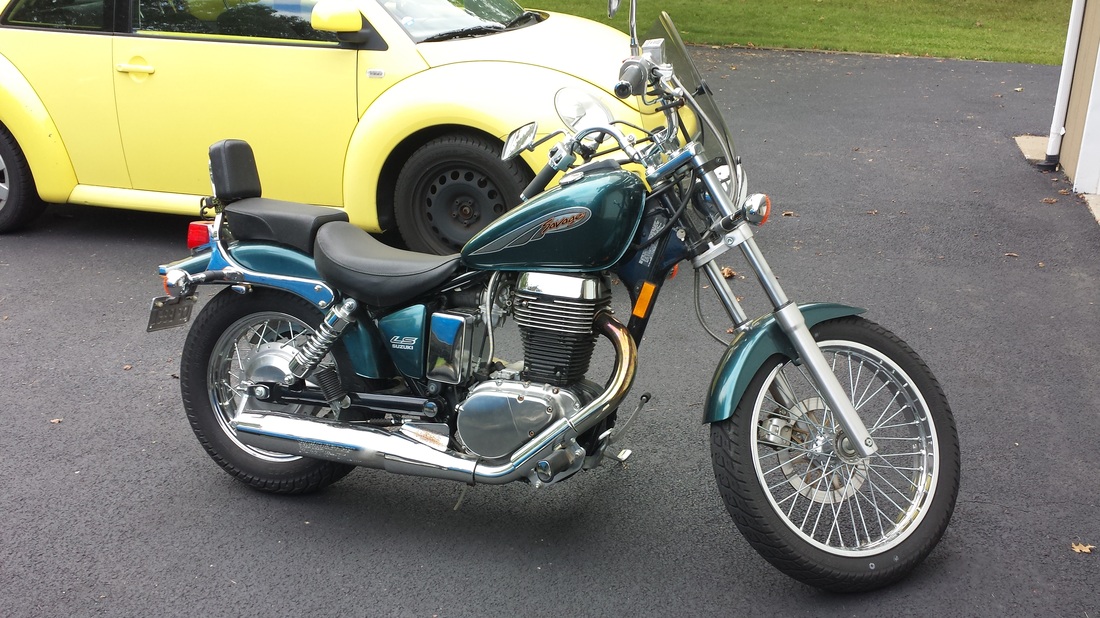
I'll keep this simple and to the point. This is my first bike build, much less my first bike. I got my license in June 2014, found this one owner, 1592 mile, nearly mint condition, 2003 Suzuki Savage only 12 miles from our house in September and ordered a Ryca kit soon after. I was planning on riding it around until the weather got bad then riding it as-is the next summer, but Ryca had a CS-1 sale that I couldn't pass up. www.rycamotors.com

From here is was controlled chaos. In order for Ryca to send me their kit, I had to send them my gas tank and rear wheel hub. Now this really isn't that big of a deal; pull them off of the bike, send them in. BUT! I wanted to keep the bike together just in case I wanted to ride it before I built it, changed my mind etc... So off to the all-holy Ebay to find a few parts. The Savage came with a 19" front and a 15" rear. Ryca has you send in your rear hub to be relaced as a 18" wheel, but fortunately they also had the extra option of relacing the front down to 18" as well. I really liked the idea of symmetrical wheels. So what was I to do? Back to Ebay! I found a front wheel that had a damaged rim with a perfect hub. I also found a rear wheel with a rusty rim, a used rear swingarm from one of the guys at www.suzukisavage.com and scored a nearly new gas tank with a small rounded dent that Ryan said they could pound out easily when I sent it to them.
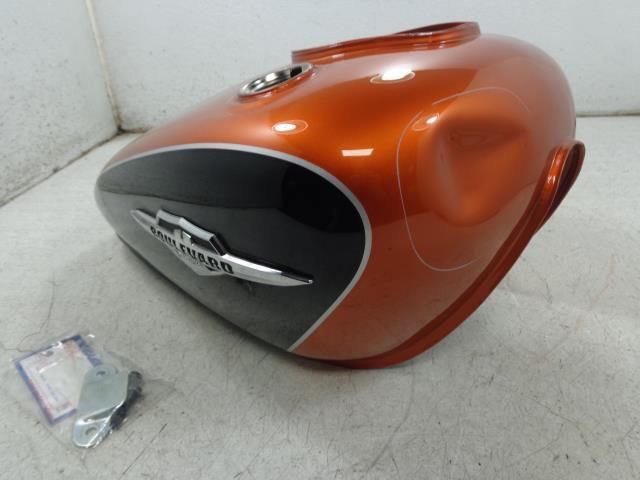
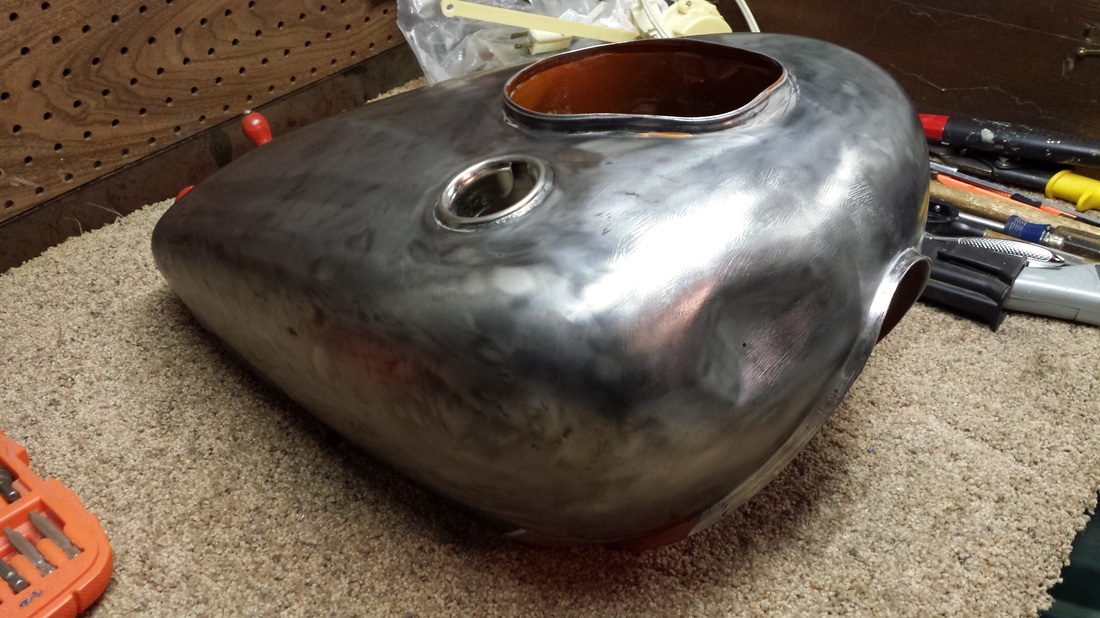
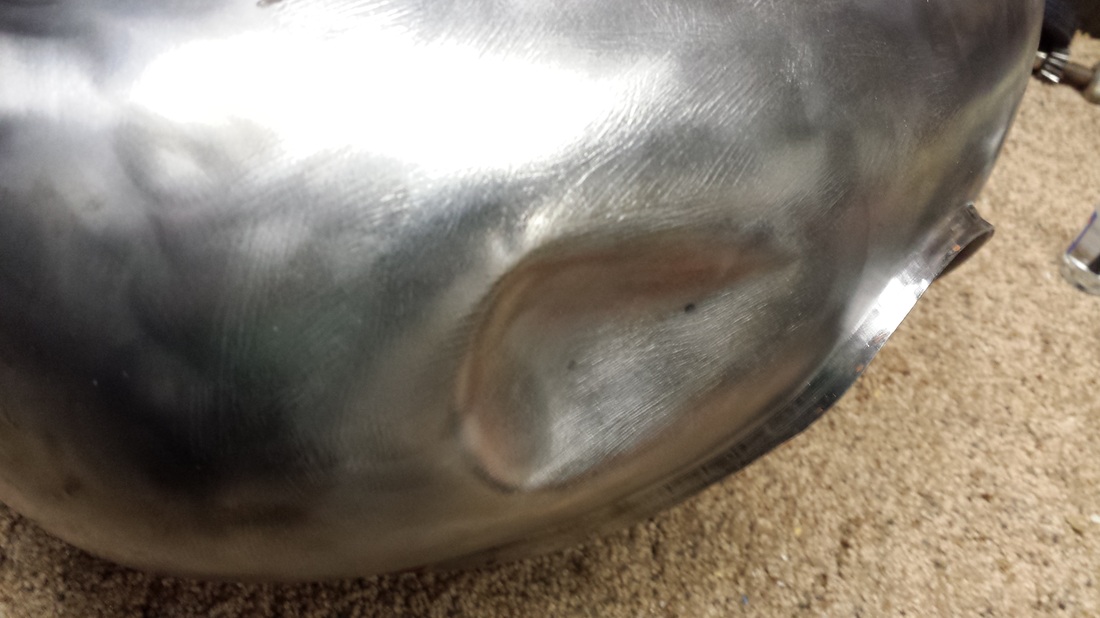


I broke down both wheels and hand sanded the hubs, getting rid of the writing on the front hub and giving them an overall cleaning. I wirewheeled the paint off of the tank, was able to pull some of the dent out, boxed everything up and shipped out to California.
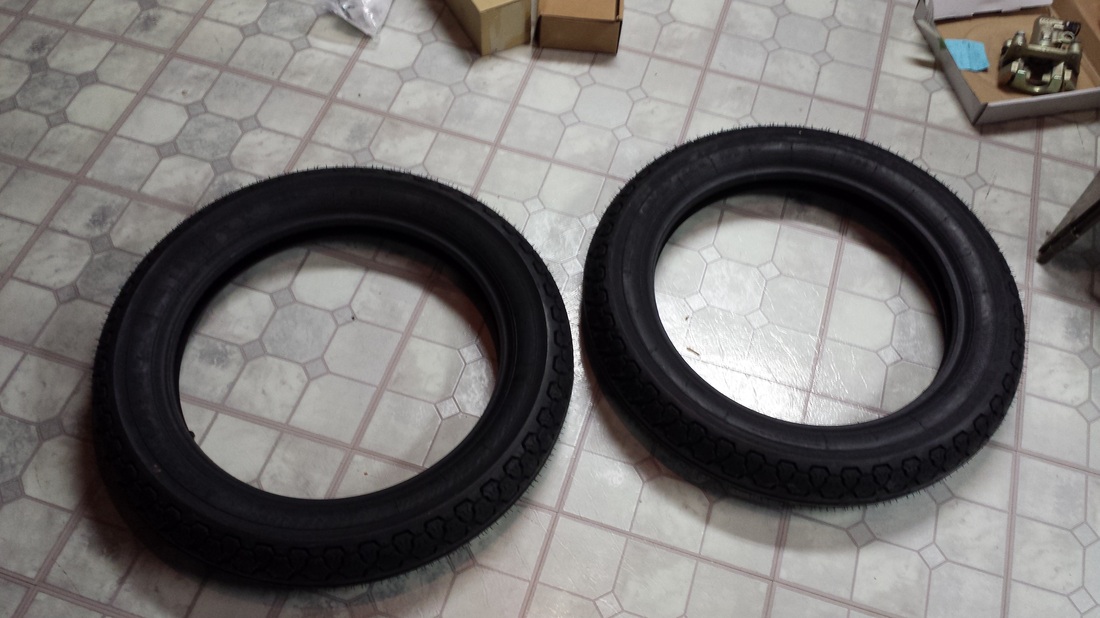
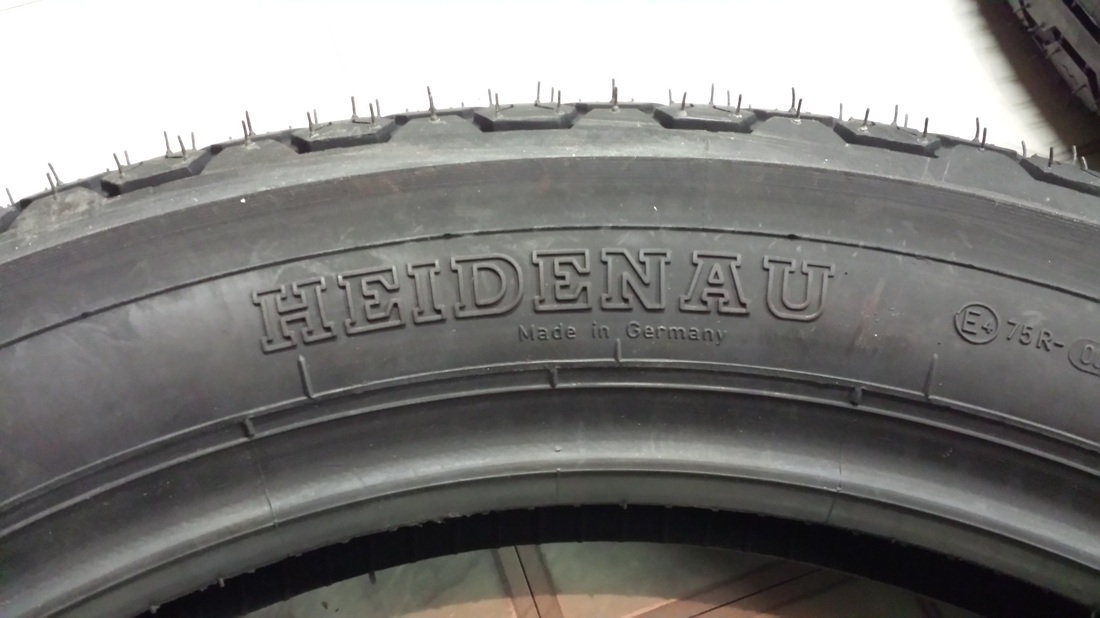
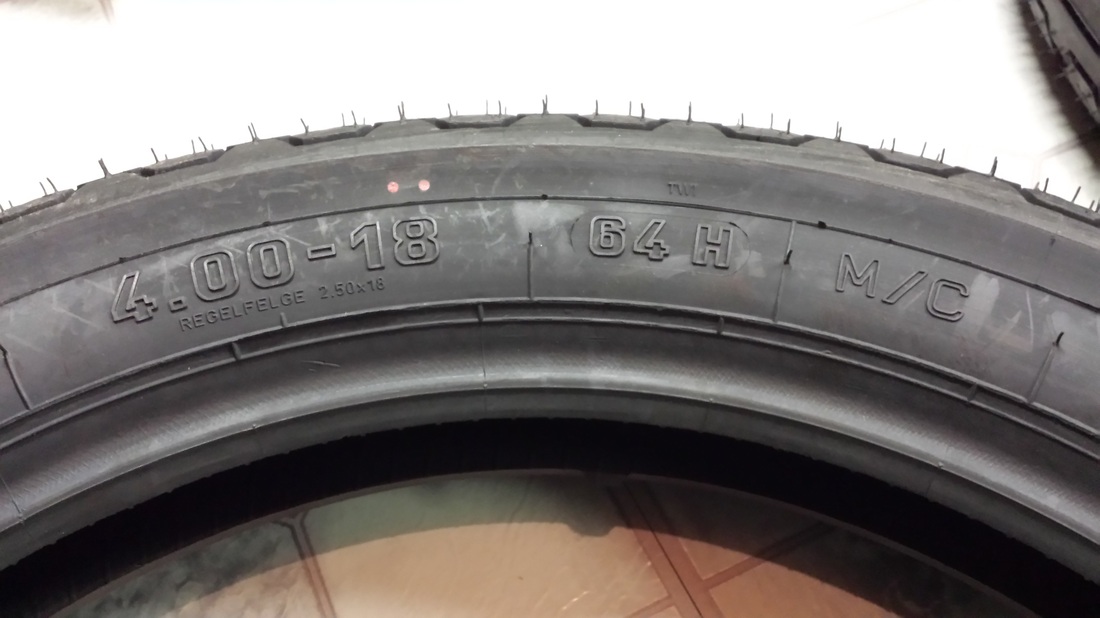
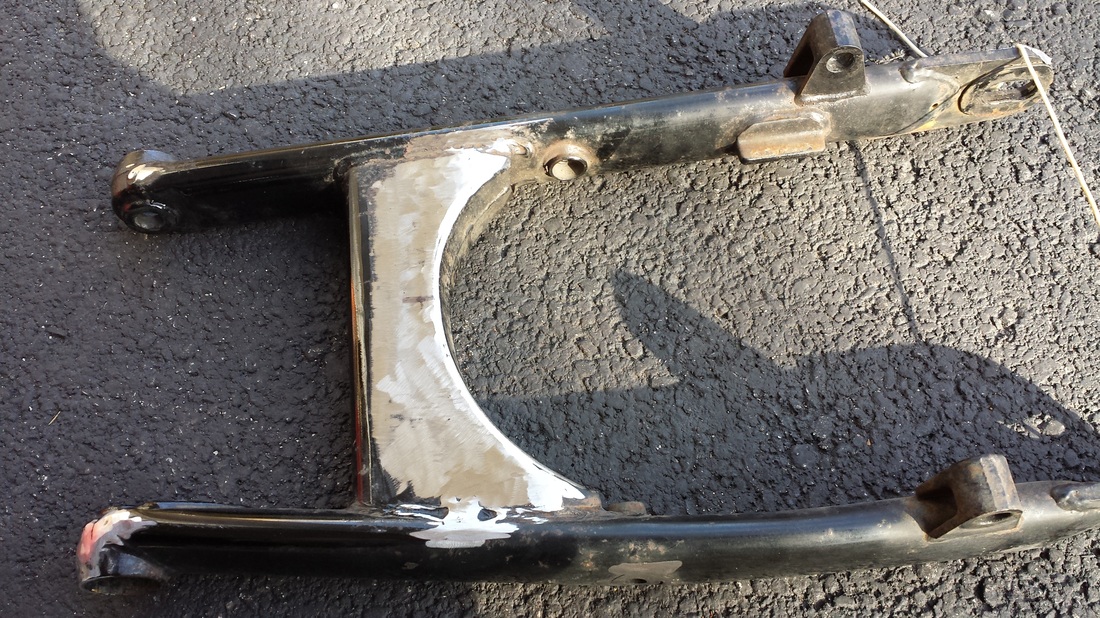
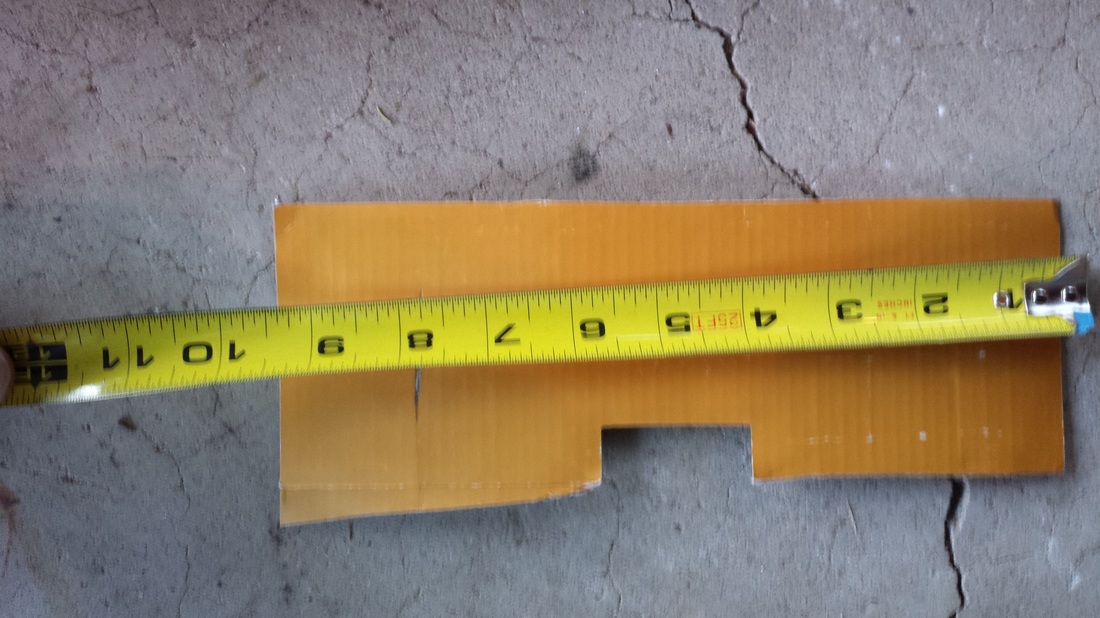
My original intention was to use Firestone Deluxe tires, but after talking to the guys over at the savage site and Ryan from Ryca Motors, they said they were more for looks and not very good in the handling department. Now this posed a few added kinks to the project. I needed a tire that could be used in the front and rear and that was preferably the same size as the Firestones. After a bit of research I decided on a pair of Heidenau K36 4.00-18 tires. (Bought them through www.revzilla.com) The Firestones are 26.57" diameter while the Heidenaus are 26.97". With those dimensions I was told I was going to have to notch the rear arm for clearance. I saw how several of the guys did it and it really didn't look that hard to do. I could have had Ryca do it for me, but I have the skills and tools to cut and weld it myself. Ryca's kit comes with the fact that there is no welding needed, but if you want to go custom, make some mods or fill and smooth some unused holes, welding comes into play.
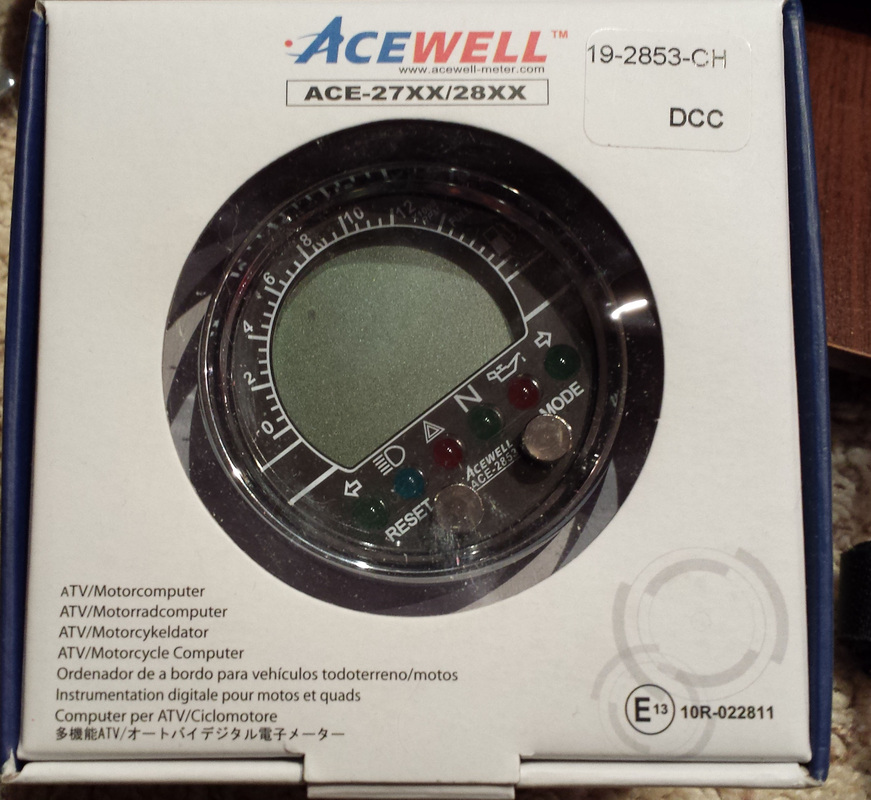
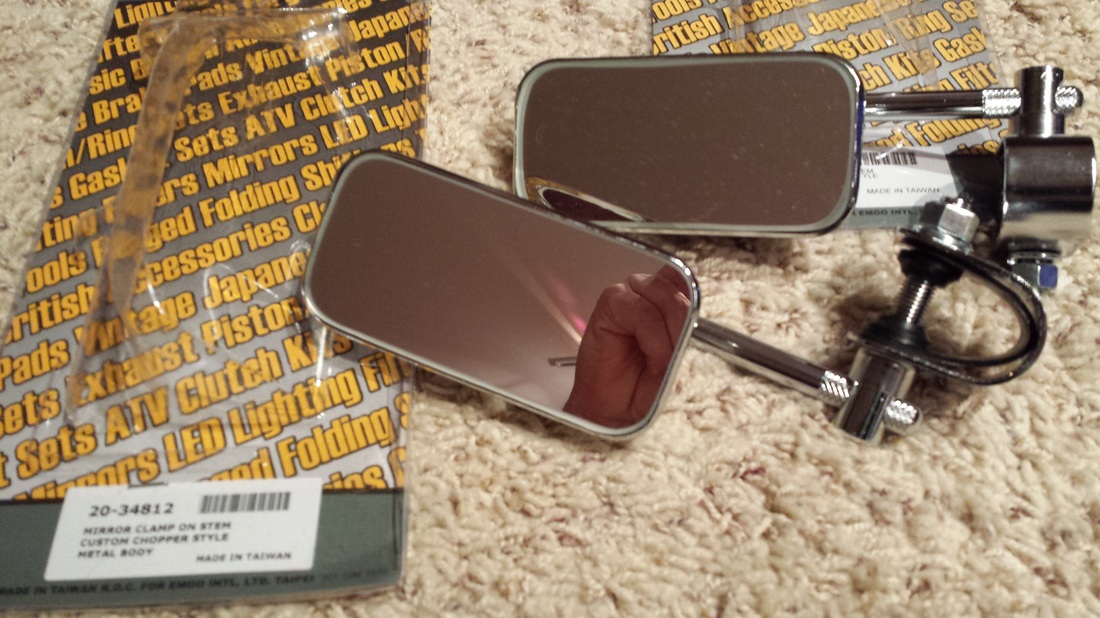
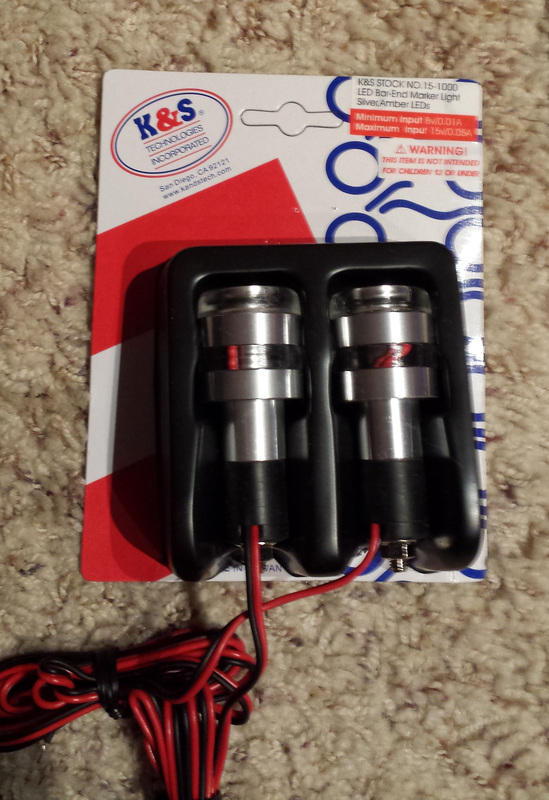
As with most projects, you need to make things your own. Here are a few of the things I'll be putting on the bike. First off, I wanted to put a unique gauge on it. I saw a video where a guy was running an Acewell 2853 All-in-one setup. I knew that it would fit the bike. I'll need to make a custom bracket for it. I then wanted to put bar end lights on along with bar end mirrors. I found the Acewell and lights over at Dime City Cycles and the mirrors on Ebay. The unique thing I'm doing with this bike is putting a little history with it. When I was 5, I got my first bike; A bright red Schwinn Stingray. (Which I still have.) I loved the sense of freedom I got from riding it. The same feeling came over me when I was riding home with the Savage, therefore, I'm going to be painting the Ryca the same color as my Schwinn. Little kid's bike, big kid's bike. :) The mirrors have a retro look to them and will go well with the layout of the bike. I'm planning on some graphics that will be cut from reflective vinyl. I originally titled the thread over at the savage site, "cocked the gun", so I titled the bike "BANG!". I copied the graphic design of Roy Lichtenstein and will be applying it to the tailpiece.
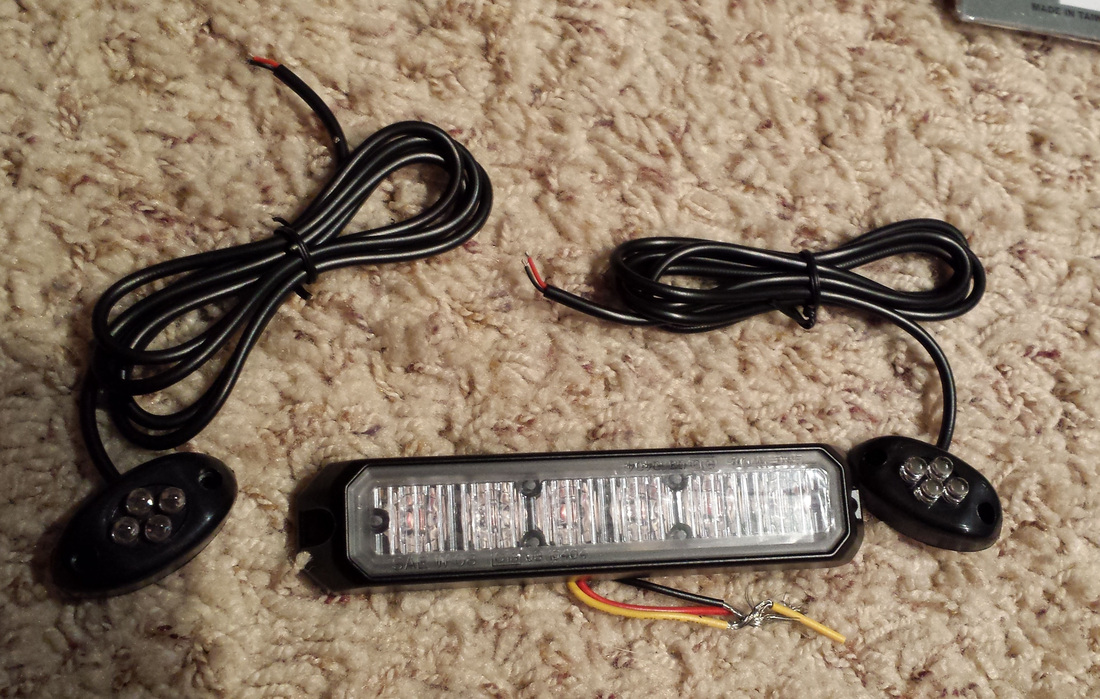
I'm also adding additional rear lighting to the bike (Thanks Dave and Bob!) as the Ryca taillight looks great but isn't that super bright. The long, white light below is a red strobe that is freakishly bright and will make a great brake light. The other two will hang just under my license plate and be additional taillights.
My original intention was to use Firestone Deluxe tires, but after talking to the guys over at the savage site and Ryan from Ryca Motors, they said they were more for looks and not very good in the handling department. Now this posed a few added kinks to the project. I needed a tire that could be used in the front and rear and that was preferably the same size as the Firestones. After a bit of research I decided on a pair of Heidenau K36 4.00-18 tires. (Bought them through www.revzilla.com) The Firestones are 26.57" diameter while the Heidenaus are 26.97". With those dimensions I was told I was going to have to notch the rear arm for clearance. I saw how several of the guys did it and it really didn't look that hard to do. I could have had Ryca do it for me, but I have the skills and tools to cut and weld it myself. Ryca's kit comes with the fact that there is no welding needed, but if you want to go custom, make some mods or fill and smooth some unused holes, welding comes into play.
As with most projects, you need to make things your own. Here are a few of the things I'll be putting on the bike. First off, I wanted to put a unique gauge on it. I saw a video where a guy was running an Acewell 2853 All-in-one setup. I knew that it would fit the bike. I'll need to make a custom bracket for it. I then wanted to put bar end lights on along with bar end mirrors. I found the Acewell and lights over at Dime City Cycles and the mirrors on Ebay. The unique thing I'm doing with this bike is putting a little history with it. When I was 5, I got my first bike; A bright red Schwinn Stingray. (Which I still have.) I loved the sense of freedom I got from riding it. The same feeling came over me when I was riding home with the Savage, therefore, I'm going to be painting the Ryca the same color as my Schwinn. Little kid's bike, big kid's bike. :) The mirrors have a retro look to them and will go well with the layout of the bike. I'm planning on some graphics that will be cut from reflective vinyl. I originally titled the thread over at the savage site, "cocked the gun", so I titled the bike "BANG!". I copied the graphic design of Roy Lichtenstein and will be applying it to the tailpiece.
I'm also adding additional rear lighting to the bike (Thanks Dave and Bob!) as the Ryca taillight looks great but isn't that super bright. The long, white light below is a red strobe that is freakishly bright and will make a great brake light. The other two will hang just under my license plate and be additional taillights.

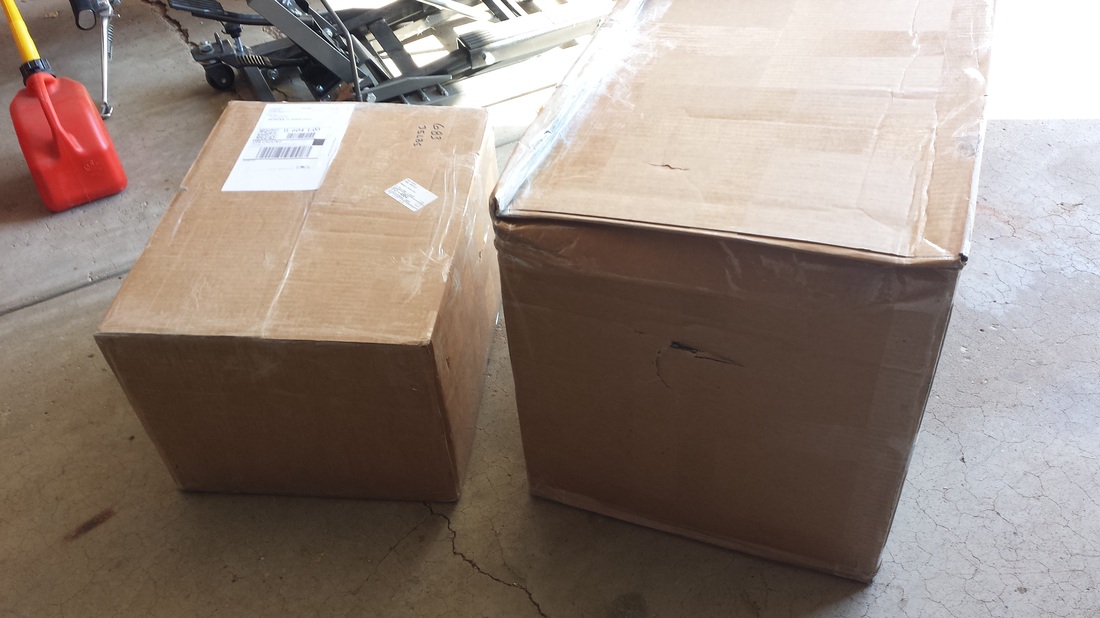
After sending everything to California, seven weeks later (Feb 27, 2015) two large boxes arrived! I was like Christmas! I got everything unpacked and accounted for in the basement and started measuring things for my next plans.
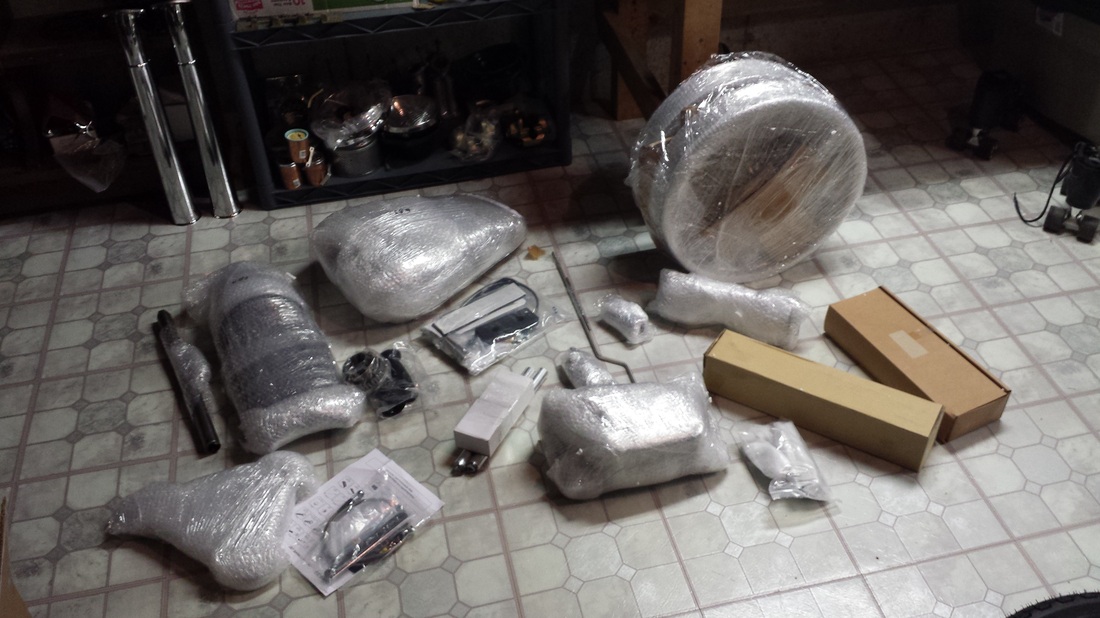

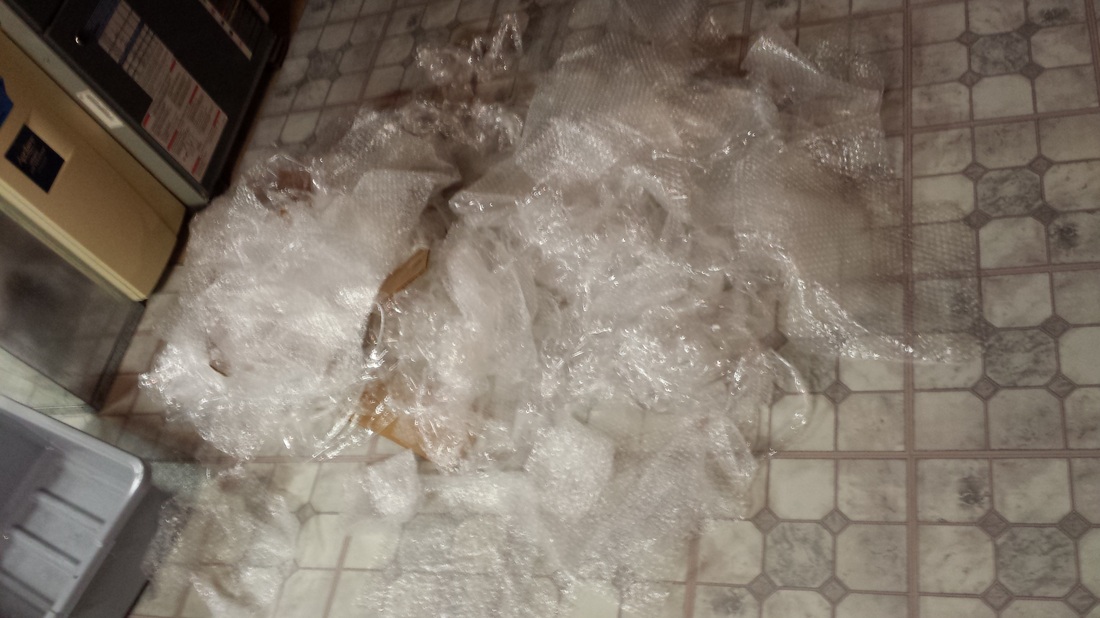
The amount of bubble wrap Ryca used was crazy but it was very much appreciated! They knocked the dent out. Now all the tank needs is a little bondo and some light sanding and It'll be ready for primer. I'm planning on building the bike for this season, work the bugs out of it and then pull the tail, tank and side panels off over winter to get painted and the graphics placed.
March 4, 2015
Just got the innertubes and mounting spoons for the tires. Once I mount the tires, I can get measurements to modify the rear arm.
March 6, 2015
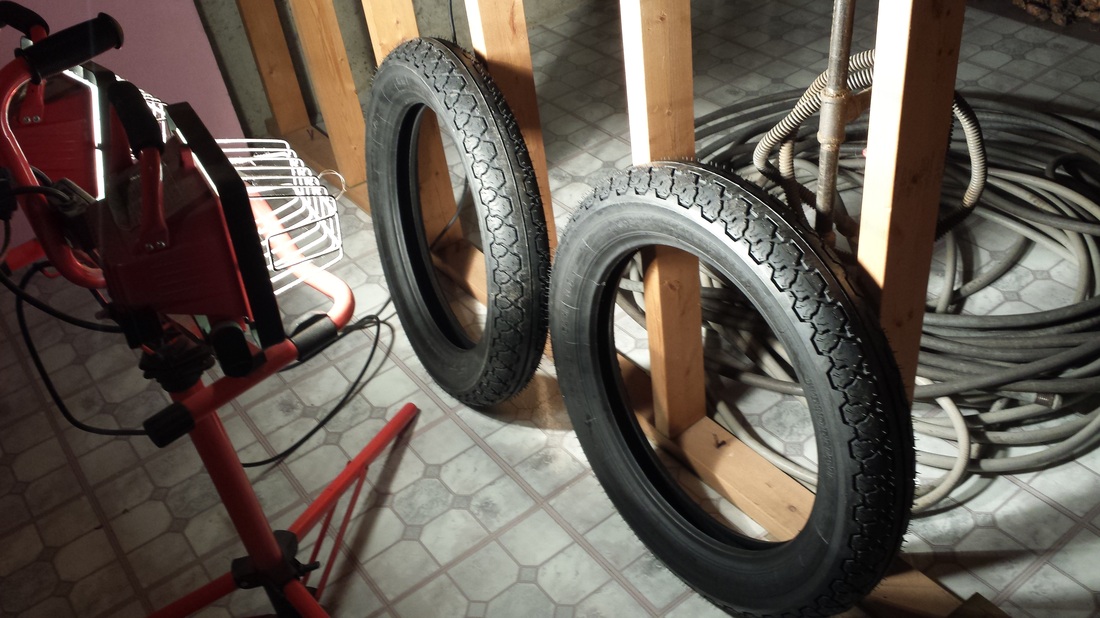
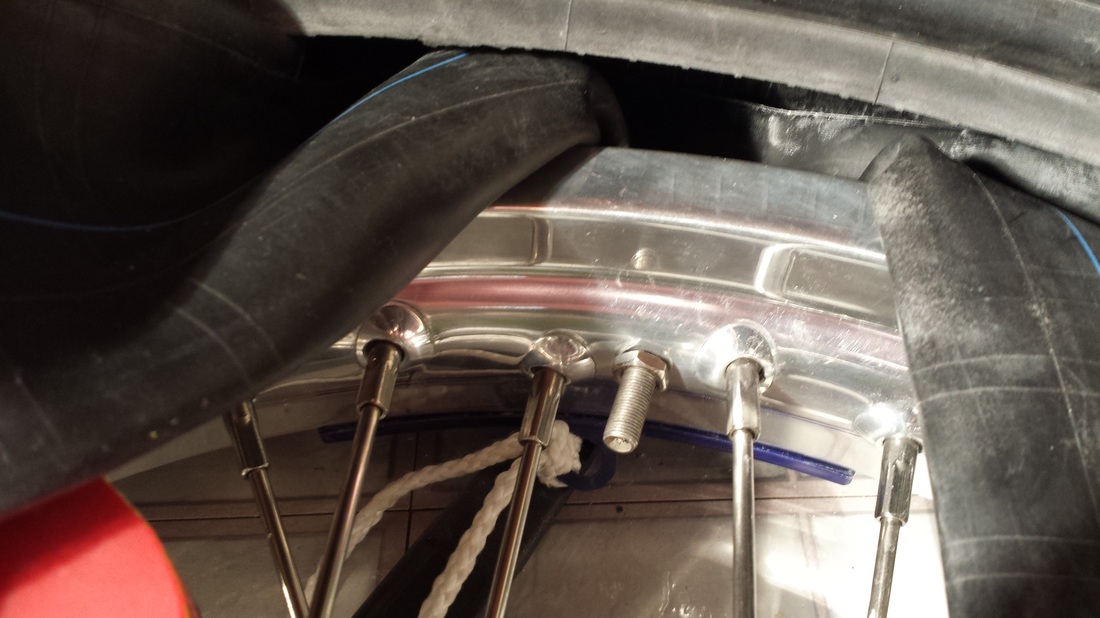
Got the rear tire on. It took 3 hours and I'm exhausted but I only scratched the rim in one spot. Just to note, the mounted tire is 4.5" wide and 26.25" diameter. Smaller than was listed on the website but They might need to stretch and settle yet too. I only have about 30 pounds of air in them right now too. The stock rear diameter is 24". The pic on the left is getting the tires a little warmed up. It was 21*F outside today and even though they were in the basement, it wasn't very warm down there at all. The pic on the right, the scratch is on the wheel about 3 o'clock, the other marks are just talcum powder. The center shot is when I had it halfway on. I spent another 20 minutes trying to get the innertube mounted inside and through the rim hole.
March 4, 2015
Just got the innertubes and mounting spoons for the tires. Once I mount the tires, I can get measurements to modify the rear arm.
March 6, 2015
Got the rear tire on. It took 3 hours and I'm exhausted but I only scratched the rim in one spot. Just to note, the mounted tire is 4.5" wide and 26.25" diameter. Smaller than was listed on the website but They might need to stretch and settle yet too. I only have about 30 pounds of air in them right now too. The stock rear diameter is 24". The pic on the left is getting the tires a little warmed up. It was 21*F outside today and even though they were in the basement, it wasn't very warm down there at all. The pic on the right, the scratch is on the wheel about 3 o'clock, the other marks are just talcum powder. The center shot is when I had it halfway on. I spent another 20 minutes trying to get the innertube mounted inside and through the rim hole.
March 7, 2015
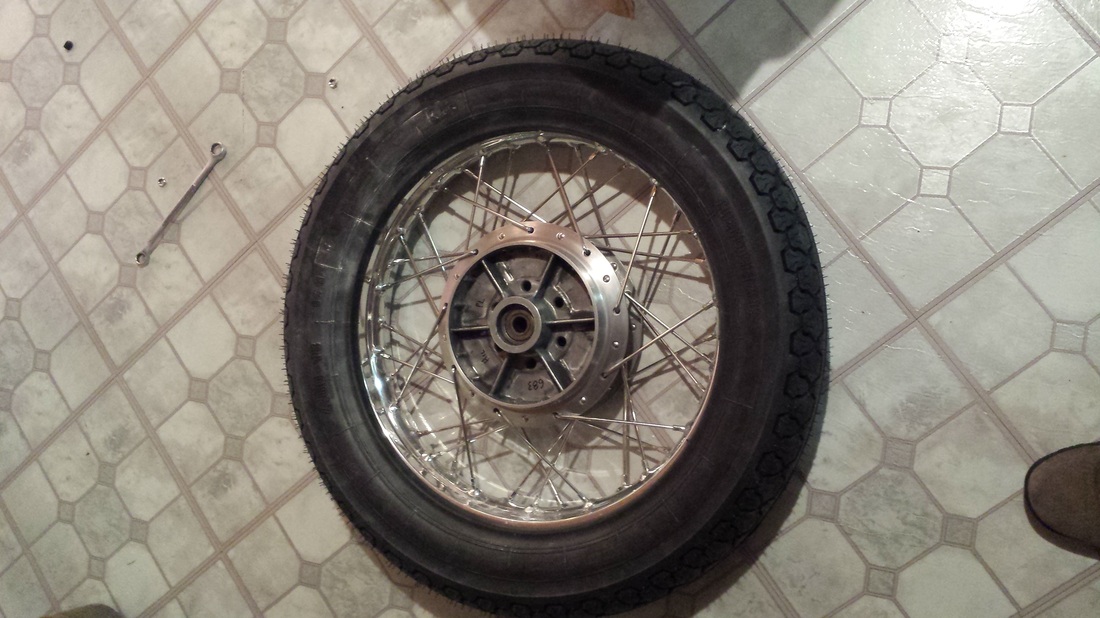
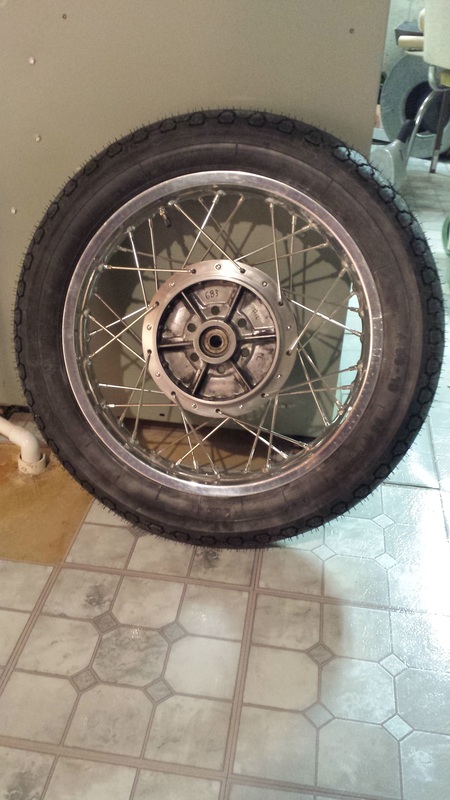
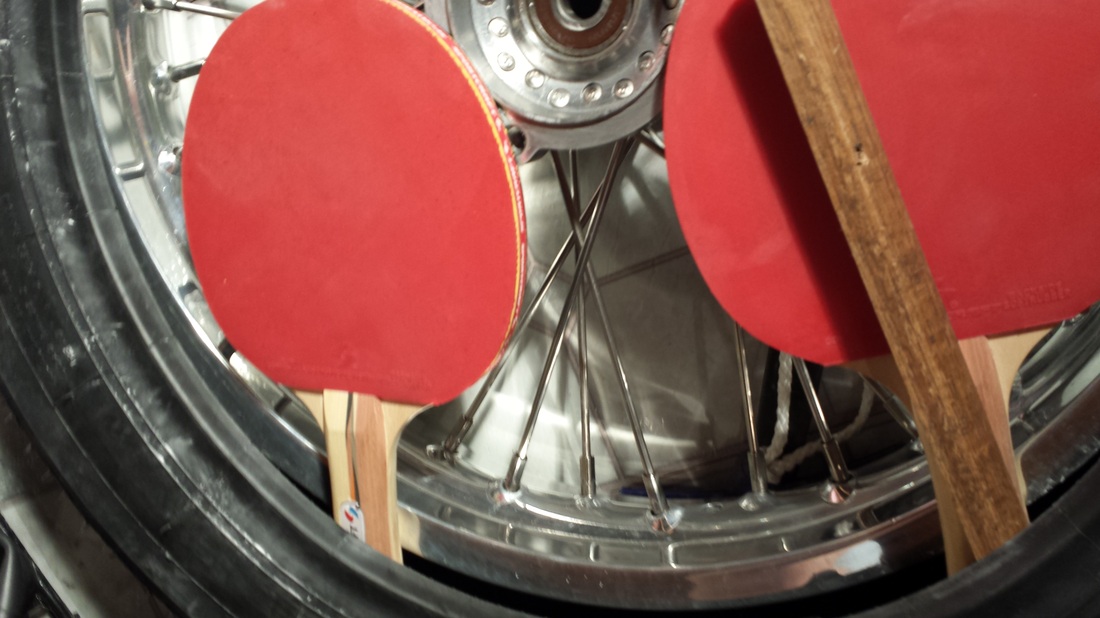
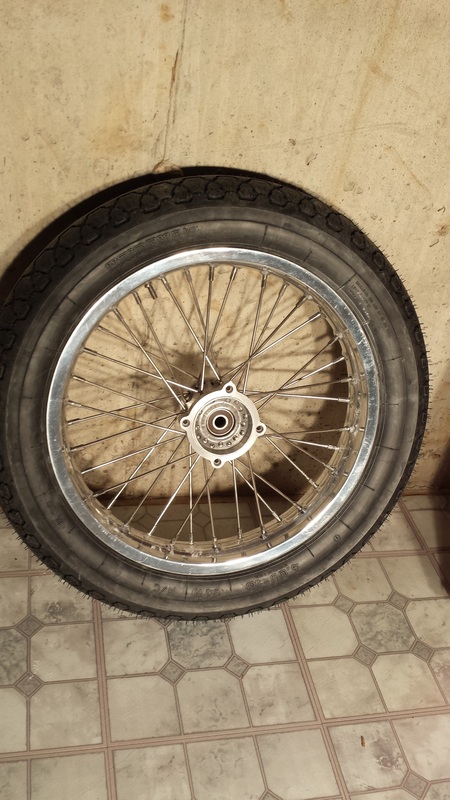
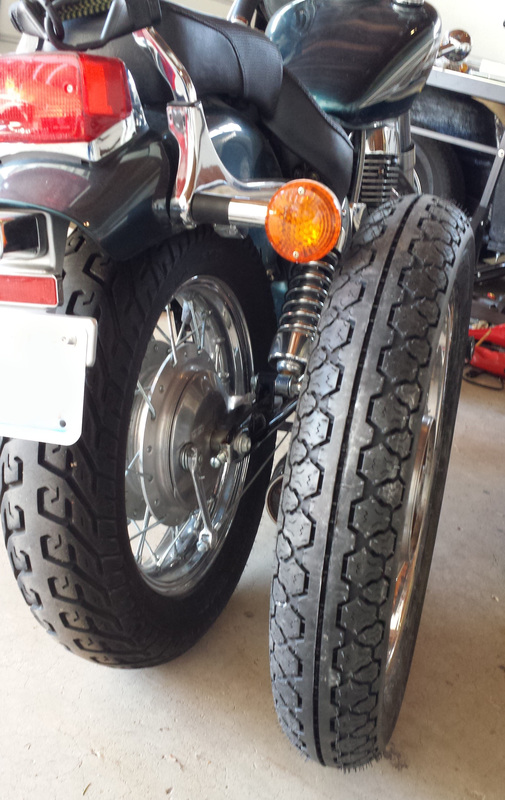
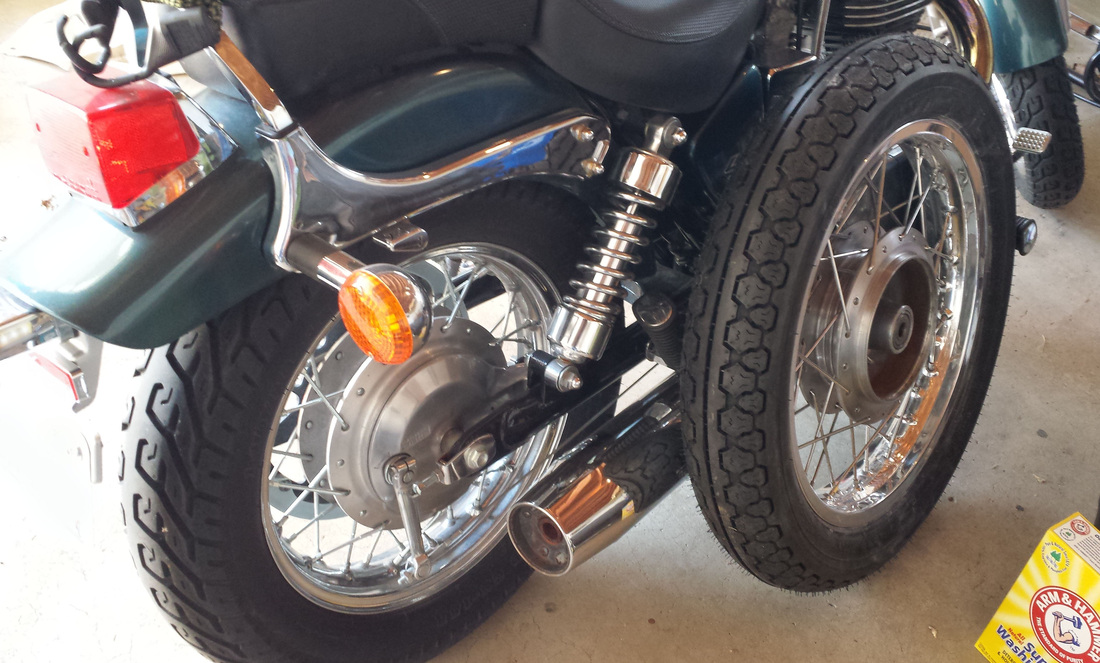
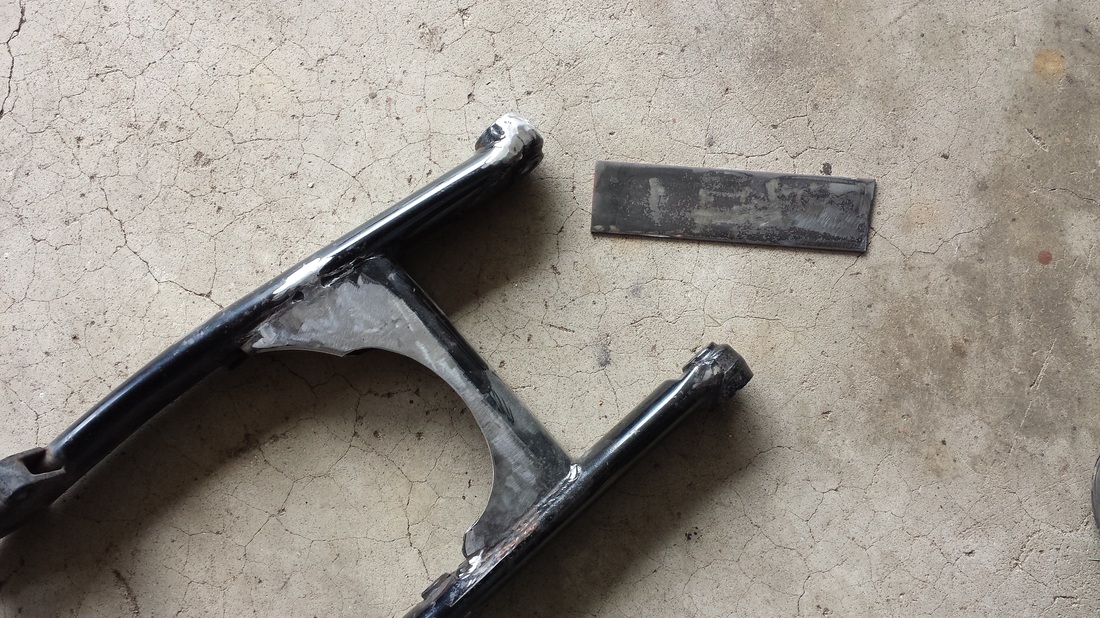
Tackled the front tire today. Took about 30 minutes less this time as I was able to get the valve stem in easier. Notice my high tech ping pong paddle technique. I plan on getting a patent on this. :) I only bled a little as my index fingernail bent back on the lip of the tire. I put the rear tire next to the original to show the size difference. The new one is 2" taller and about an inch narrower. Going from plain cruiser to nimble cafe racer! Next I tackle the rear trailing arm...
Tackled the front tire today. Took about 30 minutes less this time as I was able to get the valve stem in easier. Notice my high tech ping pong paddle technique. I plan on getting a patent on this. :) I only bled a little as my index fingernail bent back on the lip of the tire. I put the rear tire next to the original to show the size difference. The new one is 2" taller and about an inch narrower. Going from plain cruiser to nimble cafe racer! Next I tackle the rear trailing arm...


March 9, 2015
Just sent an e-mail to Acewell for the wiring of their speedo sensor. The instructions the put in the box can be a little vague. What exactly is "vibration direction"? I need to know how to mount the sensor as I'm hooking it on the rear trailing arm and I need to fab a bracket and wiring leads. The clearances on the front wheel/ brake rotor are too close. I'll be mounting the magnet on the rear belt pulley and the sensor on the inside of the trailing arm.
Went shopping yesterday. Got ATF for the forks, DOT3 brake fluid, bondo, fiberglass, loc-tite and a few other odds and ends for the buildup. I need to start filling and sanding the tank so it will be ready to mount in a month or so.
On a different note, I took the original wiring diagram for the Suzuki and redrew it in Illustrator with all the modifications. (Acewell gauge, bar lights, extra tail and brake lights etc...) If anyone wants a copy of it in Illustrator format, drop me an e-mail. I don't guarantee it will work but it's the one I'm going to try first.

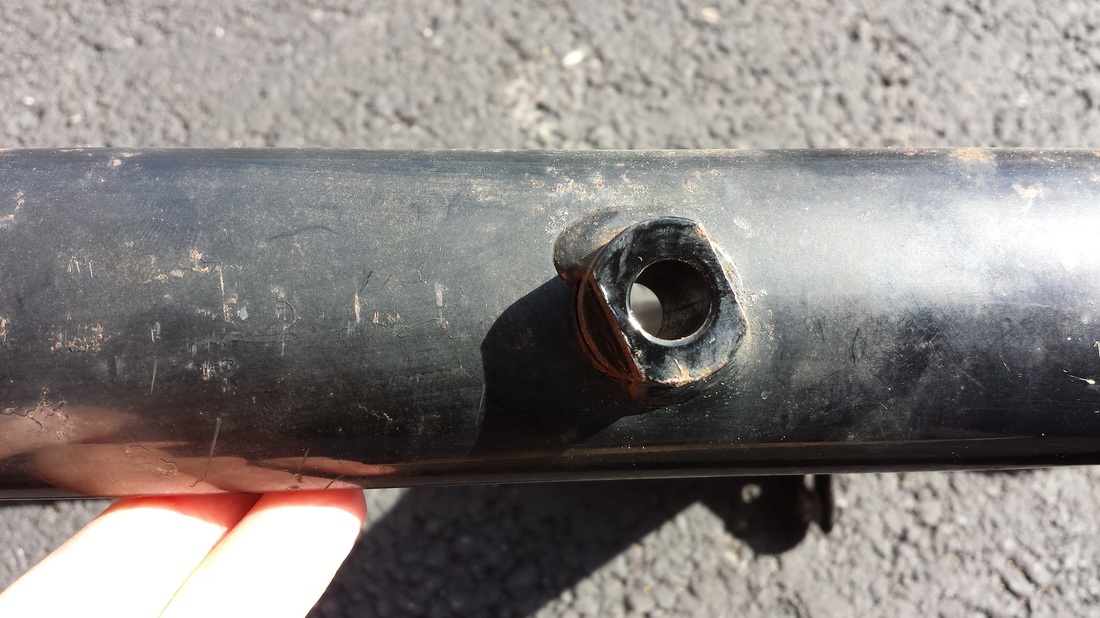
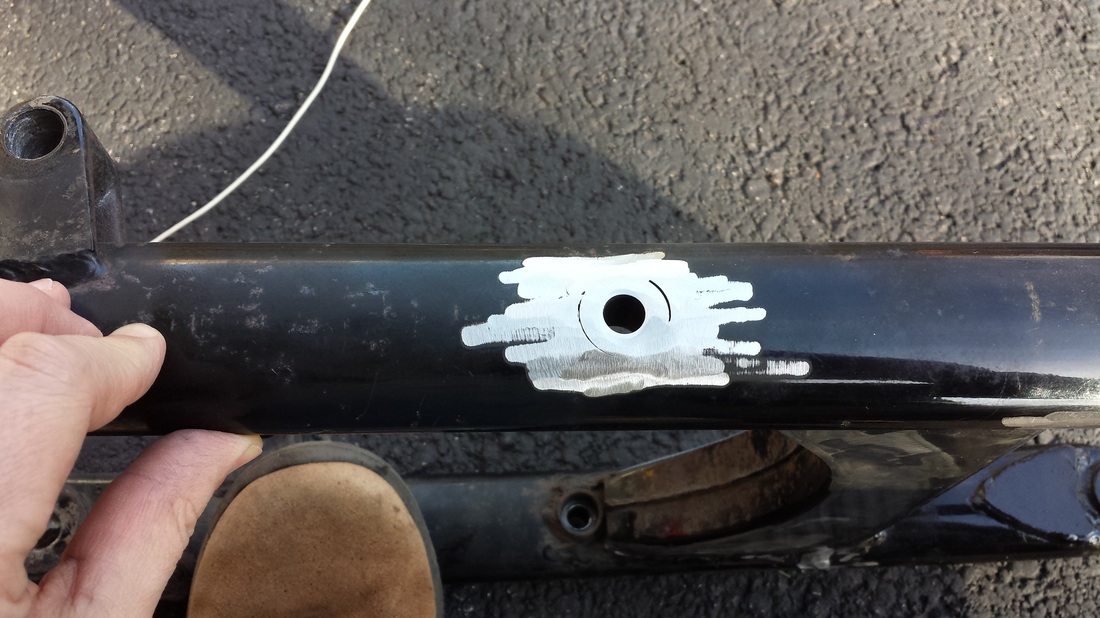
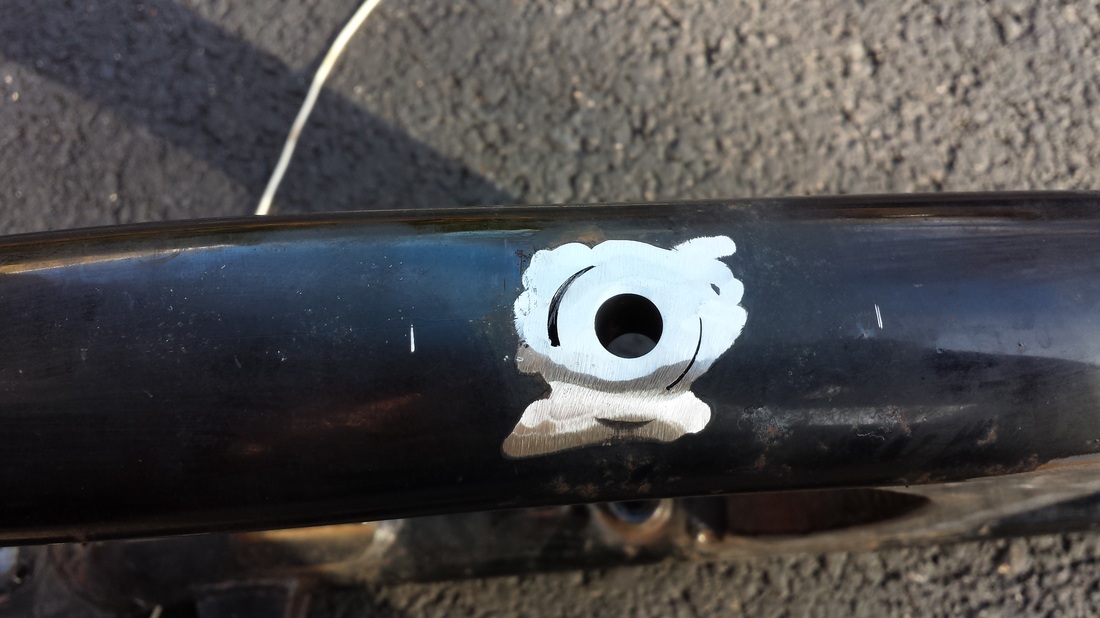
March 14, 2015
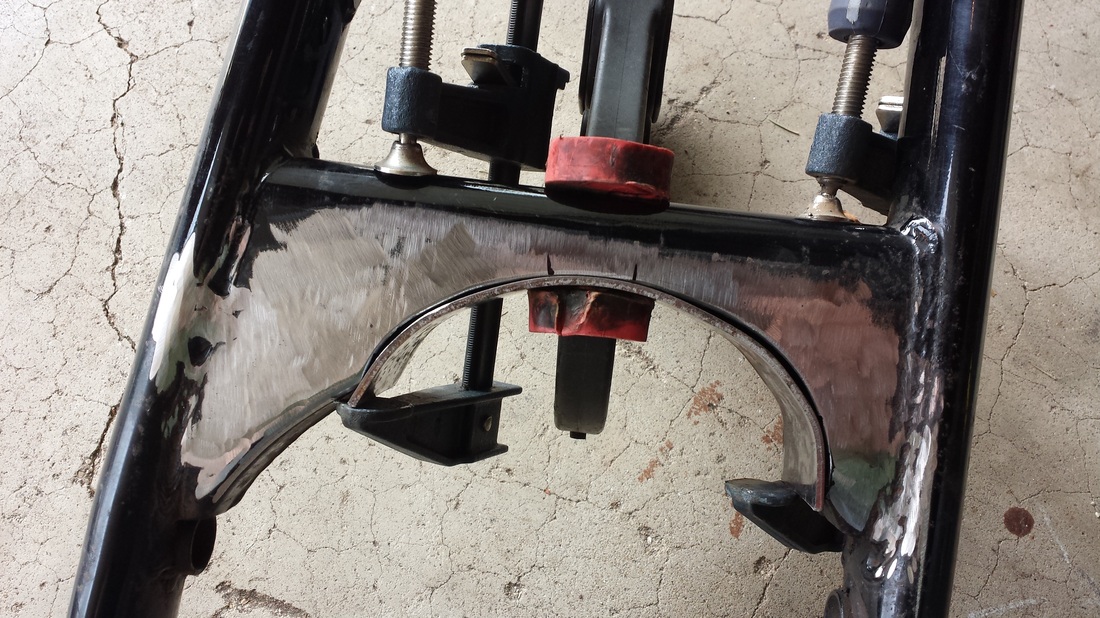
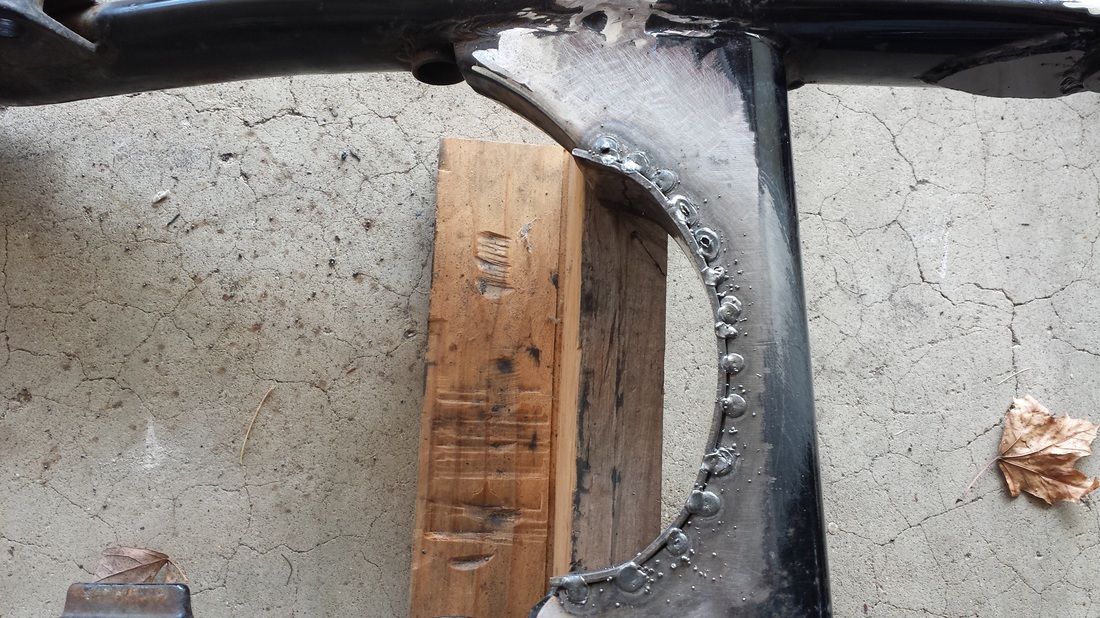
Started in on the rear arm. Below are some of the pictures and YouTube videos of what I did.
Started in on the rear arm. Below are some of the pictures and YouTube videos of what I did.


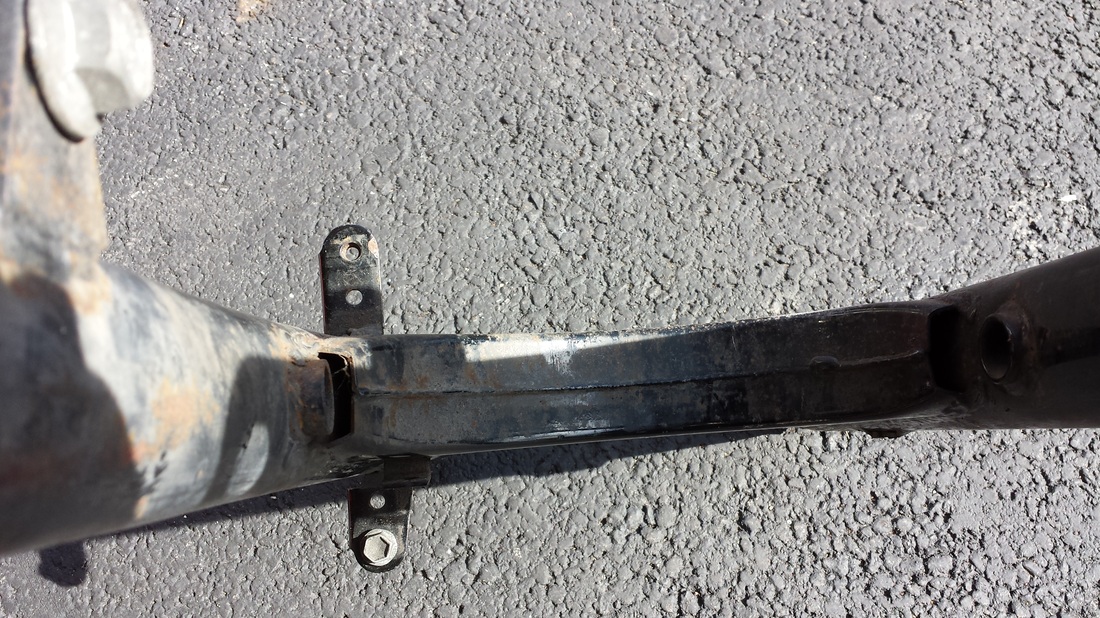
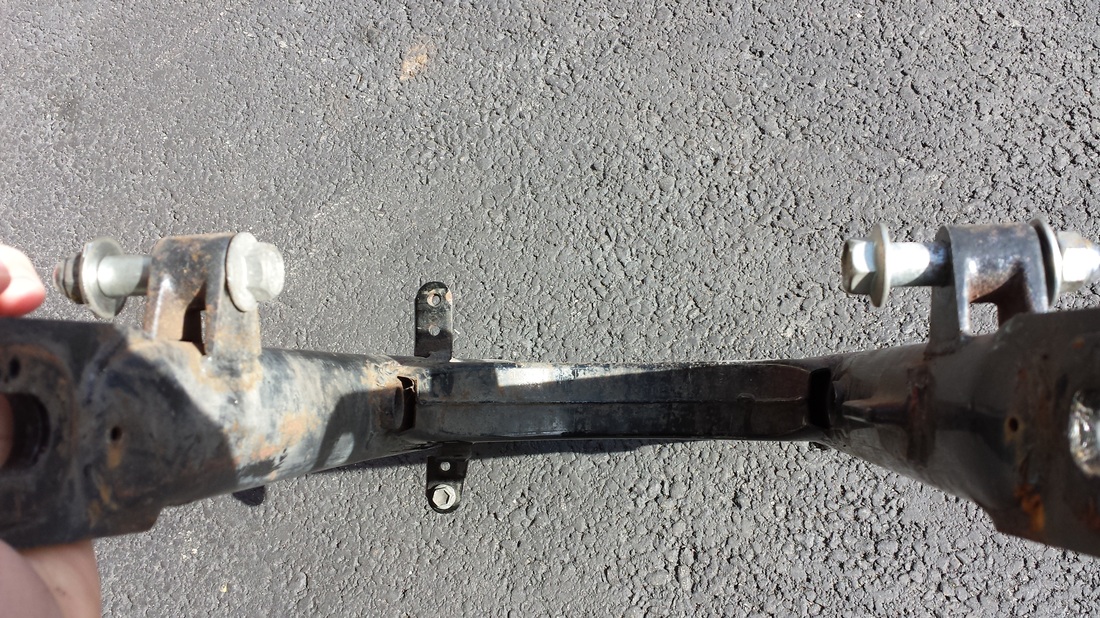

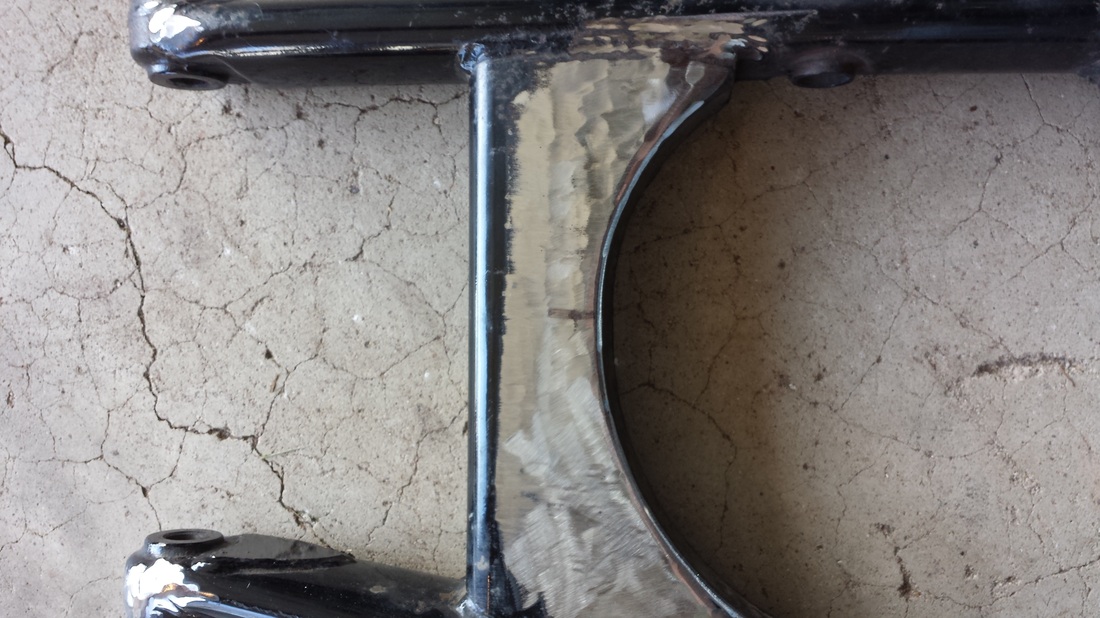

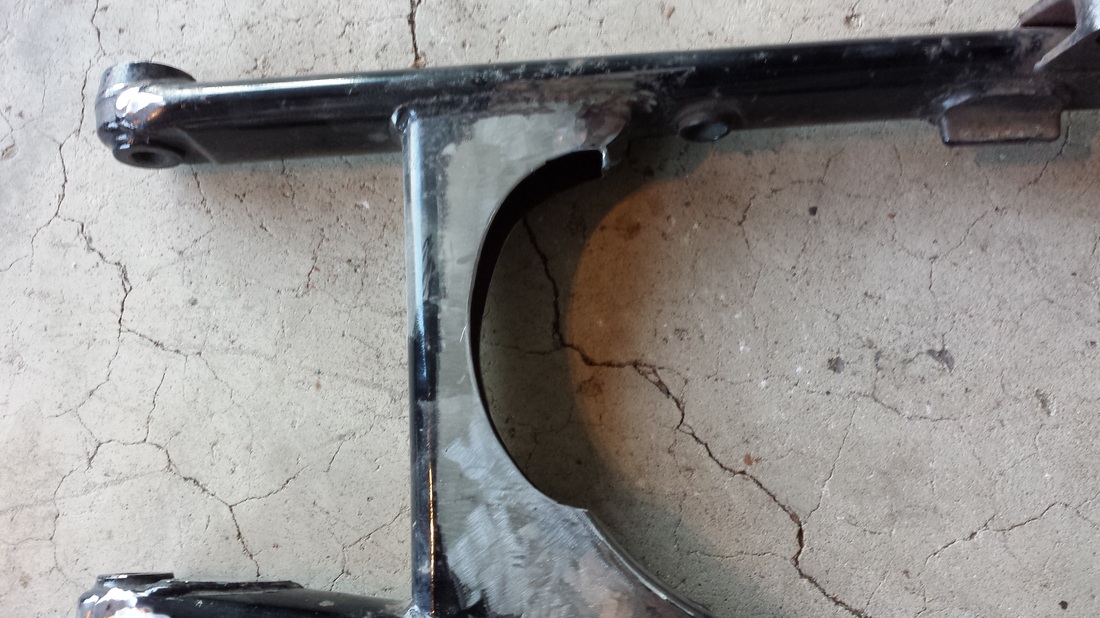

March 15, 2015
Got the plate cut and welded in. It will all get final welded then all the sharp spots smoothed out. From there, it is a total wire brushing, a quick coat of paint and on to the breakdown of the bike!
Got the plate cut and welded in. It will all get final welded then all the sharp spots smoothed out. From there, it is a total wire brushing, a quick coat of paint and on to the breakdown of the bike!

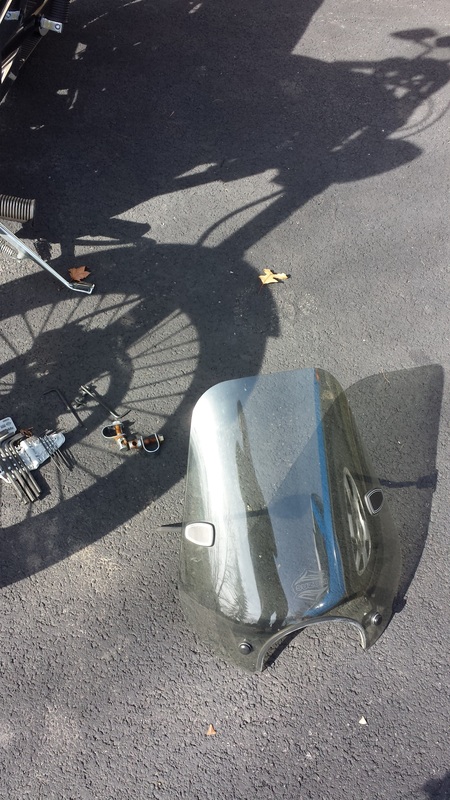
I did get the windshield off. It took a 14mm wrench and a 4mm allen.